RabbitMQ系列5 SpringBoot整合RabbitMQ
内容导读
互联网集市收集整理的这篇技术教程文章主要介绍了RabbitMQ系列5 SpringBoot整合RabbitMQ,小编现在分享给大家,供广大互联网技能从业者学习和参考。文章包含3925字,纯文字阅读大概需要6分钟。
内容图文

SpringBoot整合RabbitMQ
生产者
整合步骤概述
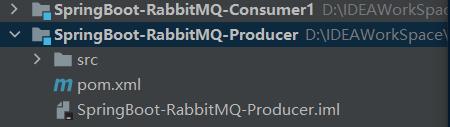
1.创建生产者SpringBoot工程
2.导入依赖坐标
3.编写yml配置,基本信息配置
4.定义交换机,队列以及绑定关系的配置类
5.注入RabbitTemplate,调用方法,完成消息发送
1.创建生产者SpringBoot工程

2.导入依赖坐标
<!--继承父类工程-->
    <parent>
        <artifactId>spring-boot-starter-parent</artifactId>
        <groupId>org.springframework.boot</groupId>
        <version>2.1.5.RELEASE</version>
    </parent>
    <!--所需依赖-->
    <dependencies>
        <dependency>
            <groupId>org.springframework.boot</groupId>
            <artifactId>spring-boot-starter-amqp</artifactId>
        </dependency>
        <dependency>
            <groupId>org.springframework.boot</groupId>
            <artifactId>spring-boot-starter-test</artifactId>
        </dependency>
    </dependencies>
3.编写yml配置,基本信息配置
spring:
  rabbitmq:
    host: 121.196.111.120 #ip
    port: 5672 #端口
    username: guest #用户名
    password: guest #密码
    virtual-host: /demo #虚拟机名称
4.定义交换机,队列以及绑定关系的配置类
package com.pjh.Config;

import org.springframework.amqp.core.*;
import org.springframework.beans.factory.annotation.Qualifier;
import org.springframework.context.annotation.Bean;
import org.springframework.context.annotation.Configuration;

@Configuration
public class RabbitConfig {
    /*定义交换机名称*/
    public static  final String EXCHANGE_NAME="boot_topic_exchange";
    /*定义队列名称*/
    public static final String QUEUE_NAME = "boot_queue";
    /*交换机*/
    @Bean("bootExchange")
    public Exchange bootExchange(){
        return ExchangeBuilder.topicExchange(EXCHANGE_NAME).durable(true).build();
    }
   /* 2.Queue 队列*/
    @Bean("bootQueue")
    public Queue bootQueue(){
        return QueueBuilder.durable(QUEUE_NAME).build();
    }
    /*队列和交换机绑定关系*/
    /*
    * 知道哪个队列
    * 知道哪个交换机
    * routing key
    * */
    @Bean
    public Binding getBinding(@Qualifier("bootQueue") Queue queue, @Qualifier("bootExchange") Exchange exchange){
        return BindingBuilder.bind(queue).to(exchange).with("boot.#").noargs();
    }
}
5.注入RabbitTemplate,调用方法,完成消息发送
package com.pjh.test;

import com.pjh.Config.RabbitConfig;
import org.junit.runner.RunWith;
import org.springframework.amqp.rabbit.core.RabbitTemplate;
import org.springframework.beans.factory.annotation.Autowired;
import org.springframework.boot.autoconfigure.SpringBootApplication;
import org.springframework.boot.test.context.SpringBootTest;
import org.springframework.test.context.junit4.SpringRunner;

import javax.print.DocFlavor;

@SpringBootTest
@RunWith(SpringRunner.class)
public class Test {
    /*注入RabbitTemplate*/
    @Autowired
    private RabbitTemplate rabbitTemplate;
    @org.junit.Test
    public void testSend(){
        rabbitTemplate.convertAndSend(RabbitConfig.EXCHANGE_NAME,"boot.haha","boot mq hello~~~");
    }
}
消费者
整合步骤概述
1.创建生产者SpringBoot工程
2.导入依赖坐标
3.编写yml配置,基本信息配置
4.编写启动类
5.编写消息监听处理类
6.测试
1.创建生产者SpringBoot工程
2.导入依赖坐标
 <!--继承父类工程-->
    <parent>
        <artifactId>spring-boot-starter-parent</artifactId>
        <groupId>org.springframework.boot</groupId>
        <version>2.1.5.RELEASE</version>
    </parent>
    <!--所需依赖-->
    <dependencies>
        <dependency>
            <groupId>org.springframework.boot</groupId>
            <artifactId>spring-boot-starter-amqp</artifactId>
        </dependency>
        <dependency>
            <groupId>org.springframework.boot</groupId>
            <artifactId>spring-boot-starter-test</artifactId>
        </dependency>
    </dependencies>
3.编写yml配置,基本信息配置
spring:
  rabbitmq:
    virtual-host: 121.196.111.120
4.编写启动类
package com.pjh;

import org.springframework.boot.SpringApplication;
import org.springframework.boot.autoconfigure.SpringBootApplication;

@SpringBootApplication
public class ConsumerApplication {
    public static void main(String[] args) {
        SpringApplication.run(ConsumerApplication.class);
    }
}
5.编写消息监听处理类
package com.pjh.Listener;
import org.springframework.amqp.rabbit.annotation.RabbitListener;
import org.springframework.stereotype.Component;
@Component
public class MyListen {
    /**
     * 监听某个队列的消息
     * @param message 接收到的消息
     */
    @RabbitListener(queues = "boot_queue")
    public void myListener1(String message){
        System.out.println("消费者接收到的消息为:" + message);
    }
}
内容总结
以上是互联网集市为您收集整理的RabbitMQ系列5 SpringBoot整合RabbitMQ全部内容,希望文章能够帮你解决RabbitMQ系列5 SpringBoot整合RabbitMQ所遇到的程序开发问题。 如果觉得互联网集市技术教程内容还不错,欢迎将互联网集市网站推荐给程序员好友。
内容备注
版权声明:本文内容由互联网用户自发贡献,该文观点与技术仅代表作者本人。本站仅提供信息存储空间服务,不拥有所有权,不承担相关法律责任。如发现本站有涉嫌侵权/违法违规的内容, 请发送邮件至 gblab@vip.qq.com 举报,一经查实,本站将立刻删除。
内容手机端
扫描二维码推送至手机访问。
来源:【匿名】