IdentityServer4 使用OpenID Connect添加用户身份验证
内容导读
互联网集市收集整理的这篇技术教程文章主要介绍了IdentityServer4 使用OpenID Connect添加用户身份验证,小编现在分享给大家,供广大互联网技能从业者学习和参考。文章包含4103字,纯文字阅读大概需要6分钟。
内容图文

使用IdentityServer4 实现OpenID Connect服务端,添加用户身份验证。客户端调用,实现授权。
IdentityServer4 目前已更新至1.0 版,在之前的文章中有所介绍。IdentityServer4 ASP.NET Core的OpenID Connect OAuth 2.0框架学习保护API 。
本文环境:IdentityServer4 1.0 .NET Core 1.0.1
下面正式开始。
新建IdentityServer4服务端
服务端也就是提供服务,如QQ Weibo等。
新建一个ASP.NET Core Web Application 项目IdentityServer4OpenID,选择模板Web 应用程序 不进行身份验证。
删除模板创建的Controllers 文件以及Views 文件夹。
添加IdentityServer4 引用:
Install-Package IdentityServer4
然后添加配置类Config.cs:
            public
            class
             Config
    {

            //
            定义系统中的资源
            public
            static IEnumerable<IdentityResource> GetIdentityResources()
        {
            returnnew List<IdentityResource>
            {
                new IdentityResources.OpenId(),
                new IdentityResources.Profile(),
            };
        }

        publicstatic IEnumerable<Client> GetClients()
        {
            // 客户端凭据returnnew List<Client>
            {
                // OpenID Connect implicit 客户端 (MVC)new Client
                {
                    ClientId = "mvc",
                    ClientName = "MVC Client",
                    AllowedGrantTypes = GrantTypes.Implicit,

                    RedirectUris = { "http://localhost:5002/signin-oidc" },
                    PostLogoutRedirectUris = { "http://localhost:5002" },
                    //运行访问的资源
                    AllowedScopes =
                    {
                        IdentityServerConstants.StandardScopes.OpenId,
                        IdentityServerConstants.StandardScopes.Profile
                    }
                }
            };
        }

        //测试用户publicstatic List<TestUser> GetUsers()
        {
            returnnew List<TestUser>
            {
                new TestUser
                {
                    SubjectId = "1",
                    Username = "admin",
                    Password = "123456",

                    Claims = new List<Claim>
                    {
                        new Claim("name", "admin"),
                        new Claim("website", "https://www.cnblogs.com/linezero")
                    }
                },
                new TestUser
                {
                    SubjectId = "2",
                    Username = "linezero",
                    Password = "123456",

                    Claims = new List<Claim>
                    {
                        new Claim("name", "linezero"),
                        new Claim("website", "https://github.com/linezero")
                    }
                }
            };
        }
    }
以上使用IdentityServer4测试数据类添加数据,直接存在内存中。IdentityServer4 是支持持久化。
然后打开Startup.cs 加入如下:
            public
            void
             ConfigureServices(IServiceCollection services)
        {

            //
             Add framework services.
                        services.AddMvc();
            services.AddIdentityServer()
                .AddTemporarySigningCredential()
                .AddInMemoryIdentityResources(Config.GetIdentityResources())
                .AddInMemoryClients(Config.GetClients())
                .AddTestUsers(Config.GetUsers());
        }


            public
            void
             Configure(IApplicationBuilder app, IHostingEnvironment env, ILoggerFactory loggerFactory)
        {
            ...
            app.UseIdentityServer();
            ...
接着安装UI,UI部分也可以自己编写,也就是登录 注销 允许和错误。
可以到 https://github.com/IdentityServer/IdentityServer4.Quickstart.UI/tree/release 下载,然后解压到项目目录下。
也可以使用命令提示符快速安装:
powershell iex ((New-Object System.Net.WebClient).DownloadString(‘https://raw.githubusercontent.com/IdentityServer/IdentityServer4.Quickstart.UI/release/get.ps1‘))
在项目目录下打开命令提示符,输入以上命令。
更多信息,可以查看官方readme:https://github.com/IdentityServer/IdentityServer4.Quickstart.UI/blob/release/README.md
新建MVC客户端
接着新建一个MVC客户端,可以理解为你自己的应用,需要使用第三方提供的服务。
新建一个ASP.NET Core Web Application 项目MvcClient,选择模板Web 应用程序 不进行身份验证。
配置Url 绑定5002端口 UseUrls("http://localhost:5002")
然后添加引用:
Install-Package Microsoft.AspNetCore.Authentication.Cookies
Install-Package Microsoft.AspNetCore.Authentication.OpenIdConnect
本文最终所引用的为1.1 。
接着打开Startup类,在Configure方法中添加如下代码:
            app.UseCookieAuthentication(new CookieAuthenticationOptions
            {
                AuthenticationScheme = "Cookies"
            });

            app.UseOpenIdConnectAuthentication(new OpenIdConnectOptions
            {
                AuthenticationScheme = "oidc",
                SignInScheme = "Cookies",

                Authority = "http://localhost:5000",
                RequireHttpsMetadata = false,

                ClientId = "mvc",
                SaveTokens = true
            });
然后在HomeController 加上[Authorize] 特性,HomeController是VS2015 模板创建的,如没有可以自行创建。
然后更改Home文件夹下的Index视图如下:
            <
            dl
            >

    @foreach (var claim in User.Claims)
    {

            <
            dt
            >@claim.Type</dt><dd>@claim.Value</dd>
    }
</dl>
运行
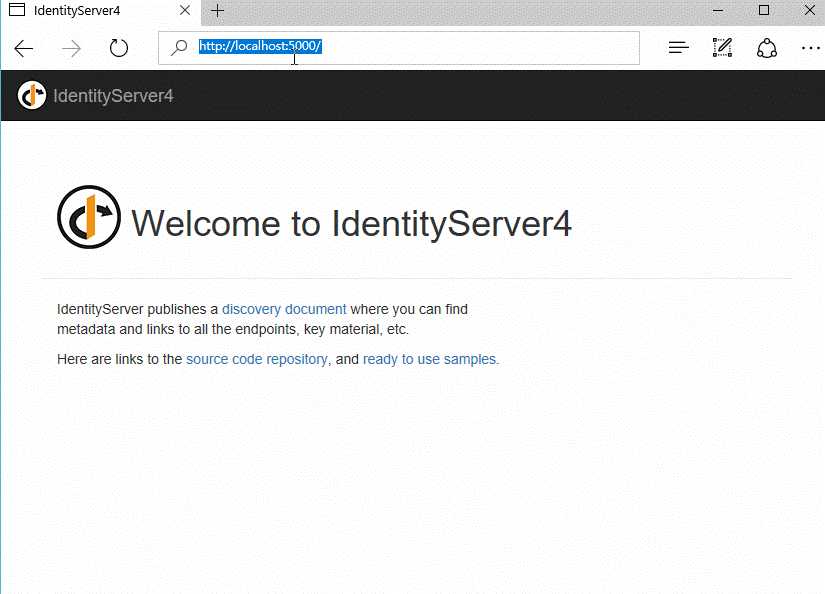
首先运行服务端,定位到项目目录下dotnet run,运行起服务端以后,访问http://localhost:5000 ,确认是否正常访问。
能正常访问接着运行客户端,同样是dotnet run ,然后访问http://localhost:5002,会默认跳转至http://localhost:5000 ,这样也就对了。
最终效果如下:
这里UI部分就是官方UI,我们也可以自行设计应用到自己的系统中。登录的用户是配置的测试用户,授权以后可以看到配置的Claims。
本文所采用的 Grant 为 Implicit,更为详细的OAuth 2.0 https://tools.ietf.org/html/rfc6749 。
示例GitHub:https://github.com/linezero/Blog/tree/master/IdentityServer4OpenID
参考官方文档:https://identityserver4.readthedocs.io/en/release/quickstarts/3_interactive_login.html
如果你觉得本文对你有帮助,请点击“推荐”,谢谢。
原文:http://www.cnblogs.com/linezero/p/identityserver4openidconnect.html
内容总结
以上是互联网集市为您收集整理的IdentityServer4 使用OpenID Connect添加用户身份验证全部内容,希望文章能够帮你解决IdentityServer4 使用OpenID Connect添加用户身份验证所遇到的程序开发问题。 如果觉得互联网集市技术教程内容还不错,欢迎将互联网集市网站推荐给程序员好友。
内容备注
版权声明:本文内容由互联网用户自发贡献,该文观点与技术仅代表作者本人。本站仅提供信息存储空间服务,不拥有所有权,不承担相关法律责任。如发现本站有涉嫌侵权/违法违规的内容, 请发送邮件至 gblab@vip.qq.com 举报,一经查实,本站将立刻删除。
内容手机端
扫描二维码推送至手机访问。