【Android】 Android studio 底部导航栏的基本实现(一)
内容导读
互联网集市收集整理的这篇技术教程文章主要介绍了【Android】 Android studio 底部导航栏的基本实现(一),小编现在分享给大家,供广大互联网技能从业者学习和参考。文章包含4838字,纯文字阅读大概需要7分钟。
内容图文
")
【爱迪的懂】本期来学一学一个底部导航栏的基本实现~
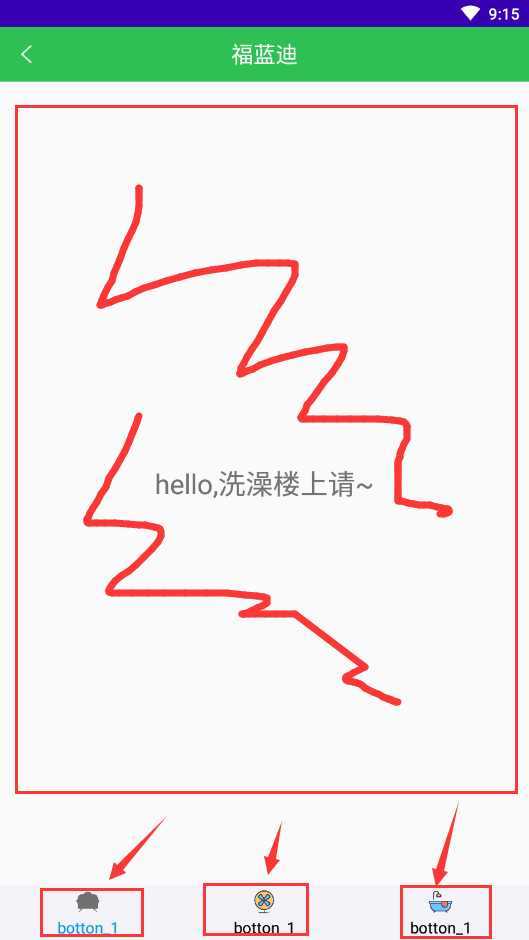
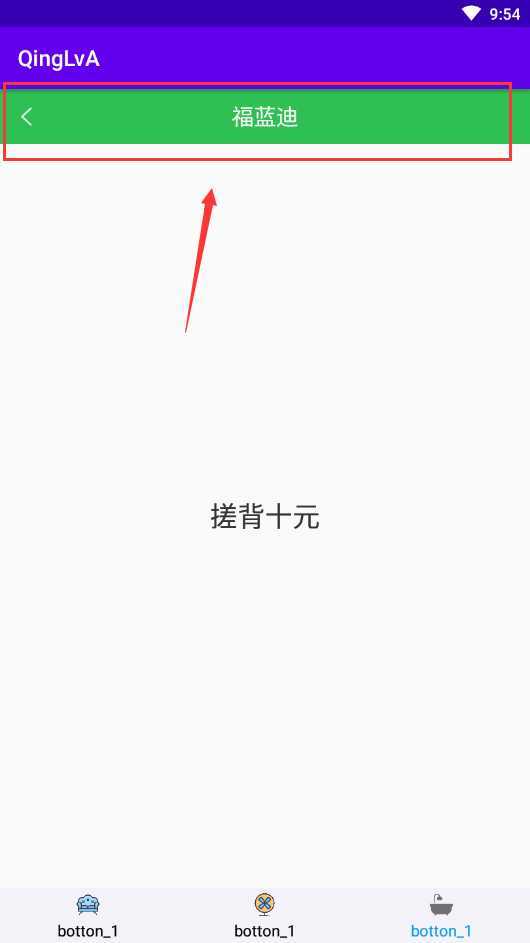
效果图:点击三个按钮任意一个,切换页面上文字。
步骤:
1.准备
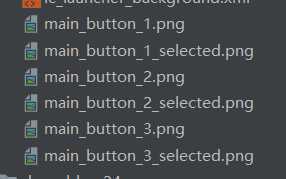
开始前需要准备导航栏底部的图片,以及点击后变换的图片,这里共6张。放在 drawable 下
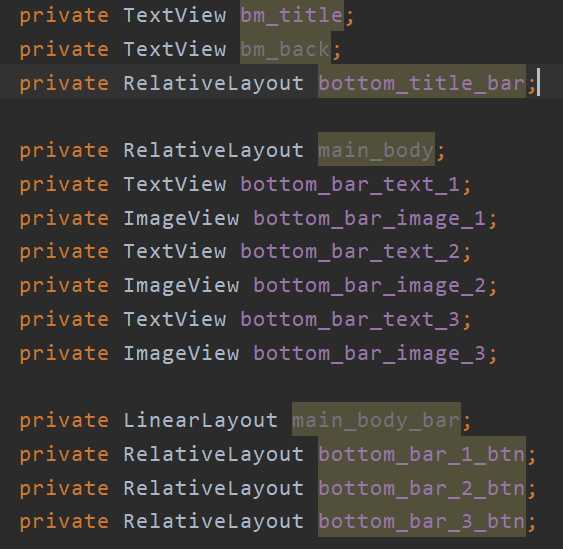
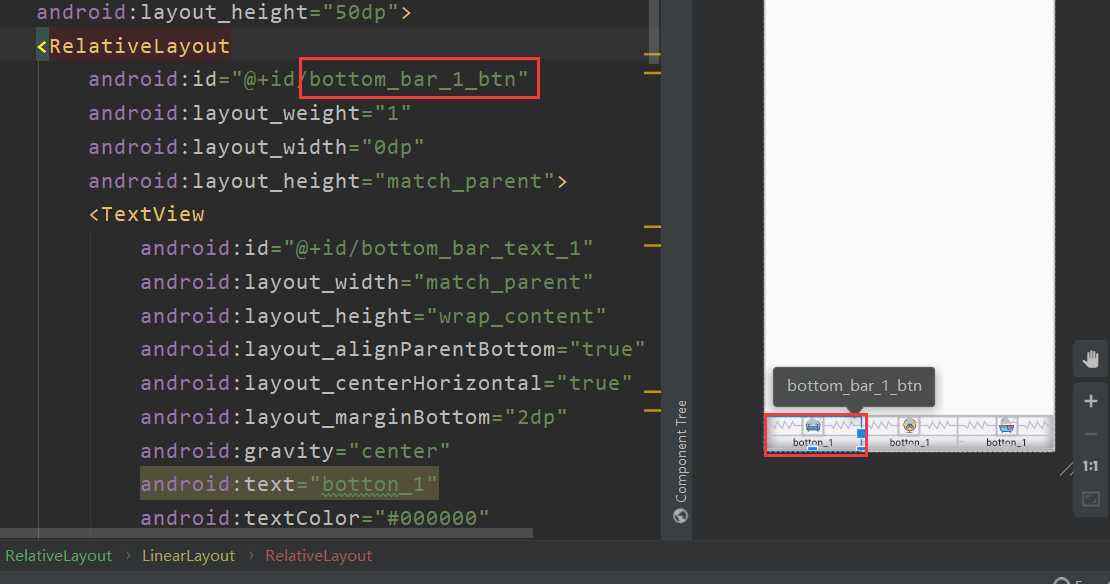
2.新建一个Activity ![]() ,修改他对应的布局文件
,修改他对应的布局文件
FrameLayout: 相当于一个碎片的容器
1
<
LinearLayout
2
xmlns:android
="http://schemas.android.com/apk/res/android"
3
android:id
="@+id/main_body_bar"
4
android:orientation
="vertical"
5
android:layout_width
="match_parent"
6
android:layout_height
="match_parent"
>
7
8
<
include
layout
="@layout/bottom_title_bar"
/>
9
10
<
RelativeLayout
11
android:id
="@+id/main_body"
12
android:layout_width
="match_parent"
13
android:layout_height
="match_parent"
>
14
15
<
FrameLayout
16
android:id
="@+id/fl_container"
17
android:layout_width
="match_parent"
18
android:layout_height
="match_parent"
19
android:layout_above
="@+id/bottom_bar"
/>
20
21
<
LinearLayout
22
android:id
="@+id/bottom_bar"
23
android:layout_alignParentBottom
="true"
24
android:orientation
="horizontal"
25
android:background
="#F2F2F8"
26
android:layout_width
="match_parent"
27
android:layout_height
="50dp"
>
28
<
RelativeLayout
29
android:id
="@+id/bottom_bar_1_btn"
30
android:layout_weight
="1"
31
android:layout_width
="0dp"
32
android:layout_height
="match_parent"
>
33
<
TextView
34
android:id
="@+id/bottom_bar_text_1"
35
android:layout_width
="match_parent"
36
android:layout_height
="wrap_content"
37
android:layout_alignParentBottom
="true"
38
android:layout_centerHorizontal
="true"
39
android:layout_marginBottom
="2dp"
40
android:gravity
="center"
41
android:text
="botton_1"
42
android:textColor
="#000000"
43
android:textSize
="14sp"
/>
44
<
ImageView
45
android:id
="@+id/bottom_bar_image_1"
46
android:layout_width
="30dp"
47
android:layout_height
="30dp"
48
android:layout_above
="@+id/bottom_bar_text_1"
49
android:layout_alignParentTop
="true"
50
android:layout_centerHorizontal
="true"
51
android:layout_marginTop
="2dp"
52
android:src
="@drawable/main_button_1"
/>
53
</
RelativeLayout
>
54
55
<
RelativeLayout
56
android:id
="@+id/bottom_bar_2_btn"
57
android:layout_weight
="1"
58
android:layout_width
="0dp"
59
android:layout_height
="match_parent"
>
60
<
TextView
61
android:id
="@+id/bottom_bar_text_2"
62
android:layout_width
="match_parent"
63
android:layout_height
="wrap_content"
64
android:layout_alignParentBottom
="true"
65
android:layout_centerHorizontal
="true"
66
android:layout_marginBottom
="2dp"
67
android:gravity
="center"
68
android:text
="botton_1"
69
android:textColor
="#000000"
70
android:textSize
="14sp"
/>
71
<
ImageView
72
android:id
="@+id/bottom_bar_image_2"
73
android:layout_width
="30dp"
74
android:layout_height
="30dp"
75
android:layout_above
="@+id/bottom_bar_text_2"
76
android:layout_alignParentTop
="true"
77
android:layout_centerHorizontal
="true"
78
android:layout_marginTop
="2dp"
79
android:src
="@drawable/main_button_2"
/>
80
</
RelativeLayout
>
81
<
RelativeLayout
82
android:id
="@+id/bottom_bar_3_btn"
83
android:layout_weight
="1"
84
android:layout_width
="0dp"
85
android:layout_height
="match_parent"
>
86
<
TextView
87
android:id
="@+id/bottom_bar_text_3"
88
android:layout_width
="match_parent"
89
android:layout_height
="wrap_content"
90
android:layout_alignParentBottom
="true"
91
android:layout_centerHorizontal
="true"
92
android:layout_marginBottom
="2dp"
93
android:gravity
="center"
94
android:text
="botton_1"
95
android:textColor
="#000000"
96
android:textSize
="14sp"
/>
97
<
ImageView
98
android:id
="@+id/bottom_bar_image_3"
99
android:layout_width
="30dp"
100
android:layout_height
="30dp"
101
android:layout_above
="@+id/bottom_bar_text_3"
102
android:layout_alignParentTop
="true"
103
android:layout_centerHorizontal
="true"
104
android:layout_marginTop
="2dp"
105
android:src
="@drawable/main_button_3"
/>
106
</
RelativeLayout
>
107
</
LinearLayout
>
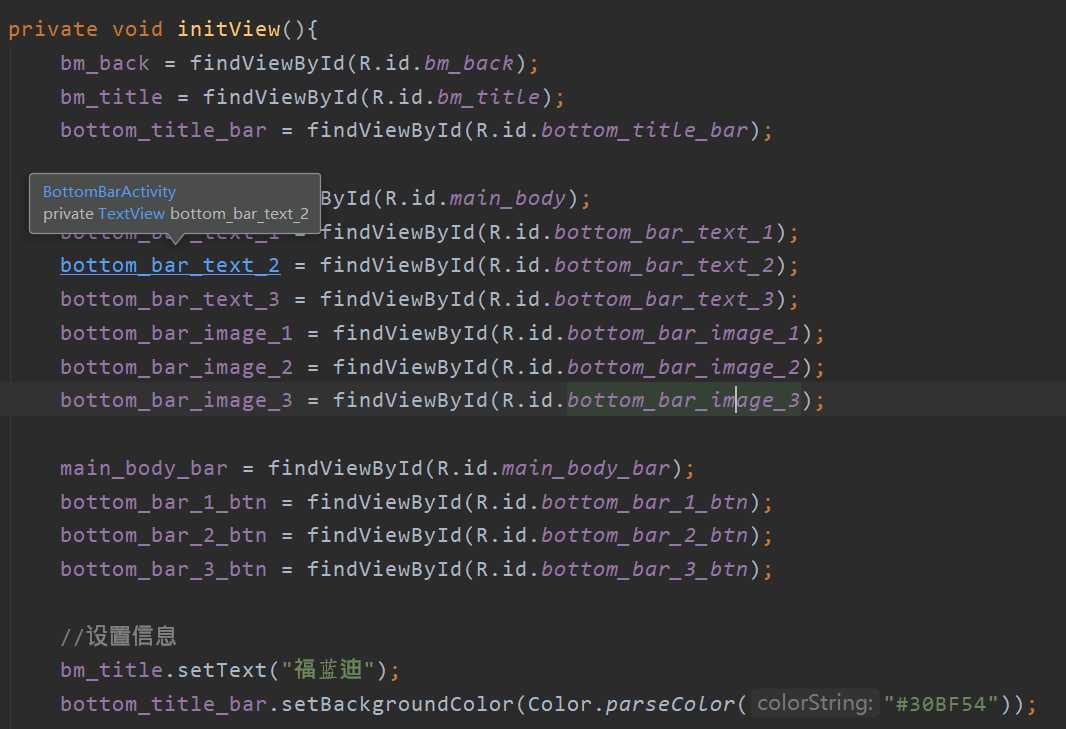
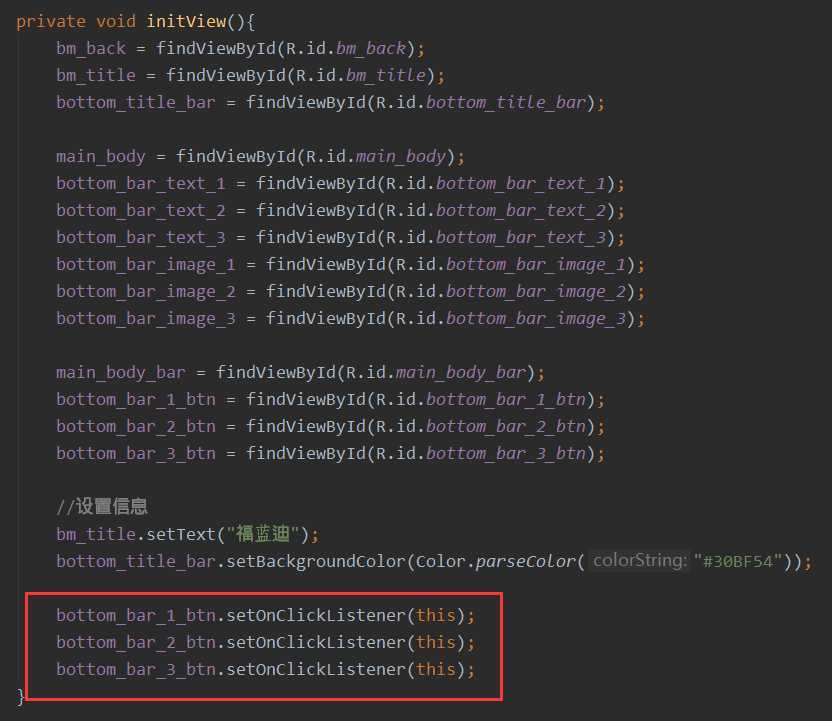
3. 返回该活动中 ![]() ,初始化布局文件中的控件
,初始化布局文件中的控件
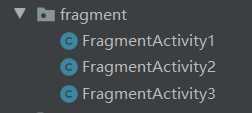
4. 新建三个Fragment (这里后两个我复制的第一个),后面只针对一 个说明,其余效果相同
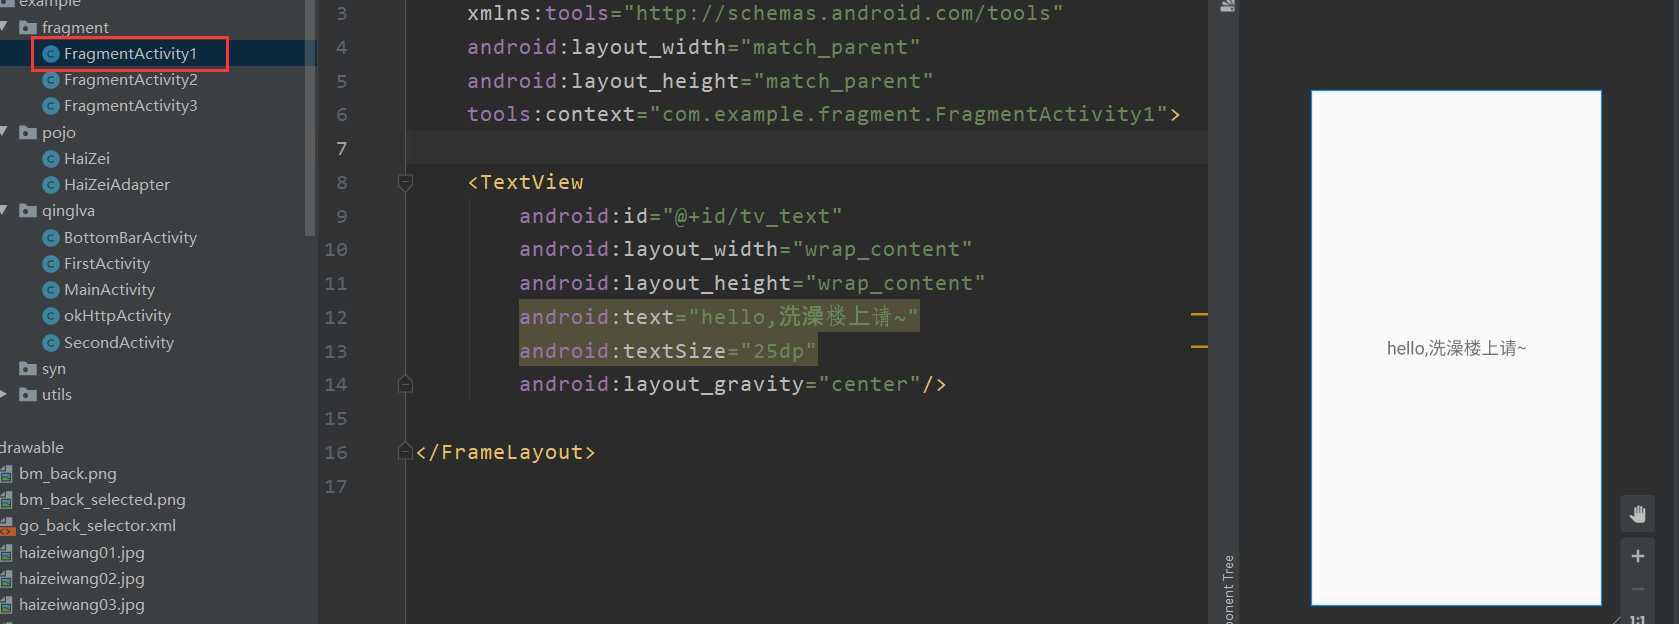
5.打开其中一个布局文件,设置一个TextView (其余两个修改一下 text 就行)
6.返回对应的 Activity 修改代码(其他两个对应修改成各自的)
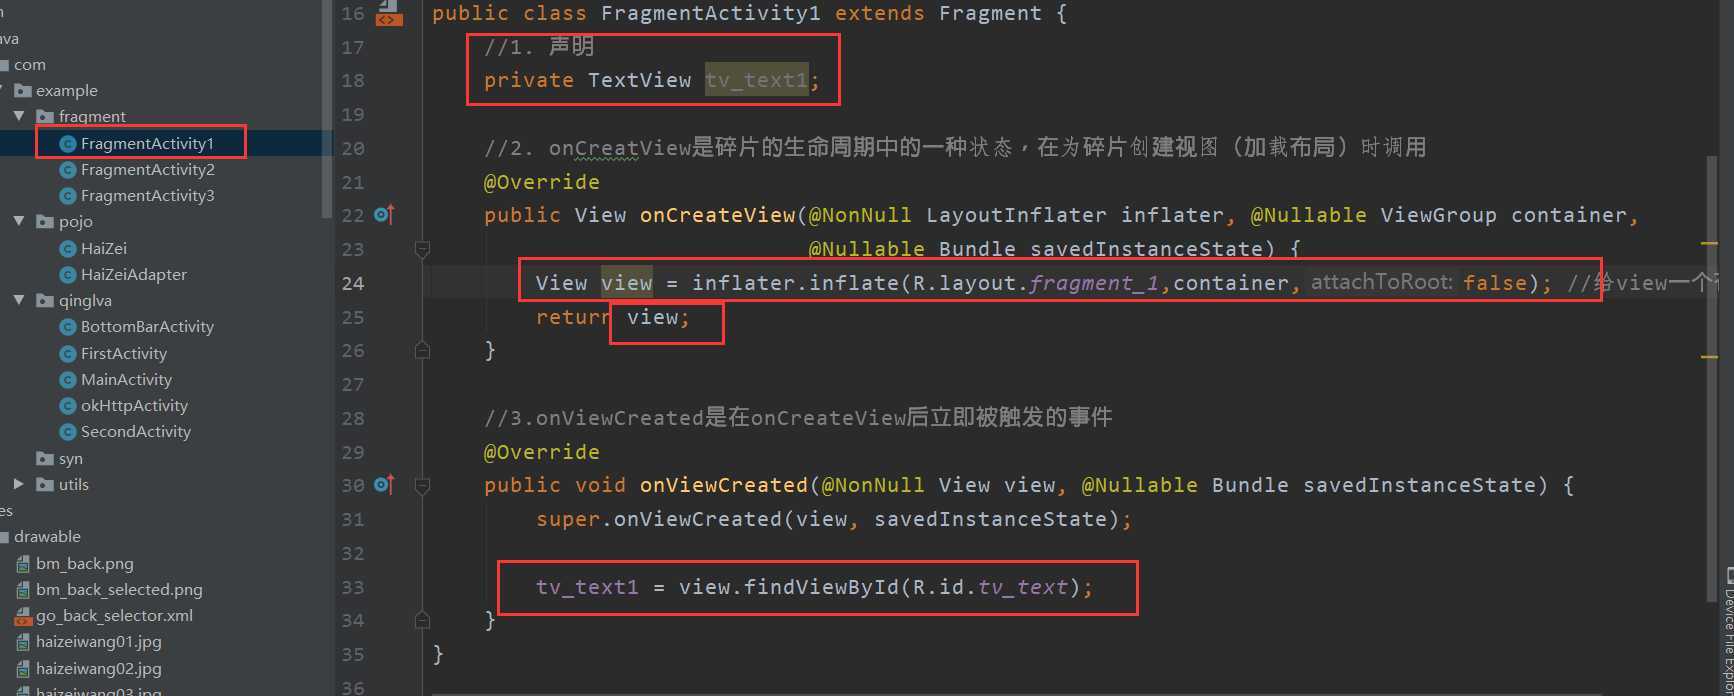
onCreateView()参考 : https://blog.csdn.net/weixin_44618862/article/details/98209943
onViewCreated()参考: https://www.jianshu.com/p/20b1f11b72b8
inflater.inflate()参数详解: https://blog.csdn.net/weixin_41213648/article/details/98453845
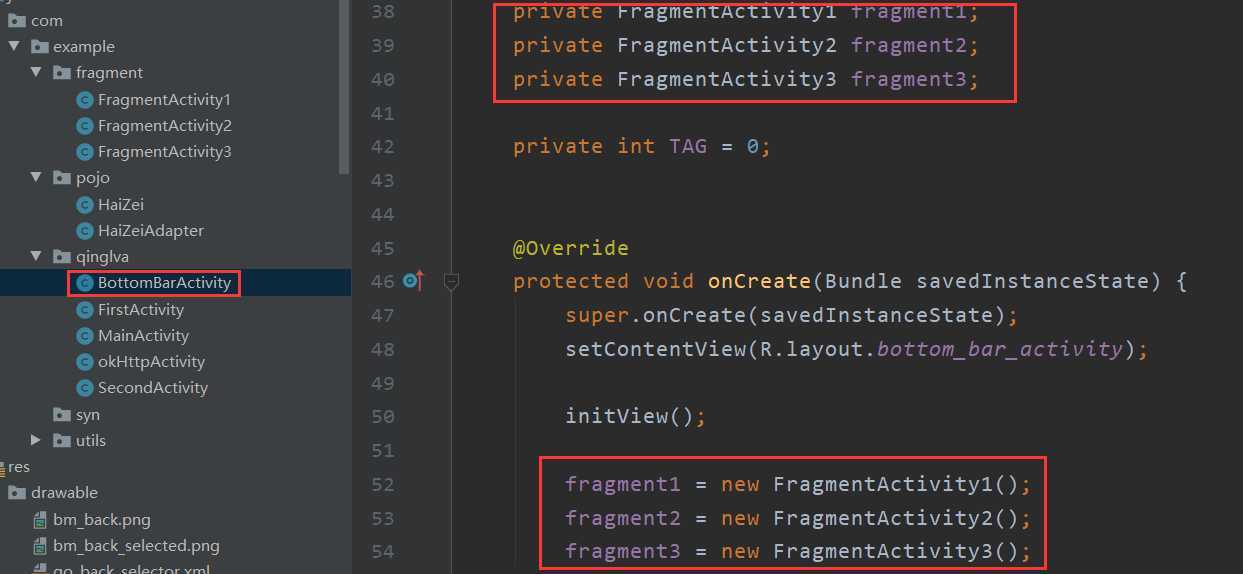
7. 再次打开 ![]() ,将三个 Fragment 创建
,将三个 Fragment 创建
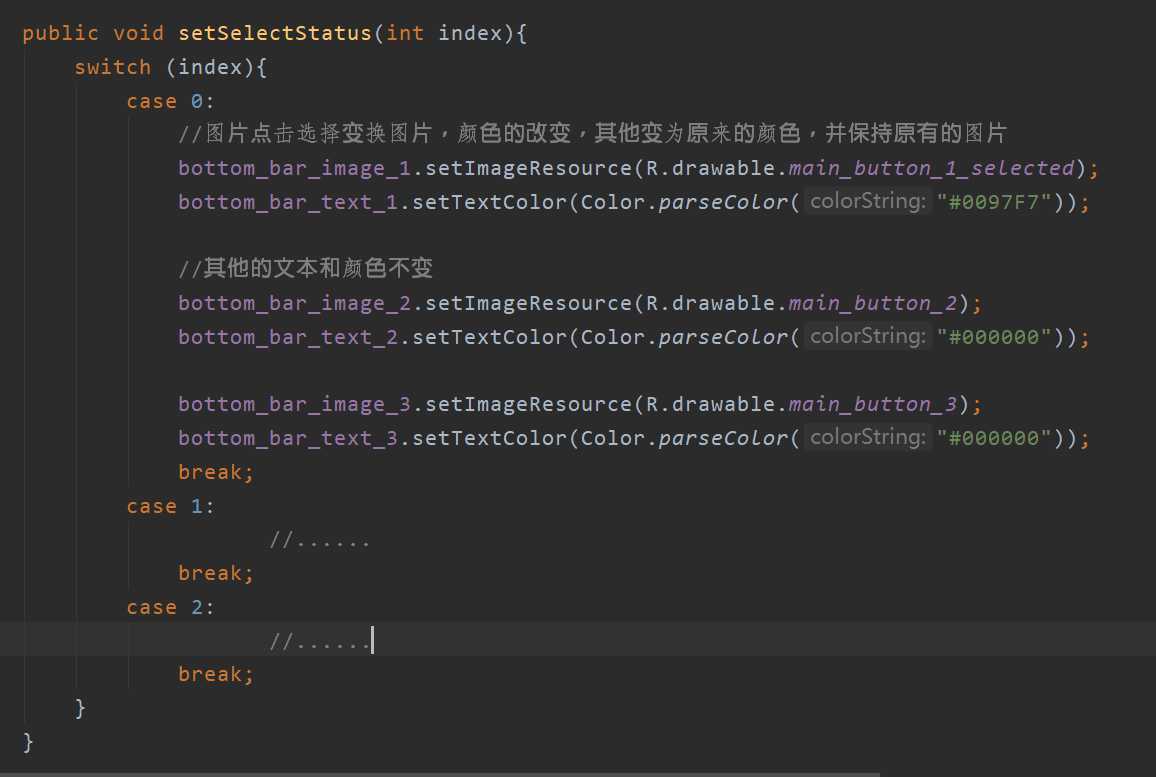
8. 写一个底部导航栏状态的切换方法
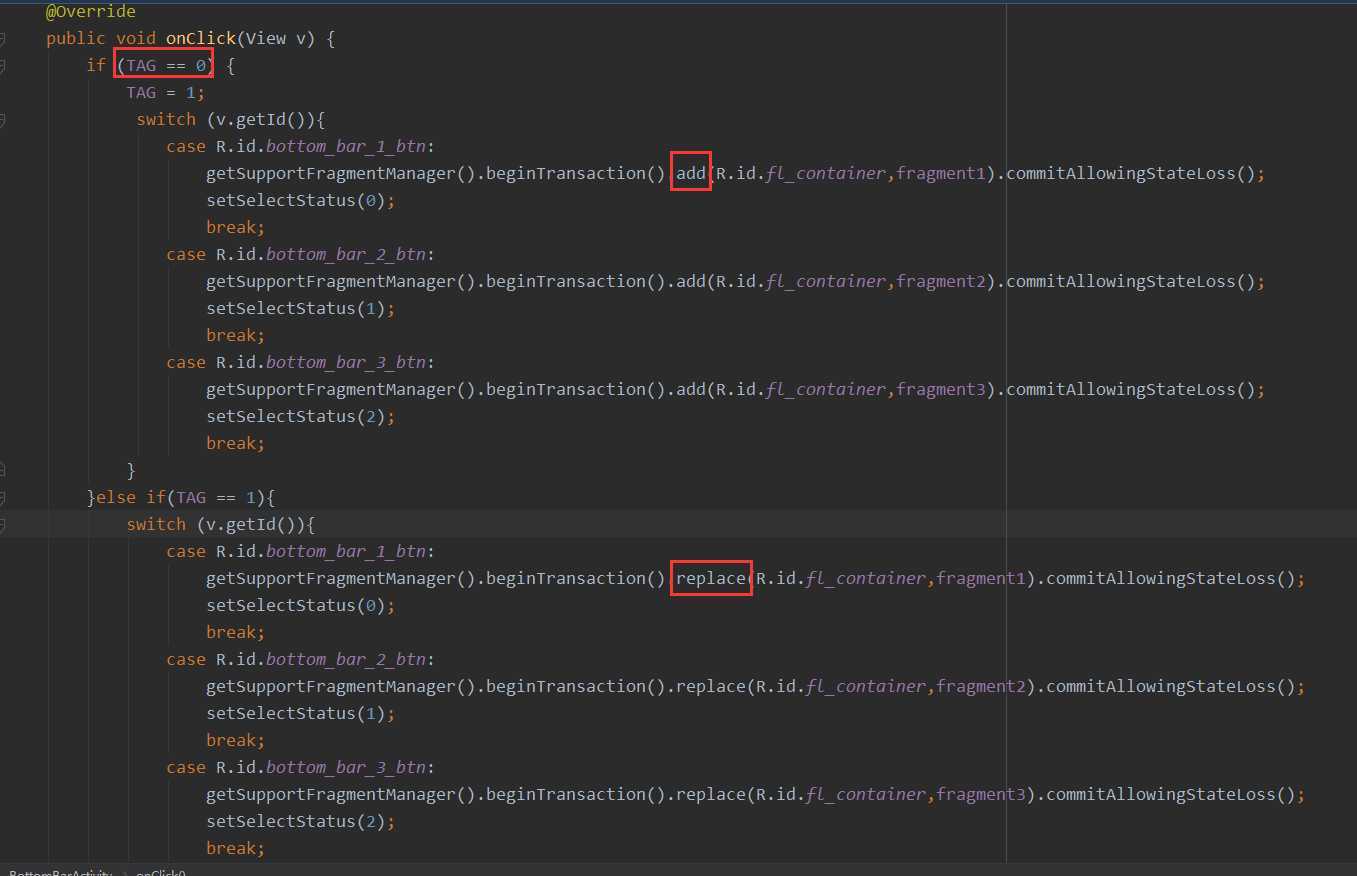
9. 实现底部导航栏的响应
添加监听方方式:通过当前类实现OnClickListener接口并在其必须实现的onClick方法中添加事件
9.1 点击事件
这里我设置了一个 TAG,目的是:如果一直都是 ADD ,会造成 fragment 重叠的效果,所以 TAG判断是否为第一次点击,如果不是则执行 replace 方法
getSupportFragmentManager().beginTransaction(): https://www.jianshu.com/p/5761ee2d3ea1
10. 总结
到这里就差不多可以运行啦~ 可实现点击按钮切换碎片容器内的内容啦~
学习期间也出现过许多困难,比如在寻找学习教程的时找了很久,说到这不得不感觉 B站的up主和博主们,B站也是一个神仙app,安利。
还有遇到的就是方法过时等一些问题,不过这都不是事,一点一点解决,加油,奥里给!

我这里还添加了一个 title bar 道友们可以自行添加
参考博客: https://cloud.tencent.com/developer/article/1455581
原文:https://www.cnblogs.com/lovedi/p/12991016.html
内容总结
以上是互联网集市为您收集整理的【Android】 Android studio 底部导航栏的基本实现(一)全部内容,希望文章能够帮你解决【Android】 Android studio 底部导航栏的基本实现(一)所遇到的程序开发问题。 如果觉得互联网集市技术教程内容还不错,欢迎将互联网集市网站推荐给程序员好友。
内容备注
版权声明:本文内容由互联网用户自发贡献,该文观点与技术仅代表作者本人。本站仅提供信息存储空间服务,不拥有所有权,不承担相关法律责任。如发现本站有涉嫌侵权/违法违规的内容, 请发送邮件至 gblab@vip.qq.com 举报,一经查实,本站将立刻删除。
内容手机端
扫描二维码推送至手机访问。