首页 / IOS / iOS引导页实现(一)
iOS引导页实现(一)
内容导读
互联网集市收集整理的这篇技术教程文章主要介绍了iOS引导页实现(一),小编现在分享给大家,供广大互联网技能从业者学习和参考。文章包含6589字,纯文字阅读大概需要10分钟。
内容图文
")
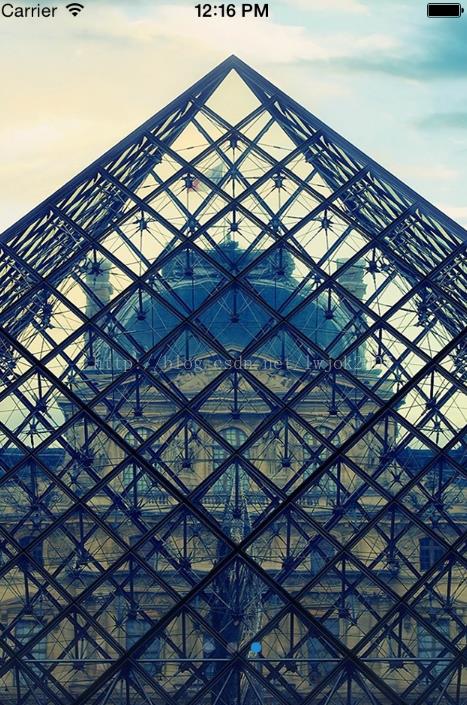
目前多数app在启动时会有引导页,今天给大家介绍一种比较直观,能够快速实现的引导页实现方法
最终效果就是有一个全屏的引导页,页面底部有UIPageControl 用来指示当前引导页为第几个页面

其中主要使用两个UI控件
    UIPageControl *pageControl; //指示当前处于第几个引导页
    UIScrollView *scrollView; //用于存放并显示引导页
首先,获取屏幕尺寸
//获取屏幕 宽度、高度
#define SCREEN_FRAME ([UIScreen mainScreen].bounds)
#define SCREEN_WIDTH ([UIScreen mainScreen].bounds.size.width)
#define SCREEN_HEIGHT ([UIScreen mainScreen].bounds.size.height)
初始化UI控件
    //初始化UI控件
    scrollView=[[UIScrollView alloc]initWithFrame:SCREEN_FRAME];
    scrollView.pagingEnabled=YES;
    [self.view addSubview:scrollView];


    pageControl=[[UIPageControl alloc]initWithFrame:CGRectMake(0, SCREEN_HEIGHT-50, SCREEN_WIDTH, 10)];
    pageControl.currentPageIndicatorTintColor=[UIColor colorWithRed:0.153 green:0.533 blue:0.796 alpha:1.0];
    [self.view addSubview:pageControl];
    pageControl.numberOfPages=3;
我们按照三个引导页来做,如果需要4个5个页面 可以修改pageControl.numberofPages;
创建三个UIImageView 并且初始化
<p style="margin-top: 0px; margin-bottom: 0px; font-size: 15px; font-family: Menlo;"> <span style="font-size: 11px; color: rgb(112, 61, 170);">UIImageView</span> *imageViewOne;</p><p style="margin-top: 0px; margin-bottom: 0px; font-size: 15px; font-family: Menlo;"> <span style="font-size: 11px; color: rgb(112, 61, 170);">UIImageView</span> *imageViewTwo;</p><p style="margin-top: 0px; margin-bottom: 0px; font-size: 15px; font-family: Menlo;"> <span style="font-size: 11px; color: rgb(112, 61, 170);">UIImageView</span> *imageViewThree;</p>
初始化第一个UIImageView
-(void)createViewOne{

    UIView *view = [[UIView alloc] initWithFrame:SCREEN_FRAME];

    imageViewOne = [[UIImageView alloc] initWithFrame:SCREEN_FRAME];
    imageViewOne.contentMode = UIViewContentModeScaleAspectFit;
    imageViewOne.image = [UIImage imageNamed:@"HelpFrist"];
    [view addSubview:imageViewOne];


    [scrollView addSubview:view];

}
其他两个类似方式实现
目前是效果出来了,但是引导页之间的相互切换还没有出来
下来需要给图片添加动作,当点击第一张图片的时候切换到第个引导页,点击第二个引导页切换到第三个引导页。
此处需要使用到给图片添加动作,可参考
http://blog.csdn.net/lwjok2007/article/details/46388935
还是一第一个图片为例,给上边的createViewOne方法再添加一段代码
-(void)createViewOne{

    UIView *view = [[UIView alloc] initWithFrame:SCREEN_FRAME];

    imageViewOne = [[UIImageView alloc] initWithFrame:SCREEN_FRAME];
    imageViewOne.contentMode = UIViewContentModeScaleAspectFit;
    imageViewOne.image = [UIImage imageNamed:@"HelpFrist"];
    [view addSubview:imageViewOne];


    UITapGestureRecognizer *singleTap1 = [[UITapGestureRecognizer alloc] initWithTarget:self action:@selector(buttonpress1:)];
    imageViewOne.userInteractionEnabled = YES;
    [imageViewOne addGestureRecognizer:singleTap1];


    [scrollView addSubview:view];

}
同时实现方法
buttonpress1
#pragma mark -- tap image
-(void)buttonpress1:(id)sender
{
    CGFloat pageWidth = CGRectGetWidth(self.view.bounds);
    CGPoint scrollPoint = CGPointMake(pageWidth, 0);
    [scrollView setContentOffset:scrollPoint animated:YES];

    pageControl.currentPage = 1;

}
其他两个仿照次方法即可
最终效果


源代码
#import "ViewController.h"


//获取屏幕 宽度、高度
#define SCREEN_FRAME ([UIScreen mainScreen].bounds)
#define SCREEN_WIDTH ([UIScreen mainScreen].bounds.size.width)
#define SCREEN_HEIGHT ([UIScreen mainScreen].bounds.size.height)


/**

 UIPageControl类提供一行点来指示当前显示的是多页面视图的哪一页。当然,由于UIPageControl类可视样式的点击不太好操作,所以最好是确保再添加了可选择的导航选项,以便让页面控件看起来更像一个指示器,而不是一个控件。当用户界面需要按页面进行显示时,使用UIPageControl控件将要显示的用户界面内容分页进行显示会使编程工作变得快捷。

 **/

@interface ViewController ()
{
    UIPageControl *pageControl; //指示当前处于第几个引导页
    UIScrollView *scrollView; //用于存放并显示引导页
    UIImageView *imageViewOne;
    UIImageView *imageViewTwo;
    UIImageView *imageViewThree;

}

@end

@implementation ViewController

- (void)viewDidLoad {
    [super viewDidLoad];
    // Do any additional setup after loading the view, typically from a nib.

    //初始化UI控件
    scrollView=[[UIScrollView alloc]initWithFrame:SCREEN_FRAME];
    scrollView.pagingEnabled=YES;
    [self.view addSubview:scrollView];


    pageControl=[[UIPageControl alloc]initWithFrame:CGRectMake(0, SCREEN_HEIGHT-50, SCREEN_WIDTH, 10)];
    pageControl.currentPageIndicatorTintColor=[UIColor colorWithRed:0.153 green:0.533 blue:0.796 alpha:1.0];
    [self.view addSubview:pageControl];
    pageControl.numberOfPages=3;

    [self createViewOne];
    [self createViewTwo];
    [self createViewThree];


}


-(void)createViewOne{

    UIView *view = [[UIView alloc] initWithFrame:SCREEN_FRAME];

    imageViewOne = [[UIImageView alloc] initWithFrame:SCREEN_FRAME];
    imageViewOne.contentMode = UIViewContentModeScaleAspectFit;
    imageViewOne.image = [UIImage imageNamed:@"HelpFrist"];
    [view addSubview:imageViewOne];


    UITapGestureRecognizer *singleTap1 = [[UITapGestureRecognizer alloc] initWithTarget:self action:@selector(buttonpress1:)];
    imageViewOne.userInteractionEnabled = YES;
    [imageViewOne addGestureRecognizer:singleTap1];


    [scrollView addSubview:view];

}

-(void)createViewTwo{


    UIView *view = [[UIView alloc] initWithFrame:CGRectMake(SCREEN_WIDTH, 0, SCREEN_WIDTH, SCREEN_HEIGHT)];
    imageViewTwo = [[UIImageView alloc] initWithFrame:SCREEN_FRAME];
    imageViewTwo.contentMode = UIViewContentModeScaleAspectFit;
    imageViewTwo.image = [UIImage imageNamed:@"HelpSecond"];
    [view addSubview:imageViewTwo];

    UITapGestureRecognizer *singleTap1 = [[UITapGestureRecognizer alloc] initWithTarget:self action:@selector(buttonpress2:)];
    imageViewTwo.userInteractionEnabled = YES;
    [imageViewTwo addGestureRecognizer:singleTap1];

    [scrollView addSubview:view];

}

-(void)createViewThree{


    UIView *view = [[UIView alloc] initWithFrame:CGRectMake(SCREEN_WIDTH*2, 0, SCREEN_WIDTH, SCREEN_HEIGHT)];

    imageViewThree = [[UIImageView alloc] initWithFrame:SCREEN_FRAME];
    imageViewThree.contentMode = UIViewContentModeScaleAspectFit;
    imageViewThree.image = [UIImage imageNamed:@"HelpThree"];
    [view addSubview:imageViewThree];

    UITapGestureRecognizer *singleTap1 = [[UITapGestureRecognizer alloc] initWithTarget:self action:@selector(buttonpress3:)];
    imageViewThree.userInteractionEnabled = YES;
    [imageViewThree addGestureRecognizer:singleTap1];

    [scrollView addSubview:view];
}

#pragma mark -- tap image
-(void)buttonpress1:(id)sender
{
    CGFloat pageWidth = CGRectGetWidth(self.view.bounds);
    CGPoint scrollPoint = CGPointMake(pageWidth, 0);
    [scrollView setContentOffset:scrollPoint animated:YES];

    pageControl.currentPage = 1;

}

-(void)buttonpress2:(id)sender
{
    CGFloat pageWidth = CGRectGetWidth(self.view.bounds);
    CGPoint scrollPoint = CGPointMake(pageWidth*2, 0);
    [scrollView setContentOffset:scrollPoint animated:YES];

    pageControl.currentPage = 2;

}

-(void)buttonpress3:(id)sender
{
    NSLog(@"引导页完成");

}
- (void)didReceiveMemoryWarning {
    [super didReceiveMemoryWarning];
    // Dispose of any resources that can be recreated.
}

@end
为方便共享源代码 交流学习
苹果开发群 :414319235 欢迎加入
原文:http://blog.csdn.net/lwjok2007/article/details/46516047
内容总结
以上是互联网集市为您收集整理的iOS引导页实现(一)全部内容,希望文章能够帮你解决iOS引导页实现(一)所遇到的程序开发问题。 如果觉得互联网集市技术教程内容还不错,欢迎将互联网集市网站推荐给程序员好友。
内容备注
版权声明:本文内容由互联网用户自发贡献,该文观点与技术仅代表作者本人。本站仅提供信息存储空间服务,不拥有所有权,不承担相关法律责任。如发现本站有涉嫌侵权/违法违规的内容, 请发送邮件至 gblab@vip.qq.com 举报,一经查实,本站将立刻删除。
内容手机端
扫描二维码推送至手机访问。