javaEE之------ApectJ的切面技术===标签
内容导读
互联网集市收集整理的这篇技术教程文章主要介绍了javaEE之------ApectJ的切面技术===标签,小编现在分享给大家,供广大互联网技能从业者学习和参考。文章包含4398字,纯文字阅读大概需要7分钟。
内容图文

现在比较流行了aop技术之一======== 标签
实现步骤:
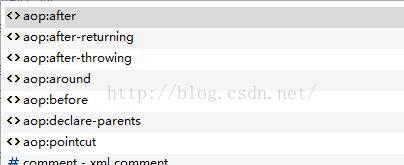
一,导入aop标签
方法,打开aop包,里面就有。
 这个里面就有

然后根据选择spring的版本。在配置文件中配置
如下:
<beans xmlns="http://www.springframework.org/schema/beans"
xmlns:xsi="http://www.w3.org/2001/XMLSchema-instance"
xmlns:context="http://www.springframework.org/schema/context"
xmlns:tx="http://www.springframework.org/schema/tx"
xmlns:aop="http://www.springframework.org/schema/aop"
xsi:schemaLocation="http://www.springframework.org/schema/beans http://www.springframework.org/schema/beans/spring-beans-3.0.xsd
http://www.springframework.org/schema/context http://www.springframework.org/schema/context/spring-context-3.0.xsd
http://www.springframework.org/schema/aop http://www.springframework.org/schema/aop/spring-aop-3.0.xsd
http://www.springframework.org/schema/tx http://www.springframework.org/schema/tx/spring-tx-3.0.xsd">
这样就导入了aop标签
二,配置切点和通知
<aop:config>
		<aop:aspect ref="myadvior"><!-- 需要导入作为切面的类-->
			<aop:pointcut expression="execution(* cn..Person.*(..))" id="cut"/>
			<aop:before method="test1" pointcut-ref="cut"/> <!-- 这是通知,拦截切点位置,也就是拦截时  需要做的事情 -->
			<aop:aftermethod="test1" pointcut-ref="cut"/> <!-- 拦截核心之后执行的动作,全部写在test1方法里面了 -->
			<!-- <aop:before method="test1" pointcut="execution(* cn..Person.*(..))"/> 这样也是可以的,就不用切点了,直接写在这里面 -->
		</aop:aspect>
	</aop:config>
里面的配置通知类型很多
三,被代理类以及自动注解类
<span style="font-size:18px;"><!-- 需要的三元素 (被代理类, 自动代理类,切面)采用标签,切面和之前的有点不同,只是一个简单的pojo导入 -->
	<bean id="person" class="cn.aop.aspectj3.Person"></bean></span>
<span style="font-size:18px;"> <!-- 注解自动标签,自动去查找带有注解的类和方法 -->
<span style="white-space:pre">	</span> <aop:aspectj-autoproxy></aop:aspectj-autoproxy>
</span>
四,导入我们作为切面的类
<bean class="cn.aop.aspectj3.MyAdvisor" id="myadvior"/><!--当做切面的pojo 注入 -->
配置文件已经完成。
五,被导入的作为切面的类
public class MyAdvisor {

		public void test1(){
			System.out.println("这是test...");
		}
}
很普通的一类,方法名在配置切面里面,通知的时间也完成了。。这里就可以实现想要完成的动作了。
标签相当于之前的,有很大的优化,如在核心模块完全不知道是都做了拦截,进一步实现了解耦。
=========================这里已经介绍完====================
源代码以及测试
1,配置文件
<?xml version="1.0" encoding="UTF-8"?>

	<beans xmlns="http://www.springframework.org/schema/beans"
		xmlns:xsi="http://www.w3.org/2001/XMLSchema-instance"
		xmlns:context="http://www.springframework.org/schema/context"
		xmlns:tx="http://www.springframework.org/schema/tx"
		xmlns:aop="http://www.springframework.org/schema/aop"
		xsi:schemaLocation="http://www.springframework.org/schema/beans http://www.springframework.org/schema/beans/spring-beans-3.0.xsd
				http://www.springframework.org/schema/context http://www.springframework.org/schema/context/spring-context-3.0.xsd
				http://www.springframework.org/schema/aop http://www.springframework.org/schema/aop/spring-aop-3.0.xsd
				http://www.springframework.org/schema/tx http://www.springframework.org/schema/tx/spring-tx-3.0.xsd">

	<!-- 需要的三元素 (被代理类, 自动代理类,切面)采用标签,切面和之前的有点不同,只是一个简单的pojo导入 -->
	<bean id="person" class="cn.aop.aspectj3.Person"></bean>

	<!-- 自动代理注解
	<bean class="org.springframework.aop.aspectj.annotation.AnnotationAwareAspectJAutoProxyCreator"></bean>
	 -->
	 <!-- 注解自动标签,自动去查找带有注解的类和方法 -->
	 <aop:aspectj-autoproxy></aop:aspectj-autoproxy>


	<aop:config>
		<aop:aspect ref="myadvior">
			<aop:pointcut expression="execution(* cn..Person.*(..))" id="cut"/>
			<aop:before method="test1" pointcut-ref="cut"/> <!-- 这是通知,拦截切点位置,也就是拦截时  需要做的事情 -->
			<aop:aftermethod="test1" pointcut-ref="cut"/> <!-- 拦截核心之后执行的动作,全部写在test1方法里面了 -->
			<!-- <aop:before method="test1" pointcut="execution(* cn..Person.*(..))"/> 这样也是可以的,就不用切点了,直接写在这里面 -->
		</aop:aspect>
	</aop:config>

	<bean class="cn.aop.aspectj3.MyAdvisor" id="myadvior"/><!--当做切面的pojo 注入 -->
</beans>
2, 作为切面的类
package cn.aop.aspectj3;

public class MyAdvisor {

		public void test1(){
			System.out.println("这是test...");
		}
}
3,被代理的对象
package cn.aop.aspectj3;

public class Person {

	public void say(){
		System.out.println("...这是say..");
	}

	public void run(){
		System.out.println("这是person中的 run方法");
	}

}
4,测试
@Test
	public void Test2(){
		ApplicationContext context =new ClassPathXmlApplicationContext("cn/aop/aspectj3/aspectj3.xml");
		Person p =context.getBean(Person.class);
		p.run();
		p.say();
	}
原文:http://blog.csdn.net/yangxin_blog/article/details/50548295
内容总结
以上是互联网集市为您收集整理的javaEE之------ApectJ的切面技术===标签全部内容,希望文章能够帮你解决javaEE之------ApectJ的切面技术===标签所遇到的程序开发问题。 如果觉得互联网集市技术教程内容还不错,欢迎将互联网集市网站推荐给程序员好友。
内容备注
版权声明:本文内容由互联网用户自发贡献,该文观点与技术仅代表作者本人。本站仅提供信息存储空间服务,不拥有所有权,不承担相关法律责任。如发现本站有涉嫌侵权/违法违规的内容, 请发送邮件至 gblab@vip.qq.com 举报,一经查实,本站将立刻删除。
内容手机端
扫描二维码推送至手机访问。