安装SCVMM
1. 实验准备
一台
Windows Server 2012 R2
服务器版的操作系统,作为域控(也可是普通域用户)
安装
Microsoft .NET Framework 3.5
、
4.5
安装
Windows ADK 8.1(2012 R2)
安装
SQL Server
(
SP2 SQL Server 2012(64-bit) Service Pack 1
)
注意:
SCVMM 2012 R2
中不再包含自助服务,如果需要自助服务,请单独安装
App Controller
。
App Controller
可以和
SCVMM 2012 SP1
、
R2
装在一起,也可以单独安装在其它服务器上。
2. 实验目标
完成数据库和
SCVMM 2012
的安装
3. 实验过程
3.1.
数据库安装
3.1.1. 安装.Net FrameWork
SCVMM2012
需要3.5,SP1需要4.5
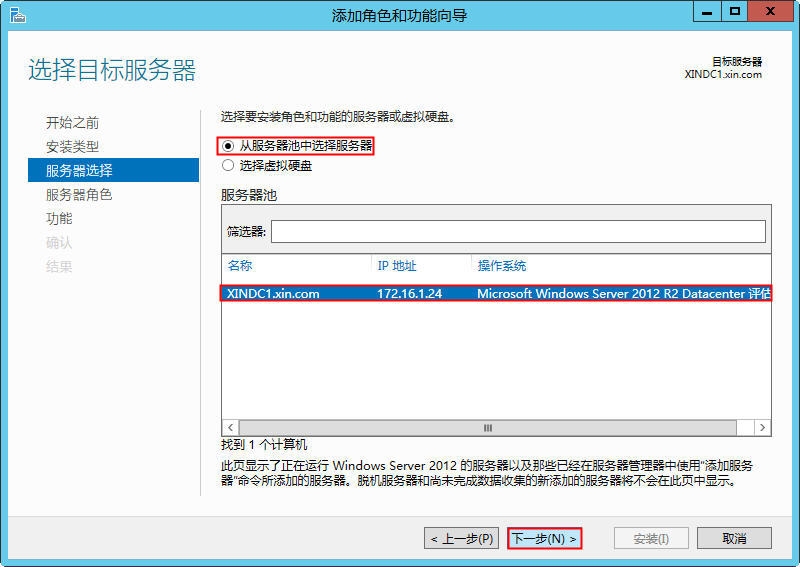
打开“服务器管理器”面板,选择“管理”菜单的“添加角色和功能”选项,进入安装向导
650) this.width=650;" width="554" height="373" src="/upload/getfiles/default/2022/11/14/20221114085102970.jpg" title="snap001.jpg" />
默认的安装步骤省略,只标出关键的步骤,见下图
650) this.width=650;" width="554" height="392" src="/upload/getfiles/default/2022/11/14/20221114085103417.jpg" title="snap003.jpg" />
650) this.width=650;" src="/upload/getfiles/default/2022/11/14/20221114085103819.jpg" title="snap004.jpg" width="554" height="393" border="0" hspace="0" vspace="0" />
650) this.width=650;" src="/upload/getfiles/default/2022/11/14/20221114085104234.jpg" title="snap005.jpg" width="554" height="393" border="0" hspace="0" vspace="0" />
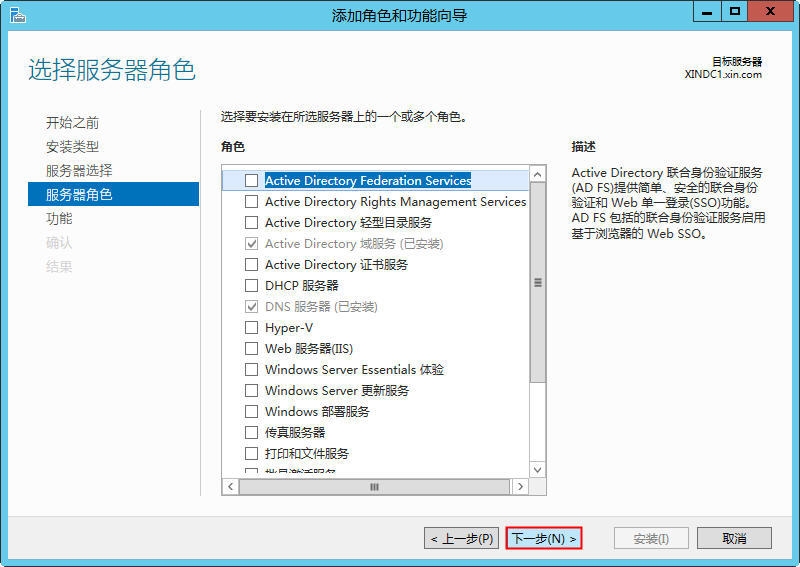
在选择“
.Net FrameWork
”功能时,只需选择
3.5
功能,
4.5
功能默认已安装
650) this.width=650;" width="554" height="392" src="/upload/getfiles/default/2022/11/14/20221114085104560.jpg" title="snap006.jpg" />
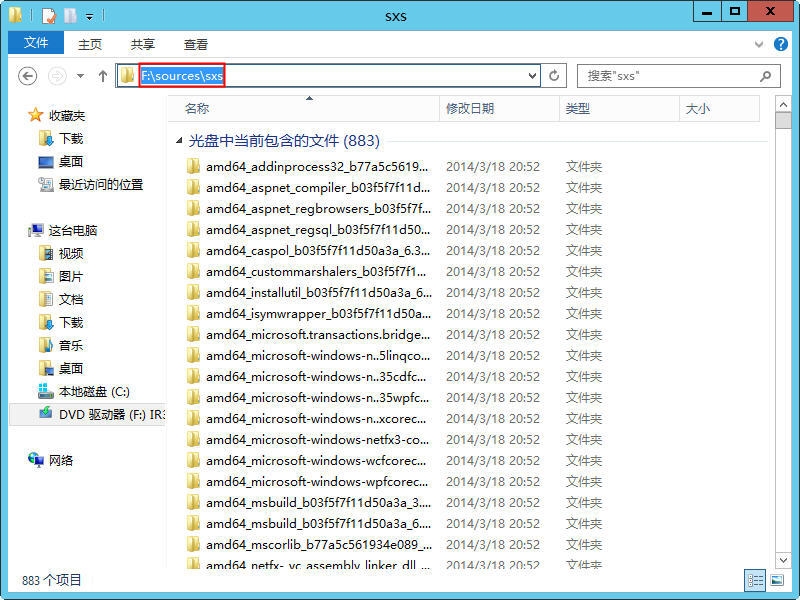
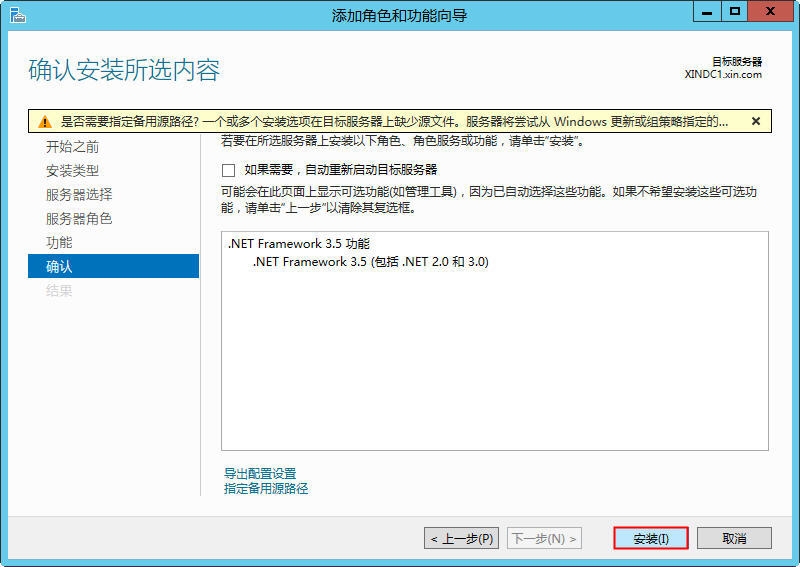
需要指定备用源路径,从光驱进入安装光盘,进入
sxs
目录,复制其绝对路径。粘贴至“指定备用源路径”链接打开的面板,之后点击“安装”按钮进行安装
650) this.width=650;" width="554" height="392" src="/upload/getfiles/default/2022/11/14/20221114085105011.jpg" title="snap007.jpg" />
650) this.width=650;" src="/upload/getfiles/default/2022/11/14/20221114085105375.jpg" title="snap008.jpg" width="554" height="417" border="0" hspace="0" vspace="0" />
650) this.width=650;" src="/upload/getfiles/default/2022/11/14/20221114085105799.jpg" title="snap009.jpg" width="554" height="385" border="0" hspace="0" vspace="0" />
650) this.width=650;" src="/upload/getfiles/default/2022/11/14/20221114085106138.jpg" title="snap010.jpg" width="554" height="393" border="0" hspace="0" vspace="0" />
650) this.width=650;" src="/upload/getfiles/default/2022/11/14/20221114085106562.jpg" title="snap012.jpg" width="554" height="372" border="0" hspace="0" vspace="0" />
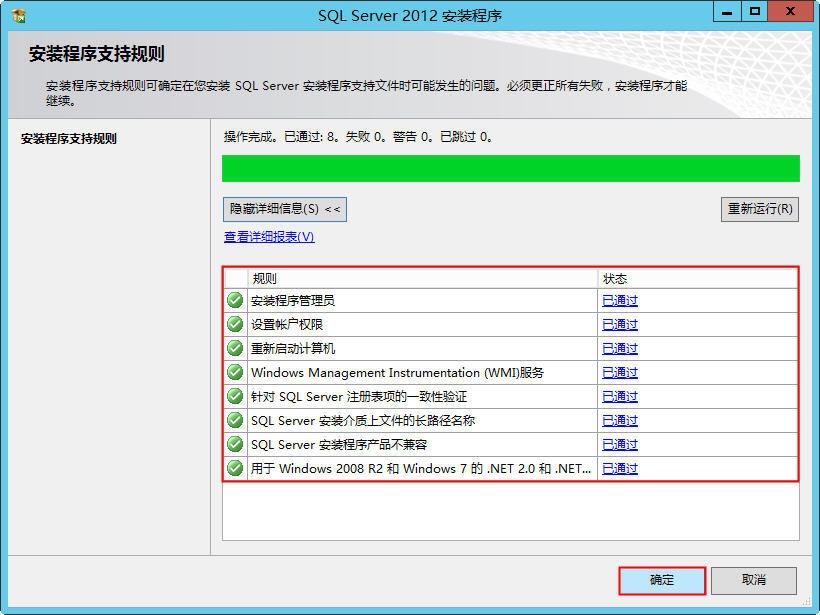
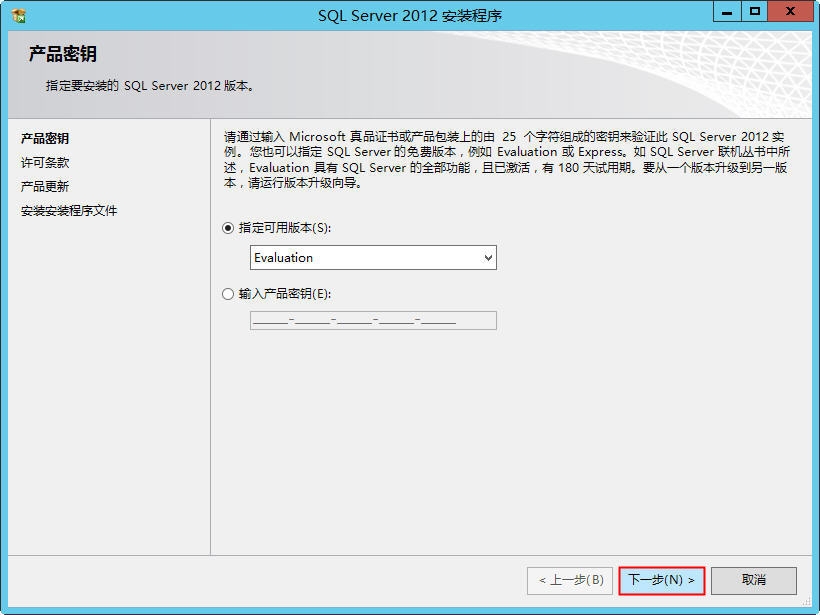
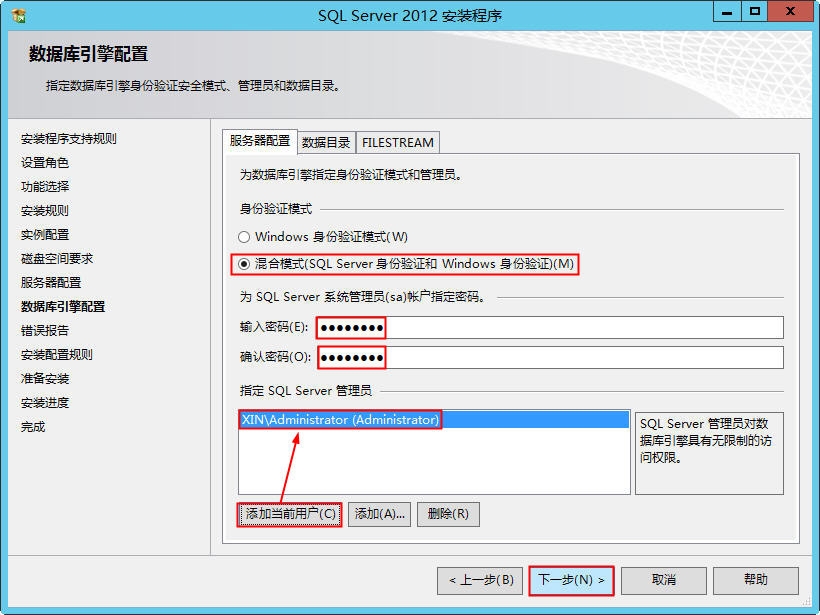
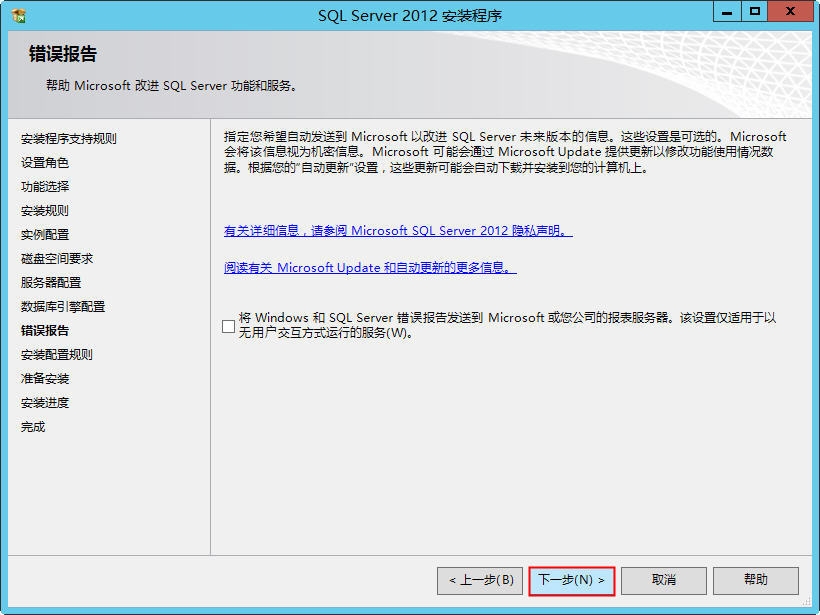
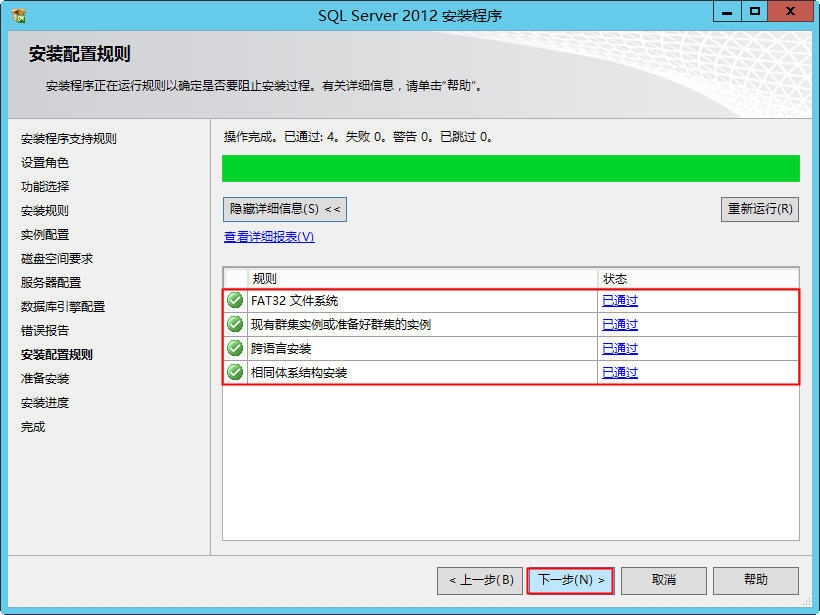
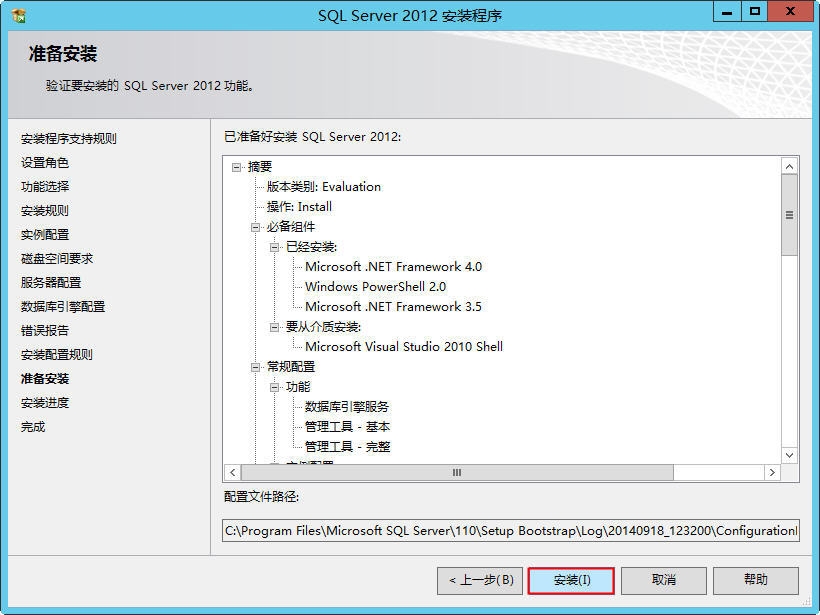
3.1.2. 安装SQL 2012数据库
挂载
SQL
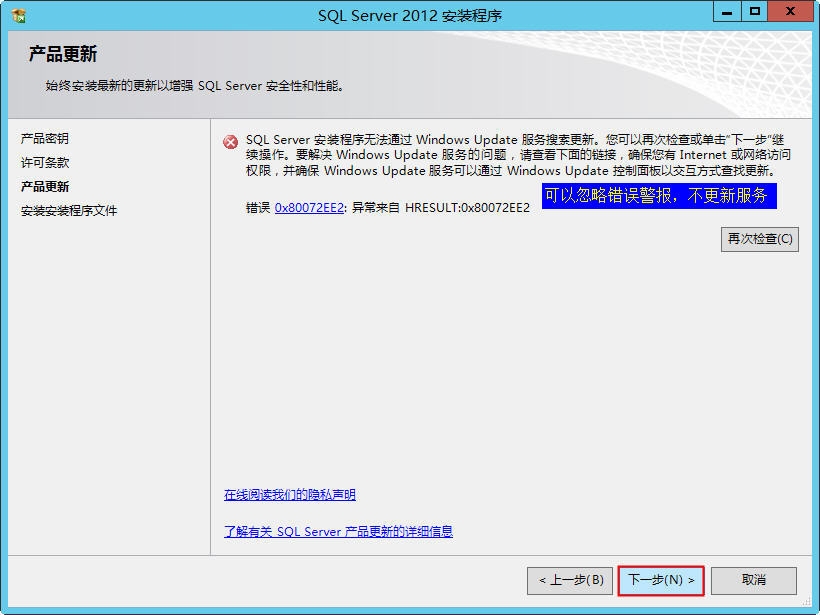
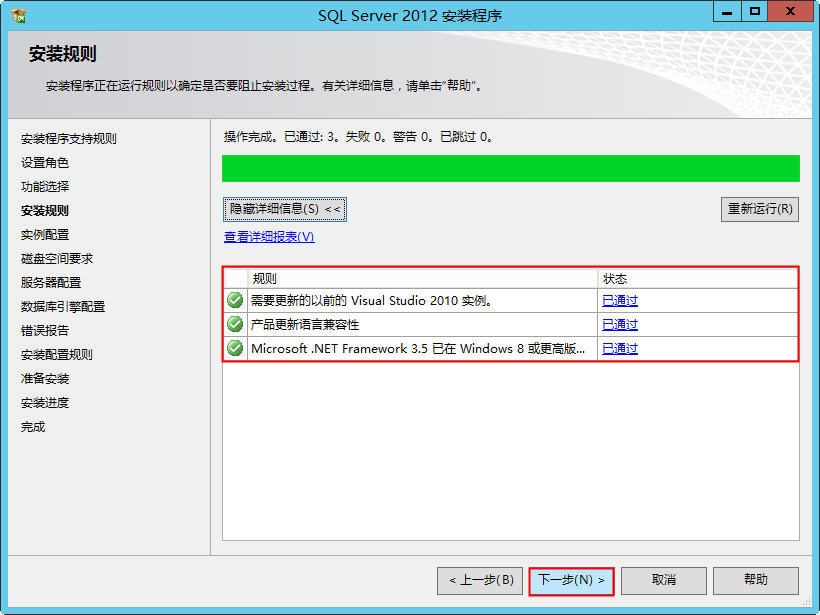
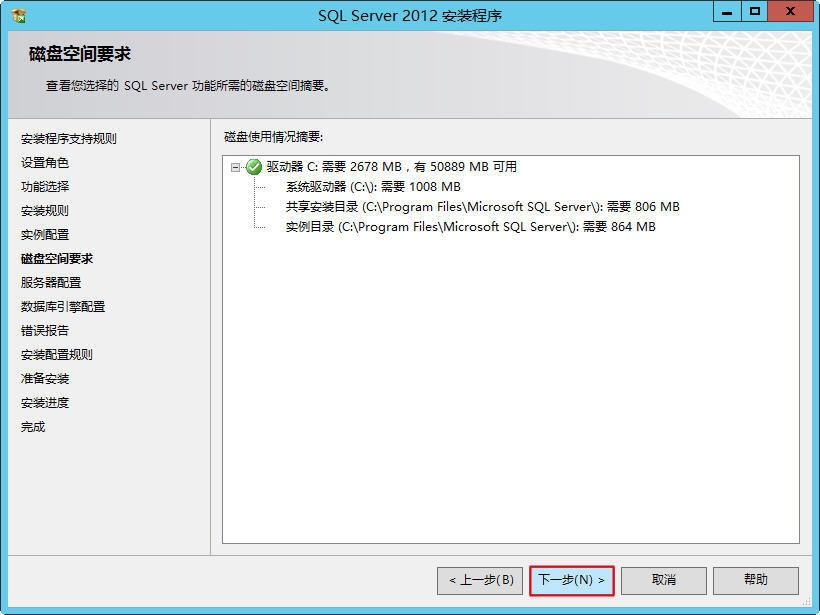
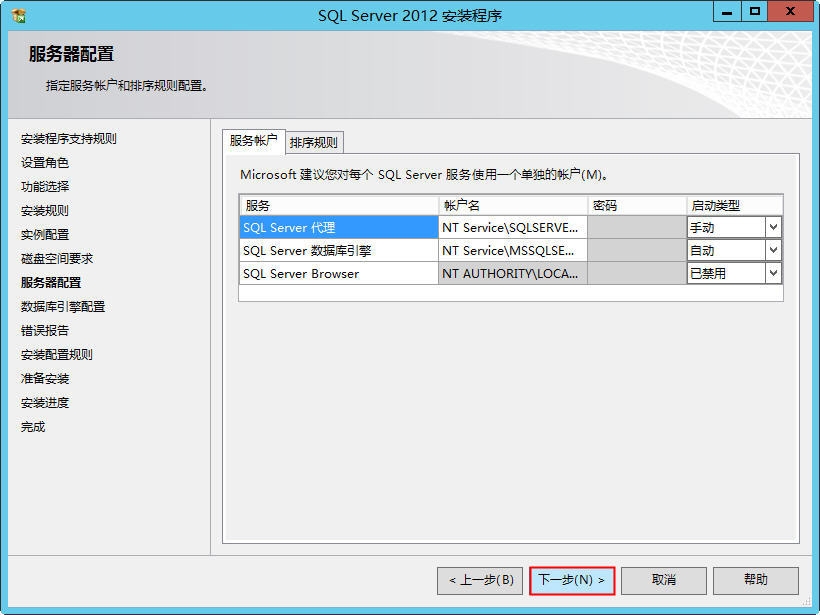
数据库安装盘,双击驱动器进入安装界面,安装过程见图详解
650) this.width=650;" width="554" height="415" src="/upload/getfiles/default/2022/11/14/20221114085106903.jpg" title="snap015.jpg" />
650) this.width=650;" src="/upload/getfiles/default/2022/11/14/20221114085107250.jpg" title="snap018.jpg" width="554" height="417" border="0" hspace="0" vspace="0" />
650) this.width=650;" src="/upload/getfiles/default/2022/11/14/20221114085107708.jpg" title="snap019.jpg" width="554" height="417" border="0" hspace="0" vspace="0" />
650) this.width=650;" src="/upload/getfiles/default/2022/11/14/20221114085108058.jpg" title="snap020.jpg" width="554" height="417" border="0" hspace="0" vspace="0" />
650) this.width=650;" src="/upload/getfiles/default/2022/11/14/20221114085108437.jpg" title="snap021.jpg" width="554" height="417" border="0" hspace="0" vspace="0" />
650) this.width=650;" src="/upload/getfiles/default/2022/11/14/20221114085108817.jpg" title="snap025.jpg" width="554" height="417" border="0" hspace="0" vspace="0" />
650) this.width=650;" src="/upload/getfiles/default/2022/11/14/20221114085109236.jpg" title="snap026.jpg" width="554" height="417" border="0" hspace="0" vspace="0" />
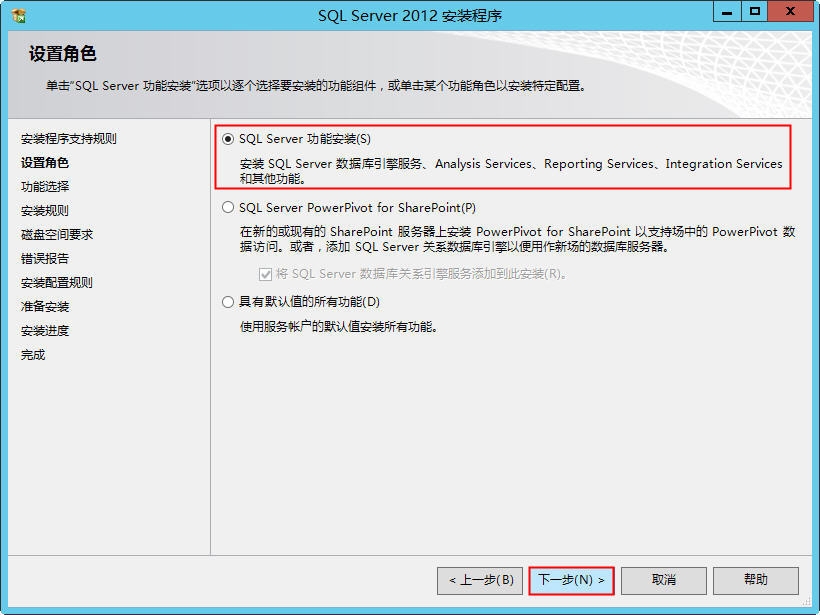
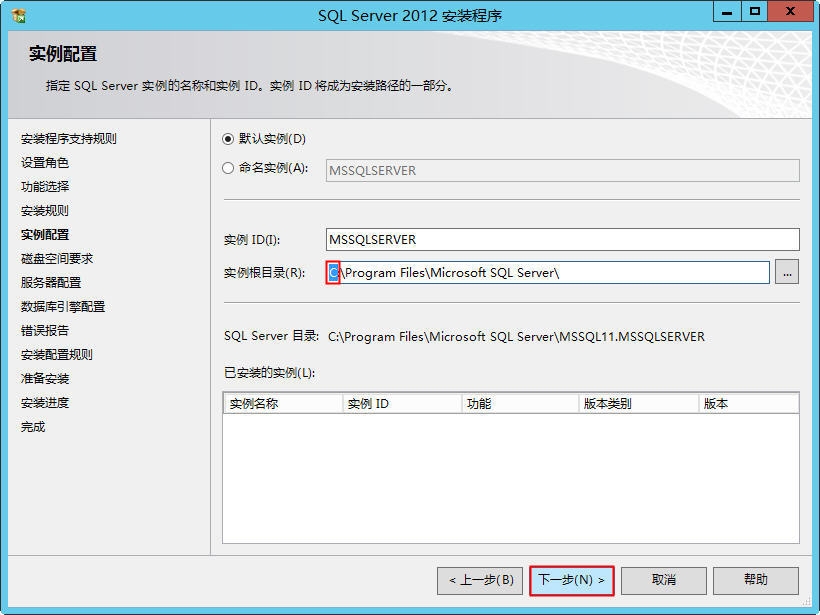
只选择安装数据库引擎和管理工具。
建议安装目录指向系统分区之外的分区(因为只有
C
盘,所以没有更改放置的目录)
650) this.width=650;" width="553" height="415" src="/upload/getfiles/default/2022/11/14/20221114085109574.jpg" title="snap028.jpg" />
650) this.width=650;" src="/upload/getfiles/default/2022/11/14/20221114085110040.jpg" title="snap029.jpg" width="554" height="417" border="0" hspace="0" vspace="0" />
650) this.width=650;" src="/upload/getfiles/default/2022/11/14/20221114085110445.jpg" title="snap030.jpg" width="554" height="417" border="0" hspace="0" vspace="0" />
650) this.width=650;" src="/upload/getfiles/default/2022/11/14/20221114085110888.jpg" title="snap031.jpg" width="554" height="417" border="0" hspace="0" vspace="0" />
650) this.width=650;" src="/upload/getfiles/default/2022/11/14/20221114085111241.jpg" title="snap032.jpg" width="554" height="417" border="0" hspace="0" vspace="0" />
650) this.width=650;" src="/upload/getfiles/default/2022/11/14/20221114085111625.jpg" title="snap033.jpg" width="554" height="417" border="0" hspace="0" vspace="0" />
650) this.width=650;" src="/upload/getfiles/default/2022/11/14/20221114085112092.jpg" title="snap034.jpg" width="554" height="417" border="0" hspace="0" vspace="0" />
650) this.width=650;" src="/upload/getfiles/default/2022/11/14/20221114085112409.jpg" title="snap035.jpg" width="554" height="417" border="0" hspace="0" vspace="0" />
650) this.width=650;" src="/upload/getfiles/default/2022/11/14/20221114085112821.jpg" title="snap036.jpg" width="554" height="417" border="0" hspace="0" vspace="0" />
650) this.width=650;" src="/upload/getfiles/default/2022/11/14/20221114085113166.jpg" title="snap037.jpg" width="554" height="417" border="0" hspace="0" vspace="0" />
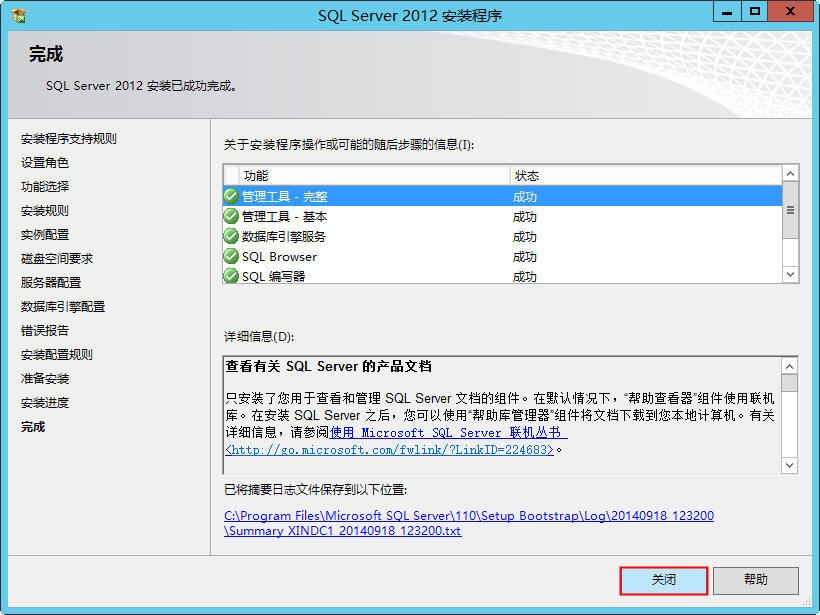
650) this.width=650;" src="/upload/getfiles/default/2022/11/14/20221114085113567.jpg" title="snap039.jpg" width="554" height="417" border="0" hspace="0" vspace="0" />
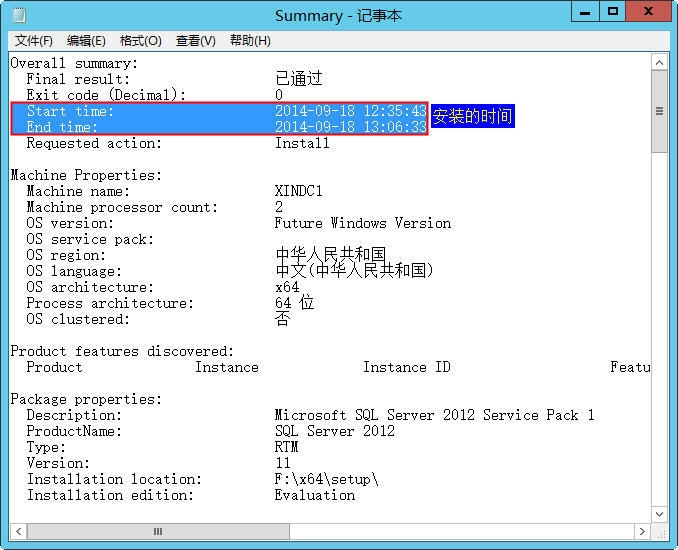
进入系统日志文件夹,查看安装情况
650) this.width=650;" width="554" height="415" src="/upload/getfiles/default/2022/11/14/20221114085113817.jpg" title="snap040.jpg" />
650) this.width=650;" src="/upload/getfiles/default/2022/11/14/20221114085114212.jpg" title="snap041.jpg" width="554" height="450" border="0" hspace="0" vspace="0" />
运行
servers.msc
命令,查看
SQL
数据库服务开启情况
650) this.width=650;" width="553" height="405" src="/upload/getfiles/default/2022/11/14/20221114085114661.jpg" title="snap042.jpg" />
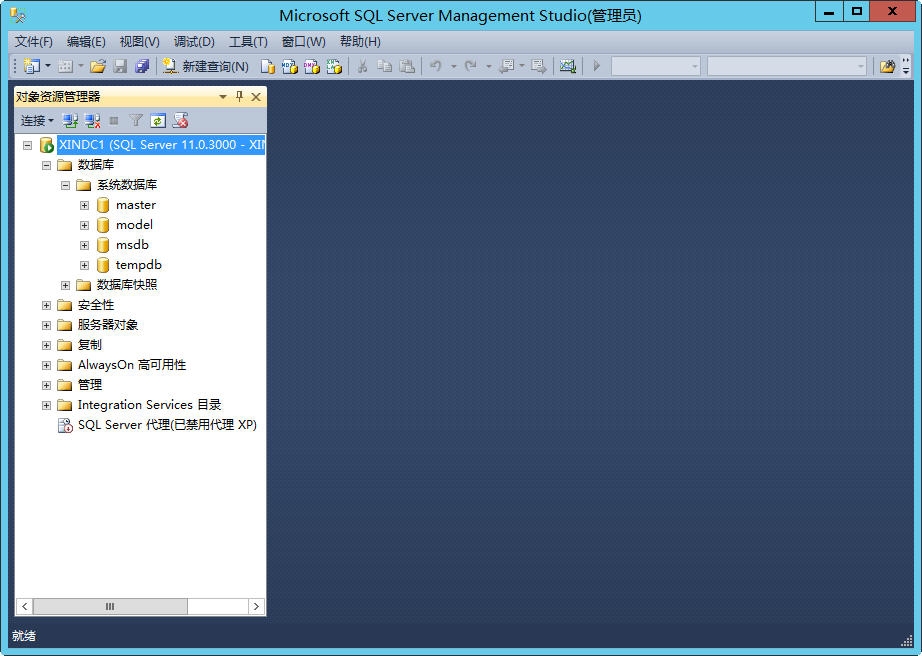
安装完毕后,使用
SQL Server Management Studio
连接到数据库,检查安装情况
650) this.width=650;" width="541" height="366" src="/upload/getfiles/default/2022/11/14/20221114085115105.jpg" title="snap0043.jpg" />
650) this.width=650;" src="/upload/getfiles/default/2022/11/14/20221114085116141.jpg" title="snap043.jpg" width="554" height="393" border="0" hspace="0" vspace="0" />
3.2. 安装VitualMachine Manager
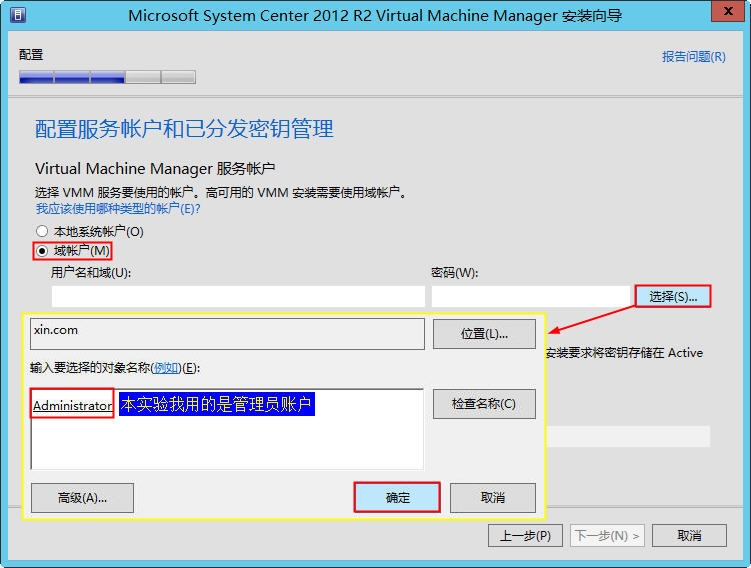
3.2.1. 创建域账户用于启动SCVMM
通过
dsa.msc
创建域账户
vmmservice
,密码永不过期,用户不能修改密码。
将域账户
vmmservice
添加到
Administrators
组
本实验未创建账户,用的是管理员账户
administrator
,这样存在很大风险
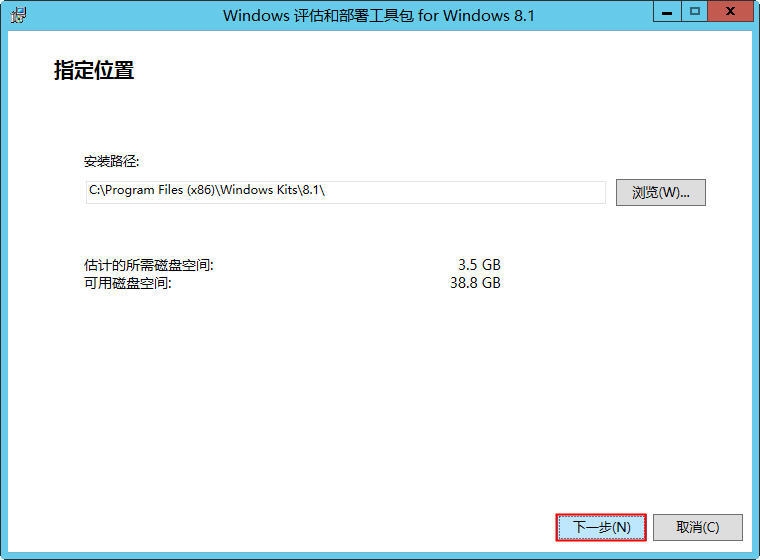
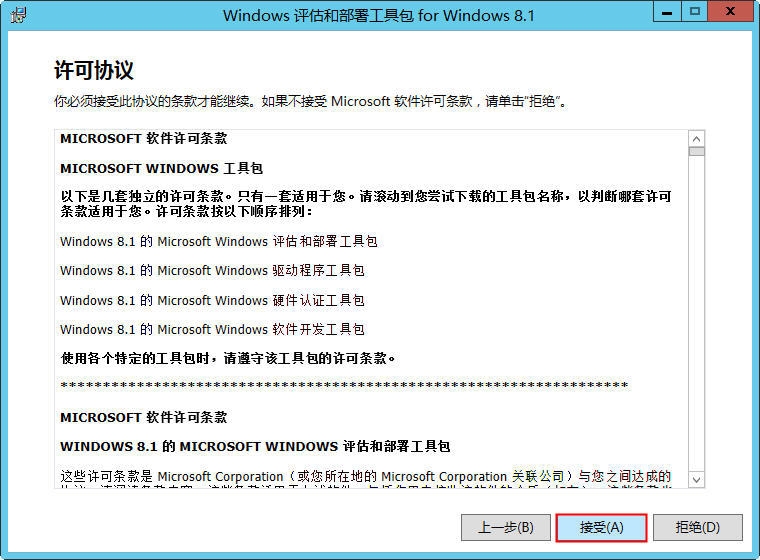
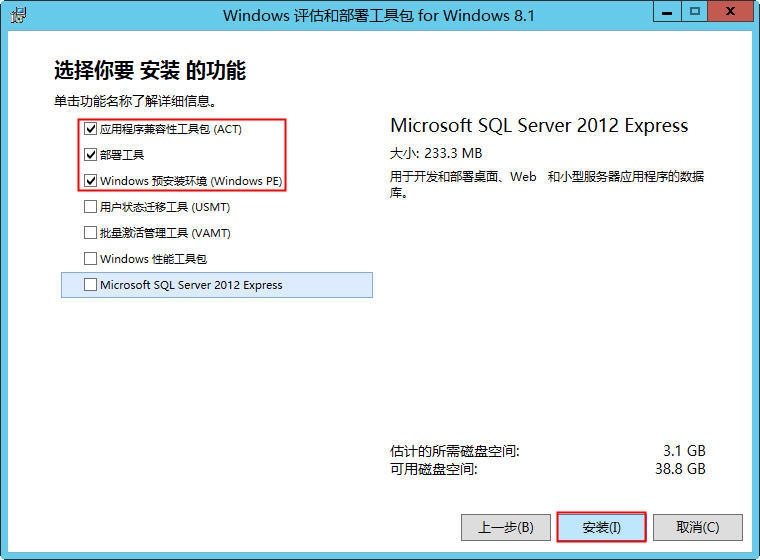
3.2.2. 安装Windows ADK 8.1
不同的
SCVMM
版本对
ADK
的版本要求是不一样的,不能混用
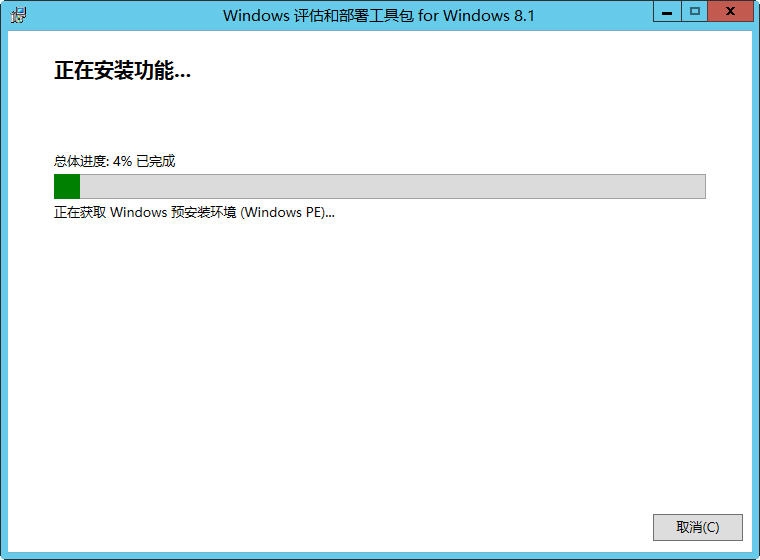
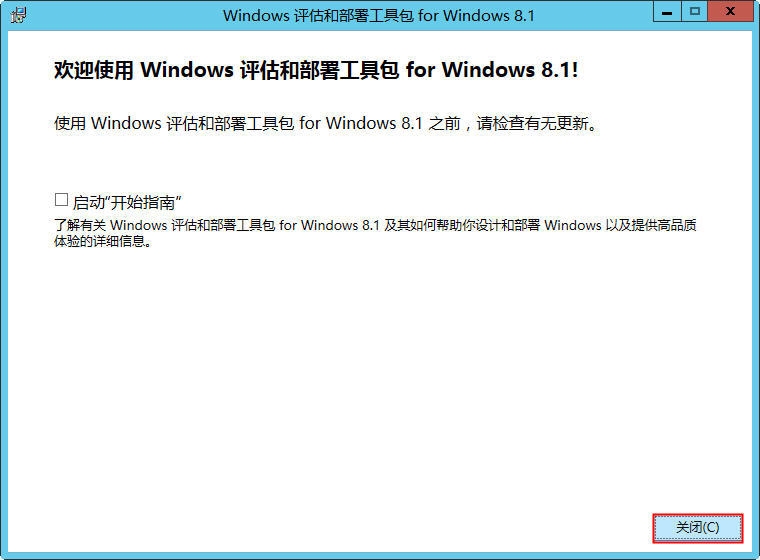
下载安装包进行安装,过程见图
650) this.width=650;" width="554" height="415" src="/upload/getfiles/default/2022/11/14/20221114085116475.jpg" title="snap053.jpg" />
650) this.width=650;" src="/upload/getfiles/default/2022/11/14/20221114085116927.jpg" title="snap055.jpg" width="554" height="407" border="0" hspace="0" vspace="0" />
650) this.width=650;" src="/upload/getfiles/default/2022/11/14/20221114085117190.jpg" title="snap056.jpg" width="554" height="407" border="0" hspace="0" vspace="0" />
650) this.width=650;" src="/upload/getfiles/default/2022/11/14/20221114085117505.jpg" title="snap057.jpg" width="554" height="407" border="0" hspace="0" vspace="0" />
650) this.width=650;" src="/upload/getfiles/default/2022/11/14/20221114085117918.jpg" title="snap058.jpg" width="554" height="407" border="0" hspace="0" vspace="0" />
650) this.width=650;" src="/upload/getfiles/default/2022/11/14/20221114085118216.jpg" title="snap059.jpg" width="554" height="407" border="0" hspace="0" vspace="0" />
650) this.width=650;" src="/upload/getfiles/default/2022/11/14/20221114085118565.jpg" title="snap060.jpg" width="554" height="407" border="0" hspace="0" vspace="0" />
3.2.3. 安装SCVMM 2012 SP1
MICROSOFT_SYSTEM_CENTER_2012_VIRTUAL_MACHINE_MANAGER_WITH_SP1_X64
从微软网站上下载
120
天试用版,
SC2012_SP1_SCVMM.exe
解压缩
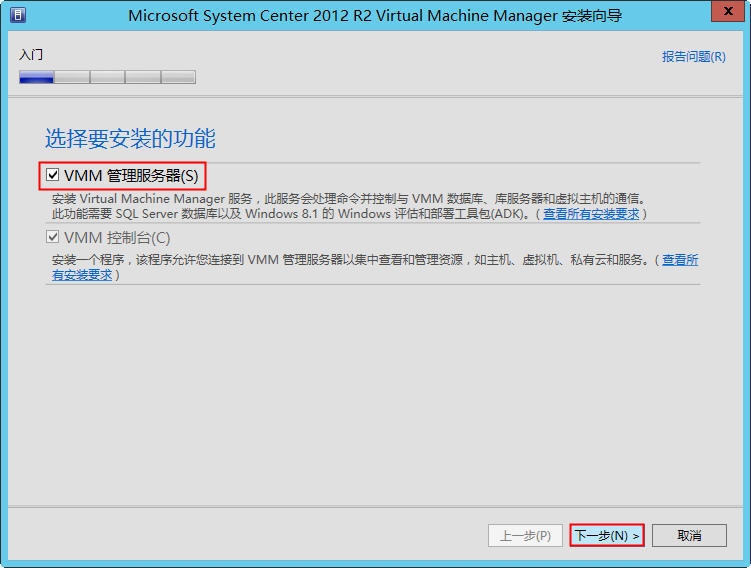
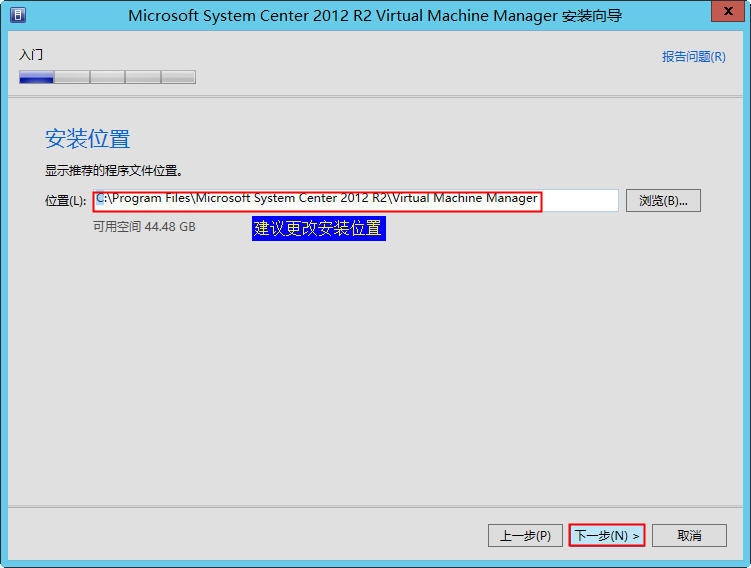
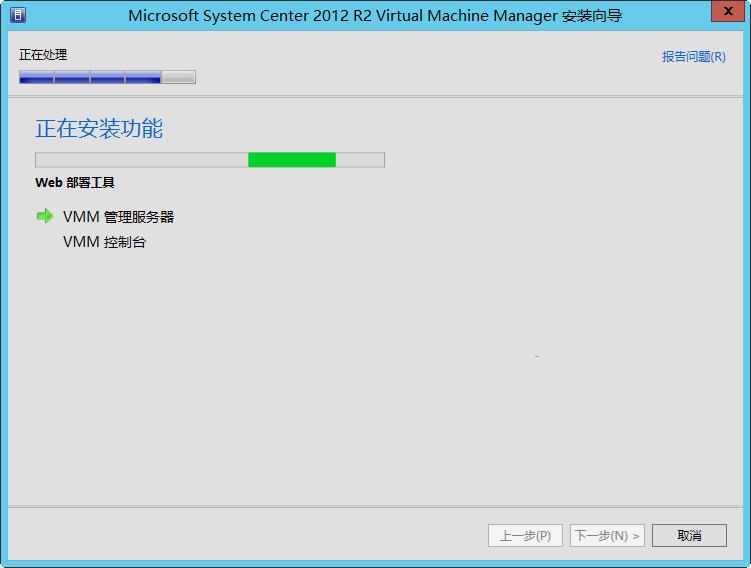
运行
setup
应用程序,进入安装应到界面
650) this.width=650;" width="553" height="399" src="/upload/getfiles/default/2022/11/14/20221114085118952.jpg" title="snap079.jpg" />
650) this.width=650;" src="/upload/getfiles/default/2022/11/14/20221114085119193.jpg" title="snap080.jpg" width="554" height="420" border="0" hspace="0" vspace="0" />
650) this.width=650;" src="/upload/getfiles/default/2022/11/14/20221114085119583.jpg" title="snap081.jpg" width="554" height="420" border="0" hspace="0" vspace="0" />
650) this.width=650;" src="/upload/getfiles/default/2022/11/14/20221114085119966.jpg" title="snap082.jpg" width="554" height="420" border="0" hspace="0" vspace="0" />
650) this.width=650;" src="/upload/getfiles/default/2022/11/14/20221114085120361.jpg" title="snap083.jpg" width="554" height="420" border="0" hspace="0" vspace="0" />
650) this.width=650;" src="/upload/getfiles/default/2022/11/14/20221114085120646.jpg" title="snap084.jpg" width="554" height="420" border="0" hspace="0" vspace="0" />
650) this.width=650;" src="/upload/getfiles/default/2022/11/14/20221114085120937.jpg" title="snap085.jpg" width="554" height="420" border="0" hspace="0" vspace="0" />
650) this.width=650;" src="/upload/getfiles/default/2022/11/14/20221114085121385.jpg" title="snap088.jpg" width="554" height="420" border="0" hspace="0" vspace="0" />
650) this.width=650;" src="/upload/getfiles/default/2022/11/14/20221114085121853.jpg" title="snap089.jpg" width="554" height="420" border="0" hspace="0" vspace="0" />
650) this.width=650;" src="/upload/getfiles/default/2022/11/14/20221114085122250.jpg" title="snap090.jpg" width="554" height="420" border="0" hspace="0" vspace="0" />
650) this.width=650;" src="/upload/getfiles/default/2022/11/14/20221114085122592.jpg" title="snap092.jpg" width="554" height="420" border="0" hspace="0" vspace="0" />
650) this.width=650;" src="/upload/getfiles/default/2022/11/14/20221114085123083.jpg" title="snap093.jpg" width="554" height="420" border="0" hspace="0" vspace="0" />
650) this.width=650;" src="/upload/getfiles/default/2022/11/14/20221114085123438.jpg" title="snap094.jpg" width="554" height="420" border="0" hspace="0" vspace="0" />
650) this.width=650;" src="/upload/getfiles/default/2022/11/14/20221114085123885.jpg" title="snap095.jpg" width="554" height="420" border="0" hspace="0" vspace="0" />
650) this.width=650;" src="/upload/getfiles/default/2022/11/14/20221114085124209.jpg" title="snap096.jpg" width="554" height="420" border="0" hspace="0" vspace="0" />
650) this.width=650;" src="/upload/getfiles/default/2022/11/14/20221114085124808.jpg" title="snap097.jpg" width="554" height="420" border="0" hspace="0" vspace="0" />
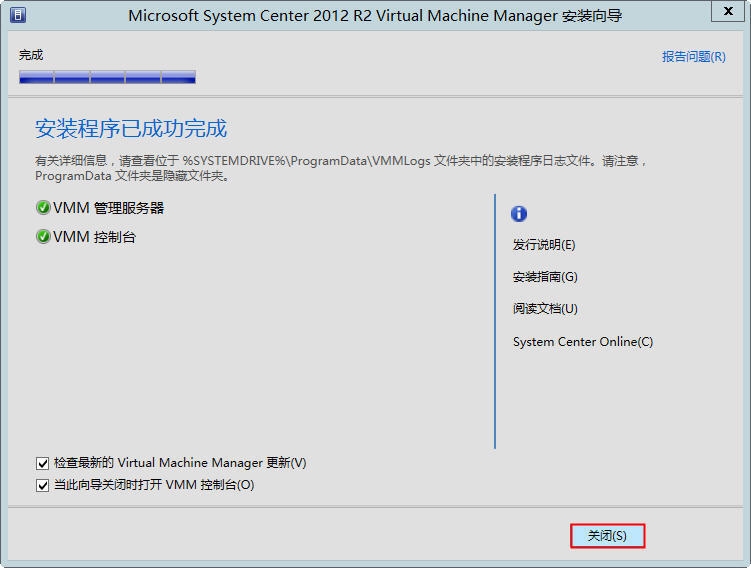
3.2.4. 检查安装结果
通过控制台连接到
VMM
管理服务器。
650) this.width=650;" width="488" height="520" src="/upload/getfiles/default/2022/11/14/20221114085125113.jpg" title="snap098.jpg" />650) this.width=650;" width="554" height="379" src="/upload/getfiles/default/2022/11/14/20221114085125404.jpg" title="snap099.jpg" />
通过数据库管理器检查一下安装程序创建的数据库
650) this.width=650;" width="554" height="394" src="/upload/getfiles/default/2022/11/14/20221114085126502.jpg" title="snap100.jpg" />
运行
servers.msc
命令,检查
VMM
的两个服务状态
650) this.width=650;" width="554" height="380" src="/upload/getfiles/default/2022/11/14/20221114085126998.jpg" title="snap101.jpg" />
4. 排错
4.1. SQL Server安装失败
650) this.width=650;" width="554" height="166" src="/upload/getfiles/default/2022/11/14/20221114085127355.jpg" title="snap103.jpg" />
SQL2012
需要有.netFramework支持,如果操作系统没有安装,就会出现此错误
4.2. 安装.netFramework 失败
650) this.width=650;" src="/upload/getfiles/default/2022/11/14/20221114085127733.jpg" title="snap104.jpg" width="554" height="396" border="0" hspace="0" vspace="0" />
安装时,无法在默认位置找到操作系统安装的源文件
\sources\sxs
目录。
其实,在确认时,就会有提示选择“指定备用源路径”
4.3. 安装VitualMachine Manager出现的警报信息
650) this.width=650;" width="554" height="395" src="/upload/getfiles/default/2022/11/14/20221114085128076.jpg" title="snap106.jpg" />
由于我在域控上安装
SQL
数据库,出现下面警报,可以忽略
650) this.width=650;" width="391" height="205" src="/upload/getfiles/default/2022/11/14/20221114085128468.jpg" title="snap107.jpg" />
由于防火墙的相应端口未开启,出现警报,开启相应端口即可
650) this.width=650;" width="476" height="239" src="/upload/getfiles/default/2022/11/14/20221114085128714.jpg" title="snap109.jpg" />
4.4. 安装VitualMachine Manager出现错误警告
650) this.width=650;" width="553" height="419" src="/upload/getfiles/default/2022/11/14/20221114085128981.jpg" title="snap108.jpg" />
由于
Vitual Machine Manager
依赖于
ADK
,再安装之前需先安装Windows ADK 8.1,这样就不会出现警报了
本文出自 “高松涛-精灵在路上” 博客,请务必保留此出处http://gaoxin1993.blog.51cto.com/9151134/1555241
原文:http://gaoxin1993.blog.51cto.com/9151134/1555241
安装")