React Native学习(四)—— 写一个公用组件(头部)
内容导读
互联网集市收集整理的这篇技术教程文章主要介绍了React Native学习(四)—— 写一个公用组件(头部),小编现在分享给大家,供广大互联网技能从业者学习和参考。文章包含2703字,纯文字阅读大概需要4分钟。
内容图文
—— 写一个公用组件(头部)")
本文基于React Native 0.52
Demo上传到Git了,有需要可以看看,写了新内容会上传的。Git地址 https://github.com/gingerJY/React-Native-Demo
一、总览
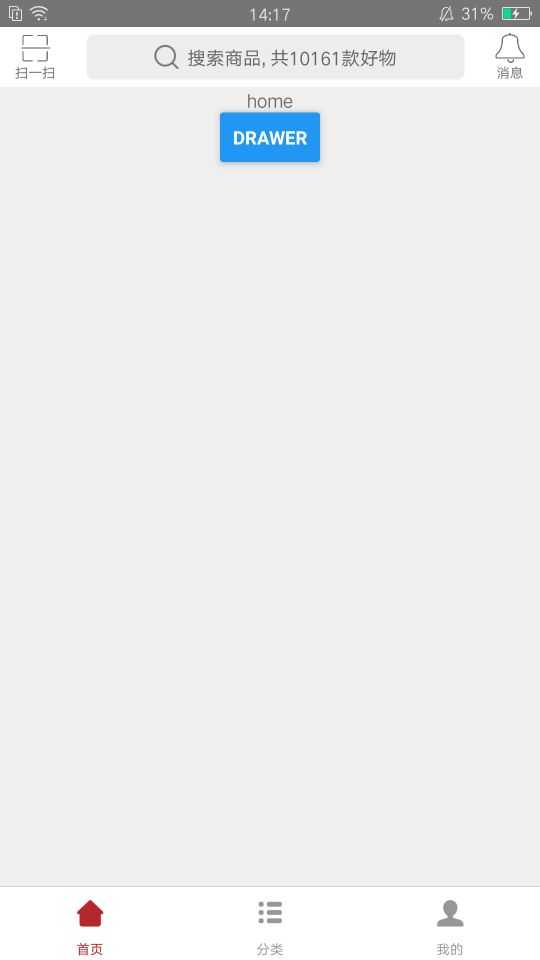
头部通常分为左、中、右三部分,效果图如下:
二、头部组件
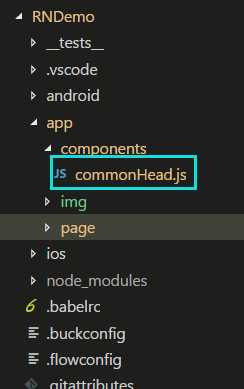
1、创建components文件夹,新建commonHead.js
2、commonHead.js
头部分为左、中、右三块,我们需要提供接口,获取外部传入的值,从而判断哪一块需要创建。
static propTypes = {
   leftItem: PropTypes.func,
   titleItem: PropTypes.func,
   rightItem: PropTypes.func,
};
左侧模块(中和右一样)
renderLeftItem(){
     if (this.props.leftItem === undefined) return;
     return this.props.leftItem();
}
样式,设置了一些默认样式和布局,也可以通过 navBarStyle 添加样式或是覆盖默认样式
    render() {
        return (
            <View style={[{width:width,
                height:40,
                backgroundColor: this.props.navBarColor || ‘#fff‘,//背景色,默认白色
                flexDirection:‘row‘,//横向排
                justifyContent:‘space-between‘,//主轴对齐方式
                alignItems: ‘center‘,//次轴对齐方式(上下居中)
                borderBottomWidth: this.props.borderBottomWidth || 0,//是否有下边框
                borderColor: this.props.borderColor || ‘#ccc‘,
            }, this.props.navBarStyle,]}>

                <View>
                    {this.renderLeftItem()}
                </View>
                <View>
                    {this.renderTitleItem()}
                </View>
                <View>
                    {this.renderRightItem()}
                </View>
            </View>
        );
    }
commonHead.js 完整代码 https://github.com/gingerJY/example/blob/master/RN_commonHead/commonHead.js
三、使用组件
1、在home.js中引入头部组件
import CommonHead from ‘../../components/commonHead‘;
2、写左中右三部分
    // 头部左侧
    renderLeftItem() {
        return (
            <TouchableOpacity onPress={() => { this.props.navigation.navigate(‘Search‘) }} style={styles.navLeft}>
                <Image source={require(‘../../img/scanning.png‘)} style={styles.navIcon} />
                <Text style={styles.navText}>扫一扫</Text>
            </TouchableOpacity>
        )
    }
    // 头部中间
    renderTitleItem() {
        return (
            <TouchableOpacity onPress={() => { this.props.navigation.navigate(‘Search‘) }}>
                <View style={styles.searchBox}>
                    <Image source={require(‘../../img/search.png‘)} style={styles.searchIcon} />
                    <Text style={styles.searchContent}>搜索商品, 共10161款好物</Text>
                </View>
            </TouchableOpacity>
        )
    }
    // 头部右侧
    renderRightItem() {
        return (
            <TouchableOpacity onPress={() => { this.props.navigation.navigate(‘MessageCenter‘) }} style={styles.navRight}>
                <Image source={require(‘../../img/remind.png‘)} style={styles.navIcon} />
                <Text style={styles.navText}>消息</Text>
            </TouchableOpacity>
        )
    }
3、使用commonHead
<CommonHead
      leftItem={() => this.renderLeftItem()}
      titleItem={() => this.renderTitleItem()}
      rightItem={() => this.renderRightItem()}
/>
home.js完整代码 https://github.com/gingerJY/example/blob/master/RN_commonHead/home.js
注:上面的代码有些内容,如样式等没有写到,点链接可以看到完整代码,文章开头那个git地址是整个项目的代码。
另:图标来自 http://www.iconfont.cn/
END---------------------------------------------------------------
上有天堂,下有书房。
原文:https://www.cnblogs.com/MaiJiangDou/p/8329984.html
内容总结
以上是互联网集市为您收集整理的React Native学习(四)—— 写一个公用组件(头部)全部内容,希望文章能够帮你解决React Native学习(四)—— 写一个公用组件(头部)所遇到的程序开发问题。 如果觉得互联网集市技术教程内容还不错,欢迎将互联网集市网站推荐给程序员好友。
内容备注
版权声明:本文内容由互联网用户自发贡献,该文观点与技术仅代表作者本人。本站仅提供信息存储空间服务,不拥有所有权,不承担相关法律责任。如发现本站有涉嫌侵权/违法违规的内容, 请发送邮件至 gblab@vip.qq.com 举报,一经查实,本站将立刻删除。
内容手机端
扫描二维码推送至手机访问。