【springmvc笔记】第二课 环境搭建
内容导读
互联网集市收集整理的这篇技术教程文章主要介绍了【springmvc笔记】第二课 环境搭建,小编现在分享给大家,供广大互联网技能从业者学习和参考。文章包含3507字,纯文字阅读大概需要6分钟。
内容图文

1. 开发工具准备
eclipse + jdk1.7
spring-framework-4.3.9.RELEASE
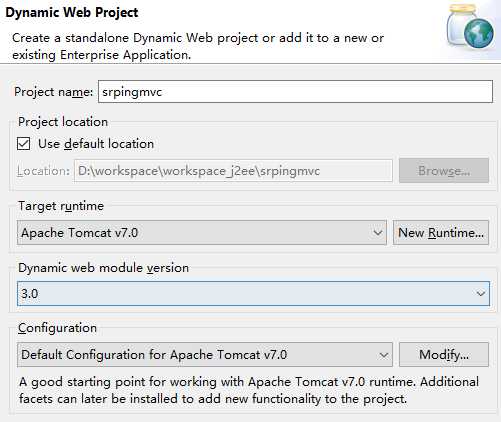
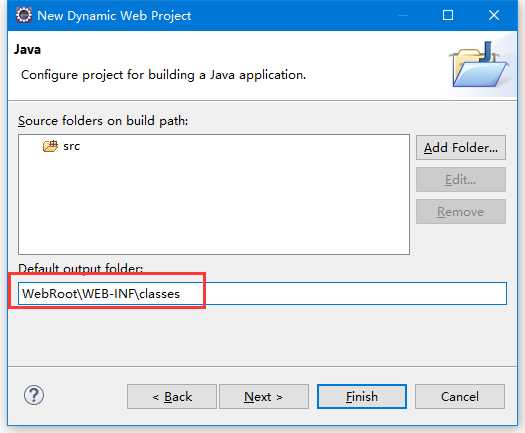
2. 新建Dynamic Web Project项目,命名为springmvc.

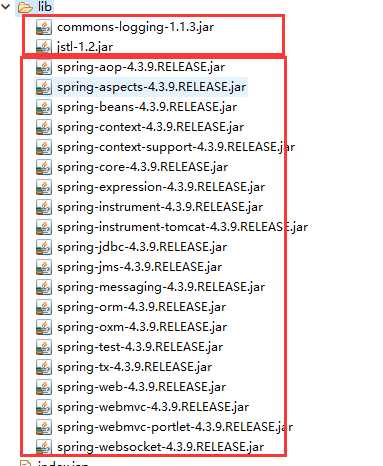
3. 导入依赖包
spring的依赖包
jstl标签的依赖包
commmons-loggling包
。这里只需要引入压缩包中的红框的jar包,javacdoc和sources的包不需要引入。

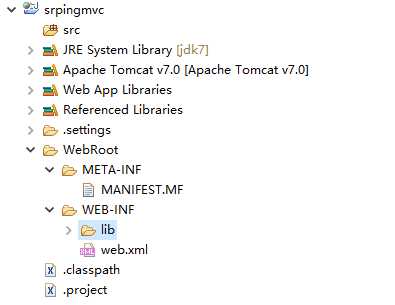
完整的lib包如下:
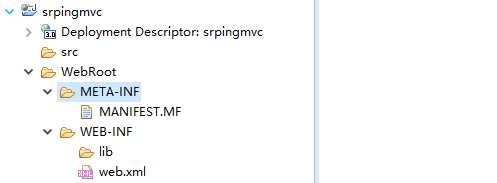
4. 完成后的项目结构如下:
5. 在web.xml中配置前端控制器
            <?
            xml version="1.0" encoding="UTF-8"
            ?>
            <
            web-app
            xmlns:xsi
            ="http://www.w3.org/2001/XMLSchema-instance"
             xmlns
            ="http://java.sun.com/xml/ns/javaee"
             xsi:schemaLocation
            ="http://java.sun.com/xml/ns/javaee http://java.sun.com/xml/ns/javaee/web-app_3_0.xsd"
             id
            ="WebApp_ID"
             version
            ="3.0"
            >
            <
            display-name
            >srpingmvc</display-name><!-- 配置前端控制器 --><servlet><servlet-name>springmvc</servlet-name><servlet-class>org.springframework.web.servlet.DispatcherServlet</servlet-class><!-- 加载配置文件(配置处理器映射器、处理器适配器、视图解析器、Handler处理器) --><init-param><param-name>contextConfigLocation</param-name><param-value>classpath:springmvc.xml</param-value></init-param></servlet><servlet-mapping><servlet-name>springmvc</servlet-name><url-pattern>*.action</url-pattern></servlet-mapping><welcome-file-list><welcome-file>index.jsp</welcome-file></welcome-file-list></web-app>
6. 配置springmvc.xml
配置处理器映射器、处理器适配器、视图解析器、Handler处理器
在src下新建config文件夹,并在其中新建springmvc.xml文件。
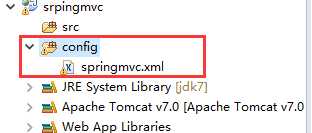
编辑springmvc.xml文件如下:
            <?
            xml version="1.0" encoding="UTF-8"
            ?>
            <
            beans
            xmlns
            ="http://www.springframework.org/schema/beans"

    xmlns:xsi
            ="http://www.w3.org/2001/XMLSchema-instance"

    xmlns:p
            ="http://www.springframework.org/schema/p"

    xmlns:context
            ="http://www.springframework.org/schema/context"

    xmlns:mvc
            ="http://www.springframework.org/schema/mvc"

    xmlns:aop
            ="http://www.springframework.org/schema/aop"

    xmlns:tx
            ="http://www.springframework.org/schema/tx"

    xsi:schemaLocation
            ="
        http://www.springframework.org/schema/beans
        http://www.springframework.org/schema/beans/spring-beans.xsd
        http://www.springframework.org/schema/context
        http://www.springframework.org/schema/context/spring-context-4.3.xsd
        http://www.springframework.org/schema/mvc
        http://www.springframework.org/schema/mvc/spring-mvc-4.3.xsd
        http://www.springframework.org/schema/aop
        http://www.springframework.org/schema/aop/spring-aop-4.3.xsd
        http://www.springframework.org/schema/tx
        http://www.springframework.org/schema/tx/spring-tx-4.3.xsd
        "
            >
            <!--
             配置处理器映射器
            -->
            <
            bean
            class
            ="org.springframework.web.servlet.handler.BeanNameUrlHandlerMapping"
            ></
            bean
            >
            <!--
             配置处理器适配器
            -->
            <
            bean
            class
            ="org.springframework.web.servlet.handler.SimpleServletHandlerAdapter"
            ></
            bean
            >
            <!--
             配置视图解析器
            -->
            <
            bean
            class
            ="org.springframework.web.servlet.view.InternalResourceViewResolver"
            ></
            bean
            >
            <!--
             配置handler处理器
            -->
            <
            bean
            name
            ="getList.action"
             class
            ="com.king.controller.UserController"
            ></
            bean
            >
            </
            beans
            >
7. 编写UserController
新建类 UserController,实现Controller的接口,放到包com.king.controller下。
            package
             com.king.controller;


            import
             javax.servlet.http.HttpServletRequest;

            import
             javax.servlet.http.HttpServletResponse;


            import
             org.springframework.web.servlet.ModelAndView;

            import
             org.springframework.web.servlet.mvc.Controller;


            public
            class UserController implements Controller{

    @Override
    public ModelAndView handleRequest(HttpServletRequest arg0,
            HttpServletResponse arg1) throws Exception {

        System.out.println("run UserController ...");
        returnnull;
    }

}
原文:http://www.cnblogs.com/30go/p/7224219.html
内容总结
以上是互联网集市为您收集整理的【springmvc笔记】第二课 环境搭建全部内容,希望文章能够帮你解决【springmvc笔记】第二课 环境搭建所遇到的程序开发问题。 如果觉得互联网集市技术教程内容还不错,欢迎将互联网集市网站推荐给程序员好友。
内容备注
版权声明:本文内容由互联网用户自发贡献,该文观点与技术仅代表作者本人。本站仅提供信息存储空间服务,不拥有所有权,不承担相关法律责任。如发现本站有涉嫌侵权/违法违规的内容, 请发送邮件至 gblab@vip.qq.com 举报,一经查实,本站将立刻删除。
内容手机端
扫描二维码推送至手机访问。