首页 / 更多教程 / [Spring]Spring注解
[Spring]Spring注解
内容导读
互联网集市收集整理的这篇技术教程文章主要介绍了[Spring]Spring注解,小编现在分享给大家,供广大互联网技能从业者学习和参考。文章包含2760字,纯文字阅读大概需要4分钟。
内容图文

@Required注解
@Required注解用于setter方法,表明这个属性是必要的,不可少的,必须注入值
假设有个测试类,里面有name和password两个属性
我给两个属性的setter方法都加了@Required注解
            package
             com.example.demo1.Implements;


            import
             com.example.demo1.Interface.UserService;

            import
             org.springframework.beans.factory.annotation.Required;


            public
            class UserClientImpl implements UserService {

    private String name;
    private String password;

    public UserClientImpl(){}

    public UserClientImpl(String name,String password){
        this.name = name;
        this.password = password;
    }

    public String getName() {
        return name;
    }

    @Required
    publicvoid setName(String name) {
        this.name = name;
    }

    public String getPassword() {
        return password;
    }

    @Required
    publicvoid setPassword(String password) {
        this.password = password;
    }

    @Override
    publicvoid save() {
        System.out.println("客户端保存信息"+name+"--"+password);
    }
}
现在我只给一个属性加注入,另一个不加
可以看到报错

然后我补上注入之后就没问题了

@Autowoired注解
其实看名字就可以看出来,这个是跟自动装填有关
使用它需要加一行代码
            <
            bean
            class
            ="org.springframework.beans.factory.annotation.AutowiredAnnotationBeanPostProcess></bean>
1,在属性前加此注解
先给定两个类
            package
             com.example.demo1.Other;


            public
            class
             CustomerTest {

            public
             CustomerTest(){
        System.out.println("在Customer.构造方法中...");
    }
    publicvoid show(){
        System.out.println("在Customer.show方法中...");
    }
}
            package
             com.example.demo1.Implements;


            import
             com.example.demo1.Interface.Customer;

            import
             com.example.demo1.Other.CustomerTest;

            import
             org.springframework.beans.factory.annotation.Autowired;


            public
            class CustomerImpl implements Customer {


    private String name;
    private String id;
    @Autowired
    private CustomerTest customerTest;

    public CustomerTest getCustomerTest() {
        return customerTest;
    }

    publicvoid setCustomerTest(CustomerTest customerTest) {
        this.customerTest = customerTest;
    }

    public String getName() {
        return name;
    }

    publicvoid setName(String name) {
        this.name = name;
    }

    public String getId() {
        return id;
    }
    publicvoid setId(String id) {
        this.id = id;
    }

    @Override
    publicvoid show() {
        System.out.println(id+"..."+name);
        customerTest.show();
    }
}
第二个类在第三个成员变量前面加个此注解
然后applicationContext这样写
            <
            bean
            id
            ="Customer"

          class
            ="com.example.demo1.Implements.CustomerImpl"
            >
            </
            bean
            >
            <
            bean
            id
            ="CustomerTest"
             class
            ="com.example.demo1.Other.CustomerTest"
            ></
            bean
            >
在打印一下结果
ApplicationContext instance = new ClassPathXmlApplicationContext("applicationContext.xml");
        CustomerImpl customer = (CustomerImpl) instance.getBean("Customer");
        customer.show();
        ((ClassPathXmlApplicationContext) instance).registerShutdownHook();
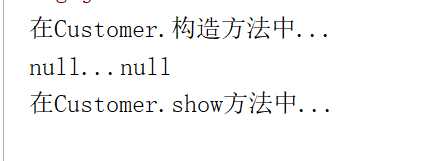 可以看到Customer对象是自动装填了的
2,在构造函数之前加此注解
效果和上面是一样的,不演示了
3,@Autowired(required=false)的作用
这里跟之前的@Required的作用类似
默认情况下,@Autowired 注释意味着依赖是必须的,它类似于 @Required 注释,然而,你可以使用 @Autowired 的 (required=false) 选项关闭默认行为。
这里跟@Required的效果类似,不演示了
//后面继续更新
原文:https://www.cnblogs.com/Yintianhao/p/9721525.html
内容总结
以上是互联网集市为您收集整理的[Spring]Spring注解全部内容,希望文章能够帮你解决[Spring]Spring注解所遇到的程序开发问题。 如果觉得互联网集市技术教程内容还不错,欢迎将互联网集市网站推荐给程序员好友。
内容备注
版权声明:本文内容由互联网用户自发贡献,该文观点与技术仅代表作者本人。本站仅提供信息存储空间服务,不拥有所有权,不承担相关法律责任。如发现本站有涉嫌侵权/违法违规的内容, 请发送邮件至 gblab@vip.qq.com 举报,一经查实,本站将立刻删除。
内容手机端
扫描二维码推送至手机访问。