47.Nginx安装、默认虚拟主机、Nginx用户认证、Nginx域名重定向
内容导读
互联网集市收集整理的这篇技术教程文章主要介绍了47.Nginx安装、默认虚拟主机、Nginx用户认证、Nginx域名重定向,小编现在分享给大家,供广大互联网技能从业者学习和参考。文章包含2835字,纯文字阅读大概需要5分钟。
内容图文
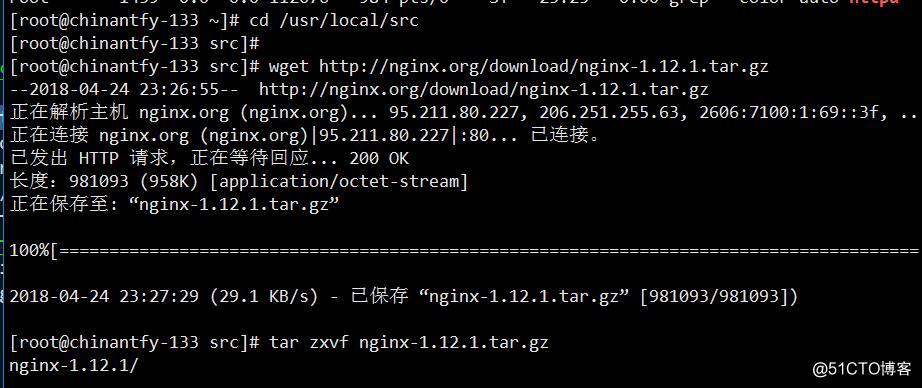
一 、Nginx安装cd /usr/local/src
wget http://nginx.org/download/nginx-1.12.1.tar.gz
tar zxf nginx-1.12.1.tar.gz
cd nginx-1.12.1
./configure --prefix=/usr/local/nginx
make && make install
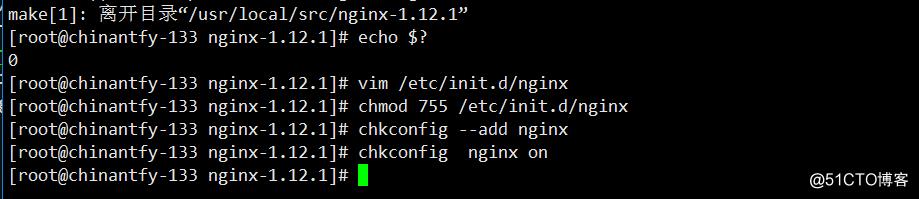
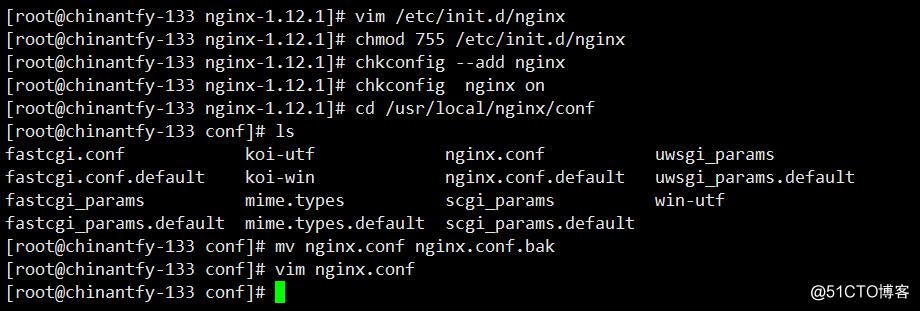
vim /etc/init.d/nginx - 复制如下内容(参考https://coding.net/u/aminglinux/p/aminglinux-book/git/blob/master/D15Z/etc_init.d_nginx )
chmod 755 /etc/init.d/nginx
chkconfig --add nginx
chkconfig nginx on
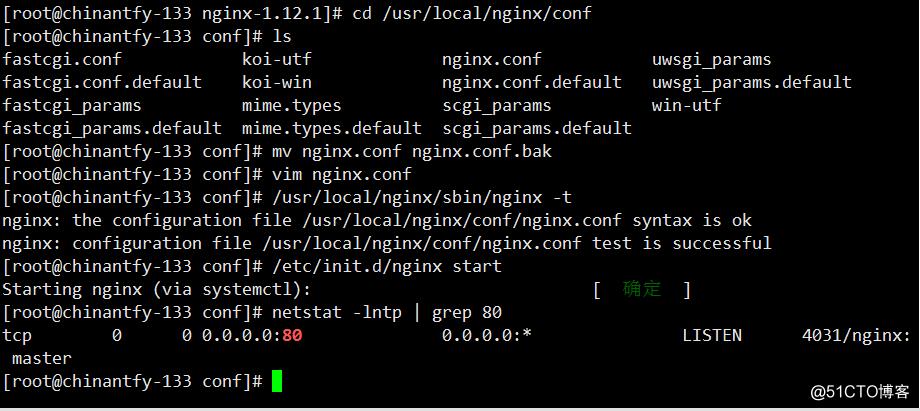
cd /usr/local/nginx/conf/
mv nginx.conf nginx.conf.bakvim nginx.conf //写入如下内容(参考https://coding.net/u/aminglinux/p/aminglinux-book/git/blob/master/D15Z/nginx.conf)
/usr/local/nginx/sbin/nginx -t
 /etc/init.d/nginx  start
 netstat -lntp |grep 80
- 测试php解析
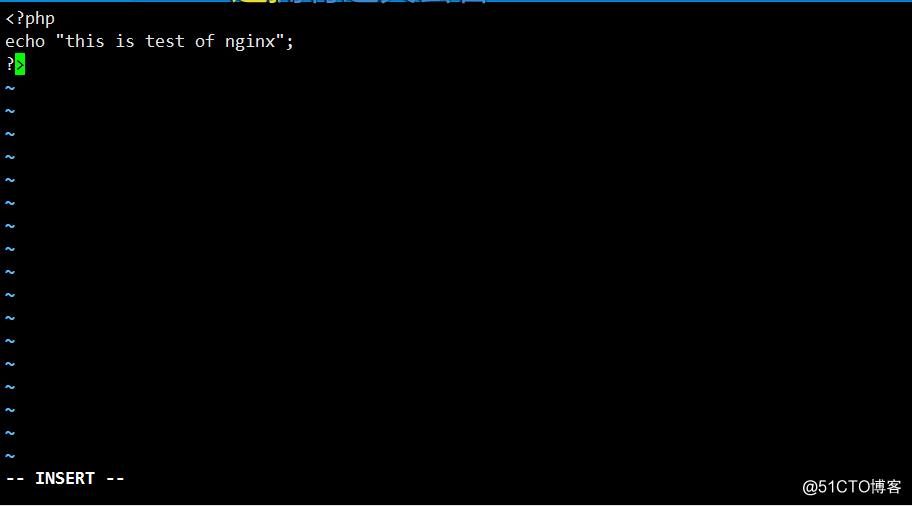
vi /usr/local/nginx/html/1.php //加入如下内容
 <?php
    echo "test php scripts.";
?>
curl localhost/1.php


二、Nginx默认虚拟主机
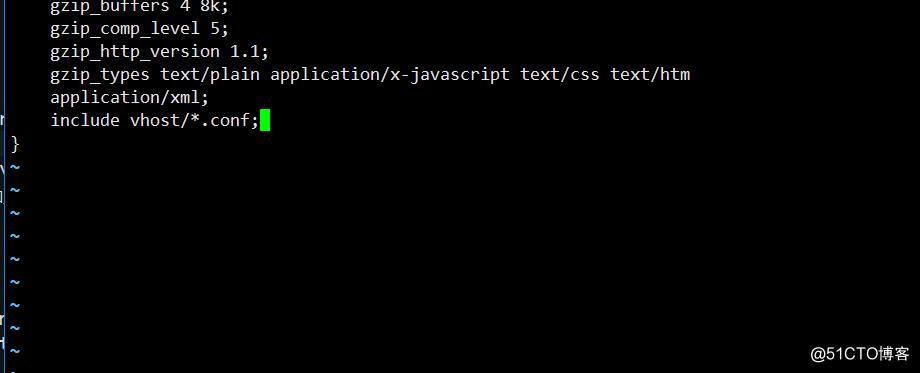
vim /usr/local/nginx/conf/nginx.conf //先删除server部分,然后增加
include vhost/*.conf
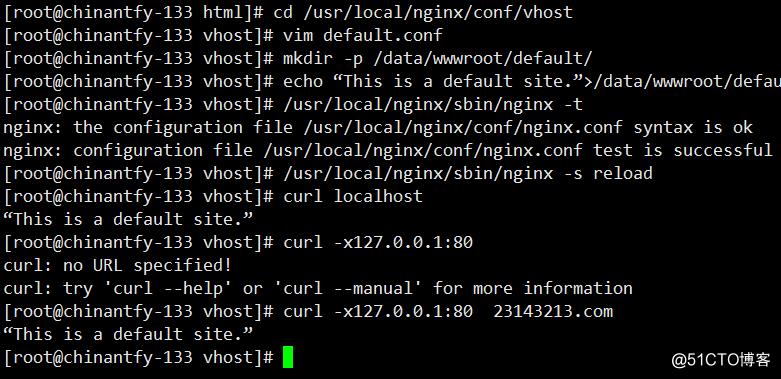
mkdir /usr/local/nginx/conf/vhost
cd !$
vim default.conf //加入如下内容
server
{
    listen 80 default_server;  // 有这个标记的就是默认虚拟主机
    server_name aaa.com;
    index index.html index.htm index.php;
    root /data/wwwroot/default;
}
 mkdir -p /data/wwwroot/default/
 echo “This is a default site.”>/data/wwwroot/default/index.html
 /usr/local/nginx/sbin/nginx -t
 /usr/local/nginx/sbin/nginx -s reload     //不重启nginx重新加载配置文件,如果配置文件错误则不会重新加载
 curl localhost
 curl -x127.0.0.1:80 123.com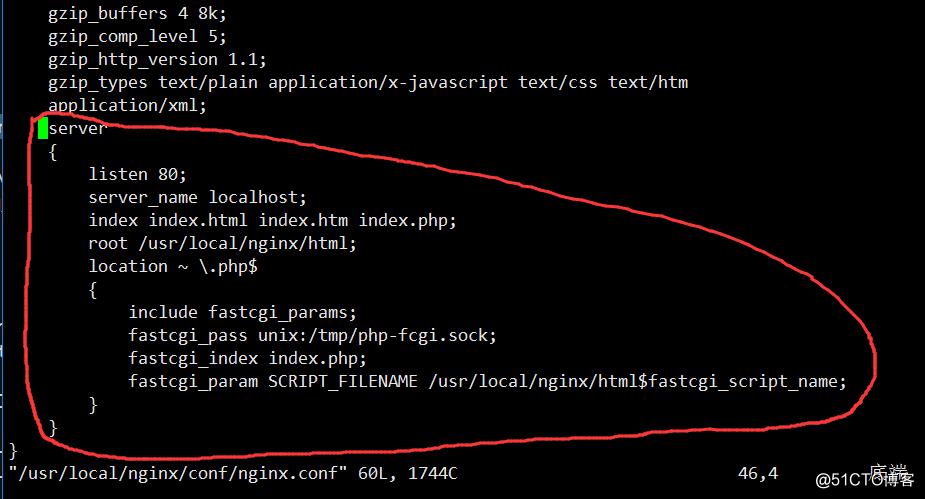
三、Nginx用户认证
vim /usr/local/nginx/conf/vhost/test.com.conf//写入如下内容server
{
listen 80;
server_name test.com;
index index.html index.htm index.php;
root /data/wwwroot/test.com;
location /
{
auth_basic "Auth";
auth_basic_user_file /usr/local/nginx/conf/htpasswd;
}
}
 yum install -y httpd  //如果没有安装apache就yum安装,然后执行下面命令
 htpasswd -c /usr/local/nginx/conf/htpasswd chinantfy
- 由于之前已经安装apache,这里直接执行命令
 /usr/local/apache2.4/bin/htpasswd -c /usr/local/nginx/conf/htpasswd  chinantfy //第一次生成文件才需要加-c,追加用户不需要加

 /usr/local/nginx/sbin/nginx -t
 /usr/local/nginx/sbin/nginx -s reload//测试配置并重新加载
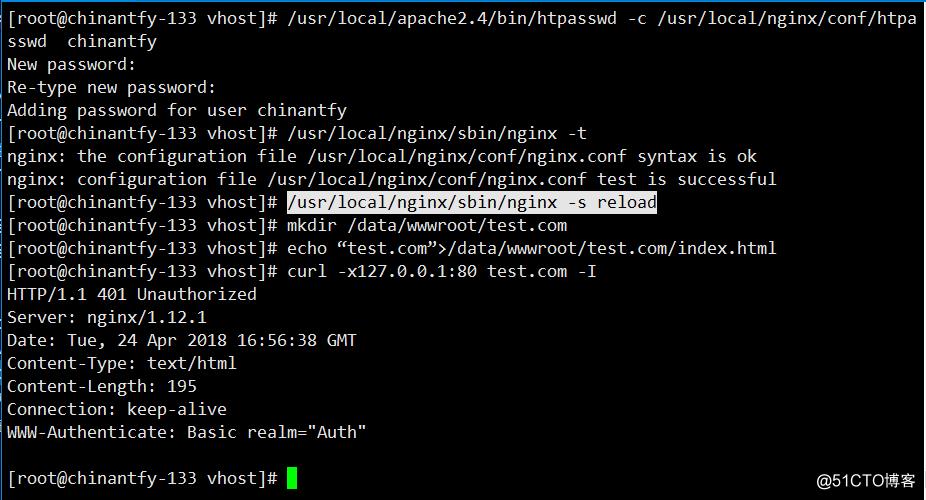
 mkdir /data/wwwroot/test.com
 echo “test.com”>/data/wwwroot/test.com/index.html
 curl -x127.0.0.1:80 test.com -I//状态码为401说明需要验证
curl -uchinantfy:qwer -x127.0.0.1:80 test.com -I //访 问状态码变为200 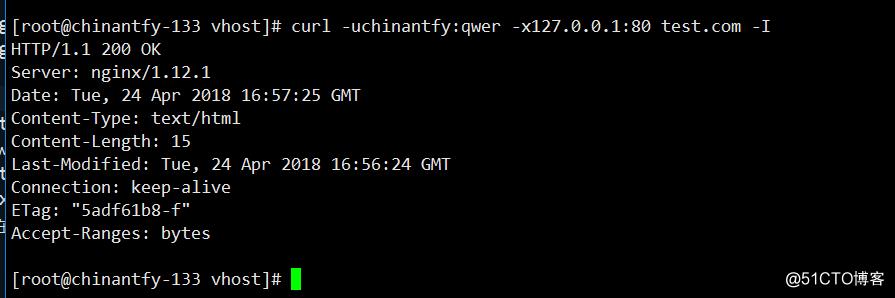
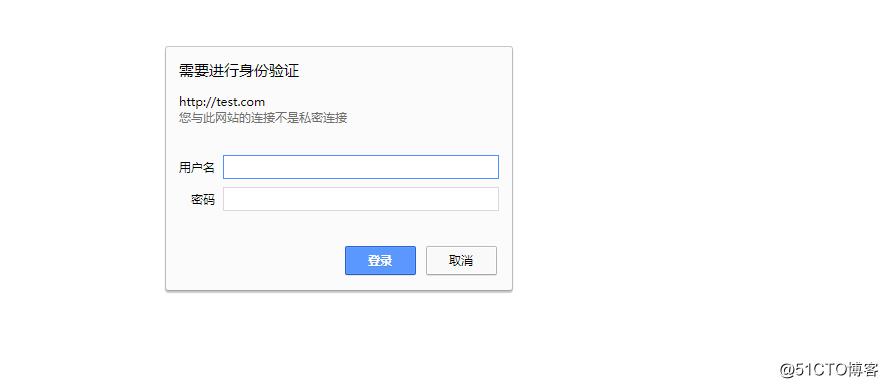
- 编辑windows的hosts文件,然后在浏览器中访问test.com会有输入用户、密码的弹窗
- 针对目录的用户认证(test/admin)
location  /admin/
    {
        auth_basic              "Auth";
        auth_basic_user_file   /usr/local/nginx/conf/htpasswd;
}- 针对php文件
location  ~ admin.php
    {
        auth_basic              "Auth";
        auth_basic_user_file   /usr/local/nginx/conf/htpasswd;
}
四、Nginx域名重定向
vim /usr/local/nginx/conf/vhost/test.com.conf
server
{
    listen 80;
    server_name test.com test1.com test2.com;
    index index.html index.htm index.php;
    root /data/wwwroot/test.com;
    if ($host != ‘test.com‘ ) {
        rewrite  ^/(.*)$  http://test.com/$1  permanent;
    }
}- server_name后面支持写多个域名,这里要和httpd的做一个对比,httpd只能写一个
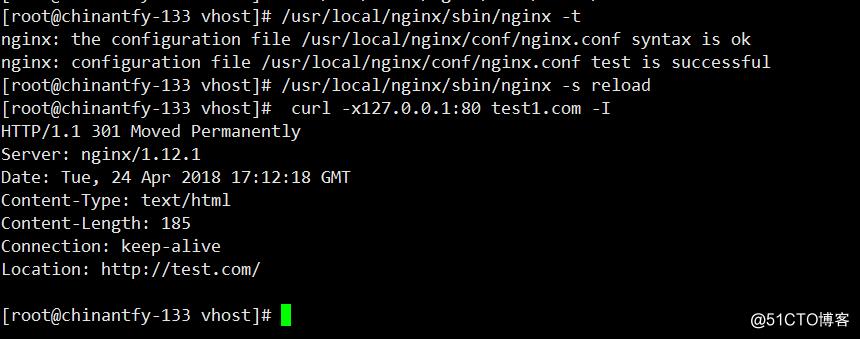
 /usr/local/nginx/sbin/nginx -t
 /usr/local/nginx/sbin/nginx -s reload
 curl -x127.0.0.1:80 test1.com -I
permanent为永久重定向,状态码为301,如果写redirect则为302
原文:http://blog.51cto.com/13569831/2107512
内容总结
以上是互联网集市为您收集整理的47.Nginx安装、默认虚拟主机、Nginx用户认证、Nginx域名重定向全部内容,希望文章能够帮你解决47.Nginx安装、默认虚拟主机、Nginx用户认证、Nginx域名重定向所遇到的程序开发问题。 如果觉得互联网集市技术教程内容还不错,欢迎将互联网集市网站推荐给程序员好友。
内容备注
版权声明:本文内容由互联网用户自发贡献,该文观点与技术仅代表作者本人。本站仅提供信息存储空间服务,不拥有所有权,不承担相关法律责任。如发现本站有涉嫌侵权/违法违规的内容, 请发送邮件至 gblab@vip.qq.com 举报,一经查实,本站将立刻删除。
内容手机端
扫描二维码推送至手机访问。