首页 / NGINX / nginx启动脚本和配置文件
nginx启动脚本和配置文件
内容导读
互联网集市收集整理的这篇技术教程文章主要介绍了nginx启动脚本和配置文件,小编现在分享给大家,供广大互联网技能从业者学习和参考。文章包含3167字,纯文字阅读大概需要5分钟。
内容图文
1、配置启动脚本
vim /etc/init.d/nginx
写入如下内容
#!/bin/bash
# chkconfig: - 30 21
# description: http service.
# Source Function Library
. /etc/init.d/functions
# Nginx Settings

NGINX_SBIN="/usr/local/nginx/sbin/nginx"
NGINX_CONF="/usr/local/nginx/conf/nginx.conf"
NGINX_PID="/usr/local/nginx/logs/nginx.pid"
RETVAL=0
prog="Nginx"

start() {
        echo -n $"Starting $prog: "
        mkdir -p /dev/shm/nginx_temp
        daemon $NGINX_SBIN -c $NGINX_CONF
        RETVAL=$?
        echo
        return $RETVAL
}

stop() {
        echo -n $"Stopping $prog: "
        killproc -p $NGINX_PID $NGINX_SBIN -TERM
        rm -rf /dev/shm/nginx_temp
        RETVAL=$?
        echo
        return $RETVAL
}

reload(){
        echo -n $"Reloading $prog: "
        killproc -p $NGINX_PID $NGINX_SBIN -HUP
        RETVAL=$?
        echo
        return $RETVAL
}

restart(){
        stop
        start
}

configtest(){
    $NGINX_SBIN -c $NGINX_CONF -t
    return 0
}

case "$1" in
  start)
        start
        ;;
  stop)
        stop
        ;;
  reload)
        reload
        ;;
  restart)
        restart
        ;;
  configtest)
        configtest
        ;;
  *)
        echo $"Usage: $0 {start|stop|reload|restart|configtest}"
        RETVAL=1
esac

exit $RETVAL
2、更改权限
chmod 755 /etc/init.d/nginx
3、加入开机启动并启动
chkconfig --add nginx
chkconfig nginx on
4、更改nginx配置
首先把原来的配置文件清空:
> /usr/local/nginx/conf/nginx.conf
修改配置文件
vim /usr/local/nginx/conf/nginx.conf
user nobody nobody;
worker_processes 2;
error_log /usr/local/nginx/logs/nginx_error.log crit;
pid /usr/local/nginx/logs/nginx.pid;
worker_rlimit_nofile 51200;

events
{
    use epoll;
    worker_connections 6000;
}

http
{
    include mime.types;
    default_type application/octet-stream;
    server_names_hash_bucket_size 3526;
    server_names_hash_max_size 4096;
    log_format combined_realip ‘$remote_addr $http_x_forwarded_for [$time_local]‘
    ‘$host "$request_uri" $status‘
    ‘"$http_referer" "$http_user_agent"‘;
    sendfile on;
    tcp_nopush on;
    keepalive_timeout 30;
    client_header_timeout 3m;
    client_body_timeout 3m;
    send_timeout 3m;
    connection_pool_size 256;
    client_header_buffer_size 1k;
    large_client_header_buffers 8 4k;
    request_pool_size 4k;
    output_buffers 4 32k;
    postpone_output 1460;
    client_max_body_size 10m;
    client_body_buffer_size 256k;
    client_body_temp_path /usr/local/nginx/client_body_temp;
    proxy_temp_path /usr/local/nginx/proxy_temp;
    fastcgi_temp_path /usr/local/nginx/fastcgi_temp;
    fastcgi_intercept_errors on;
    tcp_nodelay on;
    gzip on;
    gzip_min_length 1k;
    gzip_buffers 4 8k;
    gzip_comp_level 5;
    gzip_http_version 1.1;
    gzip_types text/plain application/x-javascript text/css text/htm application/xml;
include vhost/*.conf;
}
5、创建虚拟主机配置文件
cd /usr/local/nginx
mkdir vhosts
cd vhosts
vim default.conf
server
{
    listen 80 default;
    server_name localhost;
    index index.html index.htm index.php;
    root /usr/local/nginx/html;

    location ~ \.php$ {
        include fastcgi_params;
        fastcgi_pass unix:/tmp/php-fcgi.sock;
        fastcgi_index index.php;
        fastcgi_param SCRIPT_FILENAME /usr/local/nginx/html$fastcgi_script_name;
    }

}
检查配置文件有无错误
/usr/local/nginx/sbin/nginx -t
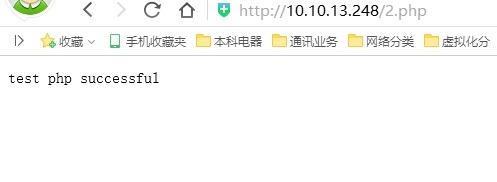
6、测试php解析
cd /usr/local/nginx/html
vim 2.php
<?php
echo "test php successful"
?>
重启nginx服务
service nginx restart
用浏览器访问成功显示如下
 650) this.width=650;" src="/upload/getfiles/default/2022/11/8/20221108120304725.jpg" title="php2.jpg" />
本文出自 “愺艮搥豩” 博客,请务必保留此出处http://riverxyz.blog.51cto.com/533303/1784004
原文:http://riverxyz.blog.51cto.com/533303/1784004
内容总结
以上是互联网集市为您收集整理的nginx启动脚本和配置文件全部内容,希望文章能够帮你解决nginx启动脚本和配置文件所遇到的程序开发问题。 如果觉得互联网集市技术教程内容还不错,欢迎将互联网集市网站推荐给程序员好友。
内容备注
版权声明:本文内容由互联网用户自发贡献,该文观点与技术仅代表作者本人。本站仅提供信息存储空间服务,不拥有所有权,不承担相关法律责任。如发现本站有涉嫌侵权/违法违规的内容, 请发送邮件至 gblab@vip.qq.com 举报,一经查实,本站将立刻删除。
内容手机端
扫描二维码推送至手机访问。