Angular表单验证的两种方法介绍
内容导读
互联网集市收集整理的这篇技术教程文章主要介绍了Angular表单验证的两种方法介绍,小编现在分享给大家,供广大互联网技能从业者学习和参考。文章包含3057字,纯文字阅读大概需要5分钟。
内容图文
 对前端开发人员来说,表单是非常重要的,它负责用户与程序的交互。它承载着一部分数据校验的功能,以此减少服务端的压力。本篇文章就是对Angular表单验证的两种方法进行介绍。
模板驱动验证
为了向模板驱动表单中添加验证,需要添加一些验证属性,这里就用户登录界面为例进行说明
一:新建项目
到工作路径下,运行ng new valicate创建一个angular项目,然后用vscode打开
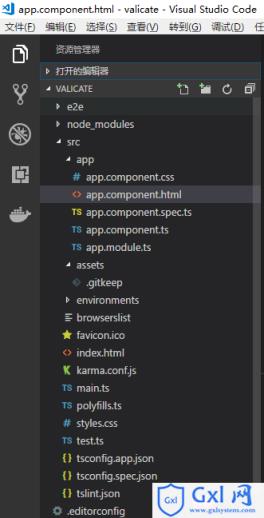
二:修改app.component.html模板文件
创建一个表单,有两个输入框,分别为用户名和密码,接下来对这两个输入框进行验证
app.component.html
<br><br>
<p class="container-fluid">
<p class="row">
<p class="col-md-4">
</p>
<p class="col-md-4">
<h1 class="form-group">Login</h1>
<form role="form">
<p class="form-group">
<label for="exampleInputEmail1">
Email address
</label>
<input type="email" class="form-control" id="exampleInputEmail1" />
</p>
<p class="form-group">
<label for="exampleInputPassword1">
Password
</label>
<input type="password" class="form-control" id="exampleInputPassword1" />
</p>
<button type="submit" class="btn btn-primary">
Submit
</button>
</form>
</p>
<p class="col-md-4">
</p>
</p>
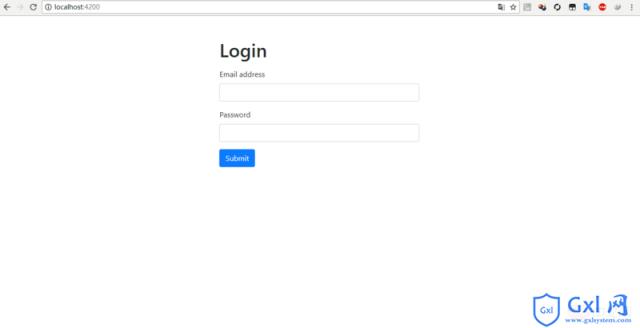
</p>代码中运用到的样式均为Bootstrap4中提供的css样式,读者可以到其官网下载。
最终的样式如下:
三:添加校验
首先在app.module.ts中,添加FormsModule模块,并增加到imports数组中
app.module.ts
import { BrowserModule } from '@angular/platform-browser';
import { NgModule } from '@angular/core';

import { AppComponent } from './app.component';
import { FormsModule } from '@angular/forms';
@NgModule({
  declarations: [
    AppComponent
  ],
  imports: [
    BrowserModule,
    FormsModule
  ],
  providers: [],
  bootstrap: [AppComponent]
})
export class AppModule { }
然后在模板页面中添加校验器
添加校验的app.component.html
<br><br>
<p class="container-fluid">
<p class="row">
<p class="col-md-4">
</p>
<p class="col-md-4">
<h1 class="form-group">Login</h1>
<form role="form">
<p class="form-group">
<label for="exampleInputEmail1">
Email address
</label>
<input type="email" class="form-control" id="exampleInputEmail1" [(ngModel)]="email" name="email"
#emailFC="ngModel" required/>
</p>
<p *ngIf="emailFC.invalid" class="alert alert-danger">
请输入邮箱地址!
</p>
<p class="form-group">
<label for="exampleInputPassword1">
Password
</label>
<input type="password" class="form-control" id="exampleInputPassword1" />
</p>
<button type="submit" class="btn btn-primary">
Submit
</button>
</form>
</p>
<p class="col-md-4">
</p>
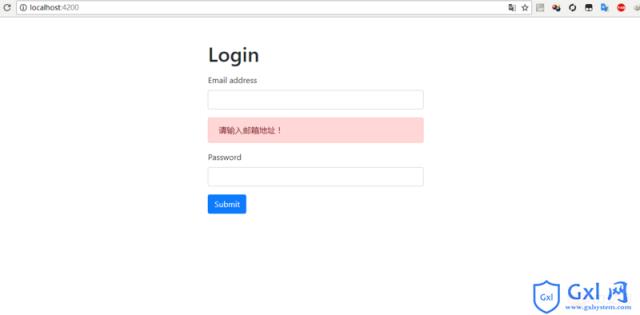
</p>
</p>最终效果如下:
四:注意事项
在Input标签中必须添加name属性,且 #name 与ts中class的属性名称不能相同,如图

响应式表单的验证
一:在app.module.ts中引用ReactiveFormsModule
app.module.ts
import { BrowserModule } from '@angular/platform-browser';
import { NgModule } from '@angular/core';

import { AppComponent } from './app.component';
import { FormsModule, ReactiveFormsModule } from '@angular/forms';
import { StudentComponent } from './student/student.component';

@NgModule({
   declarations: [
      AppComponent,
      StudentComponent
   ],
   imports: [
      BrowserModule,
      FormsModule,
      ReactiveFormsModule
   ],
   providers: [],
   bootstrap: [
      AppComponent
   ]
})
export class AppModule { }
相关文章推荐:
javascript事件定义,绑定事件和事件驱动中的命令语言
Javascript中作用域+闭包的详细讲解
以上就是Angular表单验证的两种方法介绍的详细内容,更多请关注Gxl网其它相关文章!
内容总结
以上是互联网集市为您收集整理的Angular表单验证的两种方法介绍全部内容,希望文章能够帮你解决Angular表单验证的两种方法介绍所遇到的程序开发问题。 如果觉得互联网集市技术教程内容还不错,欢迎将互联网集市网站推荐给程序员好友。
内容备注
版权声明:本文内容由互联网用户自发贡献,该文观点与技术仅代表作者本人。本站仅提供信息存储空间服务,不拥有所有权,不承担相关法律责任。如发现本站有涉嫌侵权/违法违规的内容, 请发送邮件至 gblab@vip.qq.com 举报,一经查实,本站将立刻删除。
内容手机端
扫描二维码推送至手机访问。