Vue + Element UI图片上传控件使用详解
内容导读
互联网集市收集整理的这篇技术教程文章主要介绍了Vue + Element UI图片上传控件使用详解,小编现在分享给大家,供广大互联网技能从业者学习和参考。文章包含5583字,纯文字阅读大概需要8分钟。
内容图文

上一篇 Vue +Element UI +vue-quill-editor 富文本编辑器及插入图片自定义 主要是写了富文本编辑器的自定义及编辑器中图片的上传并插入到编辑内容,这篇文章单独介绍一下element UI 图片上传控件的使用。首先要安装element并中引入,安装引入过程这里不再赘述。
1.引用element 上传控件。
<el-upload
 action="/mgr/common/imgUpload"//这里需要配置一下文件上传地址(跨域)
 list-type="picture-card"
 accept="image/*"
 :limit="imgLimit"
 :file-list="productImgs"
 :multiple="isMultiple"
 :on-preview="handlePictureCardPreview"
 :on-remove="handleRemove"
 :on-success="handleAvatarSuccess"
 :before-upload="beforeAvatarUpload"
 :on-exceed="handleExceed"
 :on-error="imgUploadError">
 <i class="el-icon-plus"></i>
 </el-upload>
 <el-dialog :visible.sync="dialogVisible">
 <img width="100%" :src="dialogImageUrl" alt="">
 </el-dialog>
2.js
export default {
 data() {
 return {
 dialogImageUrl: '',
 dialogVisible: false,
 productImgs: [],
 isMultiple: true,
 imgLimit: 6
 }
 },
 methods: {
 handleRemove(file, fileList) {//移除图片
 console.log(file, fileList);
 },
 handlePictureCardPreview(file) {//预览图片时调用
 console.log(file);
 this.dialogImageUrl = file.url;
 this.dialogVisible = true;
 },

 beforeAvatarUpload(file) {//文件上传之前调用做一些拦截限制
 console.log(file);
 const isJPG = true;
 // const isJPG = file.type === 'image/jpeg';
 const isLt2M = file.size / 1024 / 1024 < 2;

 // if (!isJPG) {
 // this.$message.error('上传头像图片只能是 JPG 格式!');
 // }
 if (!isLt2M) {
  this.$message.error('上传图片大小不能超过 2MB!');
 }
 return isJPG && isLt2M;
 },
 handleAvatarSuccess(res, file) {//图片上传成功
 console.log(res);
 console.log(file);
 this.imageUrl = URL.createObjectURL(file.raw);
 },
 handleExceed(files, fileList) {//图片上传超过数量限制
 this.$message.error('上传图片不能超过6张!');
 console.log(file, fileList);
 },
 imgUploadError(err, file, fileList){//图片上传失败调用
 console.log(err)
 this.$message.error('上传图片失败!');
 }
 }
 }
3.controller
 @RequestMapping(value = "/imgUpload")
 public Wrapper imgUpload(HttpServletRequest req, MultipartHttpServletRequest multiReq)
  throws IOException {
 System.out.println("---" + fileUploadPath);//我这里用的springboot 在application.properties中配置,使用@Value 获取的文件上传目录

 MultipartFile file = multiReq.getFile("file");
 String originalFilename = file.getOriginalFilename();
 String suffix = originalFilename.substring(originalFilename.indexOf("."));
 String localFileName = MD5Util.md5(file.getInputStream()) + suffix;
 File localFile = new File(fileUploadPath + localFileName);
 if (!localFile.exists()) {
  localFile.createNewFile();

  FileOutputStream fos = new FileOutputStream(
   localFile);
  FileInputStream fs = (FileInputStream) multiReq.getFile("img").getInputStream();
  byte[] buffer = new byte[1024];
  int len = 0;
  while ((len = fs.read(buffer)) != -1) {
  fos.write(buffer, 0, len);
  }
  fos.close();
  fs.close();

 } else {
  log.info("文件已存在!!");
 }

 return WrapMapper.wrap(
  Wrapper.SUCCESS_CODE,
  Wrapper.SUCCESS_MESSAGE,
  "http://localhost:8080/img/" + localFileName);//这里是我执行封装的返回结果,也可以使用map,
 }
4.MD5工具类
import java.io.*;
import java.security.MessageDigest;
import java.security.NoSuchAlgorithmException;

public class MD5Util {

 private static char[] Digit = {'0', '1', '2', '3', '4', '5', '6', '7', '8',
  '9', 'a', 'b', 'c', 'd', 'e', 'f'};

 public static String getMd5Sum(String inputStr)
  throws NoSuchAlgorithmException {
 MessageDigest digest = MessageDigest.getInstance("MD5");
 byte[] inputStrByte = inputStr.getBytes();
 digest.update(inputStrByte, 0, inputStrByte.length);

 byte[] md5sum = digest.digest();

 StringBuffer sb = new StringBuffer();
 for (int i = 0; i < 16; i++) {
  char[] ob = new char[2];
  ob[0] = Digit[md5sum[i] >> 4 & 0x0F];
  ob[1] = Digit[md5sum[i] & 0x0F];
  String s = new String(ob);
  sb.append(s);
 }

 return sb.toString();
 }

 /**
 * 对字符串进行 MD5 加密
 *
 * @param str
 *  待加密字符串
 *
 * @return 加密后字符串
 */
 public static String md5(String str) {
 MessageDigest md5 = null;
 try {
  md5 = MessageDigest.getInstance("MD5");
  md5.update(str.getBytes("UTF-8"));
 } catch (NoSuchAlgorithmException e) {
  throw new RuntimeException(e.getMessage());
 } catch (UnsupportedEncodingException e) {
  throw new RuntimeException(e.getMessage());
 }
 byte[] encodedValue = md5.digest();
 int j = encodedValue.length;
 char finalValue[] = new char[j * 2];
 int k = 0;
 for (int i = 0; i < j; i++) {
  byte encoded = encodedValue[i];
  finalValue[k++] = Digit[encoded >> 4 & 0xf];
  finalValue[k++] = Digit[encoded & 0xf];
 }

 return new String(finalValue);
 }

 /**
 * 签名字符串
 *
 * @param text
 *  需要签名的字符串
 * @param sign
 *  签名结果
 * @return 签名结果
 */
 public static boolean verify(String text, String sign) {
 String mysign = md5(text);
 if (mysign.equals(sign)) {
  return true;
 } else {
  return false;
 }
 }

 /**
 * 对文件进行 MD5 加密
 *
 * @param file
 *  待加密的文件
 *
 * @return 文件加密后的 MD5 值
 * @throws IOException
 */
 public static String md5(File file) throws IOException {
 FileInputStream is = new FileInputStream(file);
 return md5(is);

 }


 public static String md5(InputStream inputStream) throws IOException {

 MessageDigest md5 = null;
 try {
  md5 = MessageDigest.getInstance("MD5");
  int n = 0;
  byte[] buffer = new byte[1024];
  do {
  n = inputStream.read(buffer);
  if (n > 0) {
   md5.update(buffer, 0, n);
  }
  } while (n != -1);
  inputStream.skip(0);
 } catch (NoSuchAlgorithmException e) {
  throw new RuntimeException(e.getMessage());
 } finally {
  inputStream.close();
 }

 byte[] encodedValue = md5.digest();

 int j = encodedValue.length;
 char finalValue[] = new char[j * 2];
 int k = 0;
 for (int i = 0; i < j; i++) {
  byte encoded = encodedValue[i];
  finalValue[k++] = Digit[encoded >> 4 & 0xf];
  finalValue[k++] = Digit[encoded & 0xf];
 }
 return new String(finalValue);
 }
}
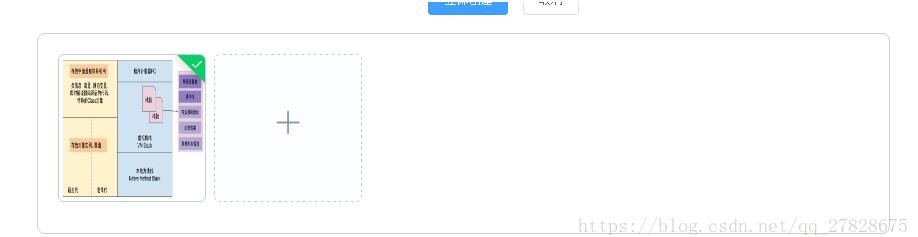
5.效果
6.主要参考文档 element 官方中文文档,文档中好多属性介绍很笼统不够详细,个人感觉比较坑。
以上就是本文的全部内容,希望对大家的学习有所帮助,也希望大家多多支持脚本之家。
内容总结
以上是互联网集市为您收集整理的Vue + Element UI图片上传控件使用详解全部内容,希望文章能够帮你解决Vue + Element UI图片上传控件使用详解所遇到的程序开发问题。 如果觉得互联网集市技术教程内容还不错,欢迎将互联网集市网站推荐给程序员好友。
内容备注
版权声明:本文内容由互联网用户自发贡献,该文观点与技术仅代表作者本人。本站仅提供信息存储空间服务,不拥有所有权,不承担相关法律责任。如发现本站有涉嫌侵权/违法违规的内容, 请发送邮件至 gblab@vip.qq.com 举报,一经查实,本站将立刻删除。
内容手机端
扫描二维码推送至手机访问。