首页 / JAVASCRIPT / 原生js轮播特效
原生js轮播特效
内容导读
互联网集市收集整理的这篇技术教程文章主要介绍了原生js轮播特效,小编现在分享给大家,供广大互联网技能从业者学习和参考。文章包含3733字,纯文字阅读大概需要6分钟。
内容图文

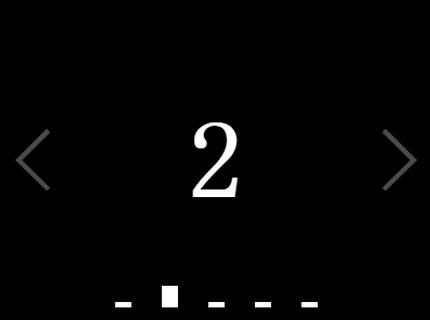
作为一名前端工程师,手写轮播图应该是最基本掌握的技能,以下是我自己原生js写的轮播,欢迎指点批评:
首先css代码
a{text-decoration:none;color:#3DBBF5;}
   *{
    margin: 0;
    padding: 0;
   }
   .wrapper{
    width: 400px;
    height: 300px;
    margin: 100px auto;
   }
   #lunbo{
    position: relative;
    overflow: hidden;
   }
   #list{
    position: relative;
    white-space: nowrap; // 这块用行元素模拟,所以才用该属性,块元素可修改这块
   }
   #list span{
    display: inline-block;
    width: 400px;
    height: 300px;
    text-align: center;
    line-height: 300px;
    font-weight: bold;
    font-size: 100px;
    color: #fff;
   }
   #buttons{
    position: absolute;
    bottom: 0;
    text-align: center;
    width: 100%;
    height: 40px;
    line-height: 40px;
   }
   #buttons span{
    display: inline-block;
    width: 15px;
    height: 5px;
    background: #fff;
    margin: 0 10px;
    cursor: pointer;
    transition: all .5s;
   }
   #buttons span.on{
    height: 20px;
   }
   .arrow{
    position: absolute;
    top: 50%;
    transform: translateY(-50%);
    font-size: 80px;
    font-weight: bold;
    color: #fff;
    opacity: .3;
    transition: all .5s;
   }
   .wrapper:hover .arrow{
    opacity: 1;
   }
   #prev{
    left: 10px;
   }
   #next{
    right: 10px;
   }
然后HTML代码
<div class="wrapper">
   <div id="lunbo">
    <div id="list" style="left: -400px;">
     <span style="background:yellow;">5</span><span style="background: red;">1</span><span style="background:black;">2</span><span style="background:green;">3</span><span style="background:blue;">4</span><span style="background:yellow;">5</span><span style="background: red;">1</span>
    </div>
    <div id="buttons">
     <span index="1" class="on"></span>
     <span index="2"></span>
     <span index="3"></span>
     <span index="4"></span>
     <span index="5"></span>
    </div>
    <a href="javascript:;" id="prev" class="arrow"><</a>
    <a href="javascript:;" id="next" class="arrow">></a>
   </div>
  </div>
最后js代码
window.onload=function () {
   var lunBo = document.getElementById("lunbo");
   var list = document.getElementById("list");
   var btn = document.getElementById("buttons").getElementsByTagName('span');
   var prev = document.getElementById("prev");
   var next = document.getElementById('next');
   var interval = 3000;
   var timer;
   var index = 1;
   var animated = false;
   for (var i=0;i<btn.length;i++) { //按钮加点击事件
    btn[i].onclick=function () {
     if(this.className=='on') //如果是状态按钮直接返回节约资源
     {
      return
     };
     var myIndex =parseInt(this.getAttribute('index'));//获取按钮的index属性值
     var offset = -400*(myIndex-index); //根据属性值 计算偏移量
     animate(offset)  //轮播动画
     index = myIndex; // 改变索引值
     showBtn();   //显示状态按钮
    }
   }
   function showBtn () {
    for (var i=0;i<btn.length;i++) {
     btn[i].className='';
    }
    btn[index-1].className='on';
   }
   prev.onclick=function () { //上一页事件
    if (animated) { //如果是动画状态 直接返回解决bug
     return;
    }
    if (index==1) {
     index =btn.length;
    } else{
     index-=1;
    }
    animate(400);
    showBtn();
   }
   next.onclick=function () {
    if (animated) {
     return;
    }
    if (index==btn.length) {
     index =1;
    } else{
     index+=1;
    }
    animate(-400);
    showBtn();
   }
   function animate(offset) {
    animated = true; //表示在动画状态
    var newLeft = parseInt(list.style.left) + offset; //计算新的left值
    var time = 400; //设置动画总时间
    var interval = 10; //动画帧时间
    var speed = offset/(time/interval); //每帧运动距离
    function go () {
     if ((speed>0 && parseInt(list.style.left)<newLeft) || (speed<0 && parseInt(list.style.left)>newLeft)) { //通过条件判断到它是否还要继续进行动画
      list.style.left = parseInt(list.style.left) + speed +'px';
      setTimeout(go,interval)
     } else{
      animated = false; //动画状态结束
      list.style.left = newLeft + 'px'; //现在的位移
      if (parseInt(list.style.left)<-2000) { // 辅助假图
       list.style.left = -400 + 'px';
      } else if( parseInt(list.style.left)>-400){
       list.style.left = -2000 + 'px';
      }
     }
    }
    go();
   }
   function play () {
    timer = setTimeout(function () {
     next.onclick();
     play();
    },interval)
   }
   play();
   function stop () {
    clearTimeout(timer);
   }
   lunBo.onmouseover=stop;
   lunBo.onmouseout=play;
  }
以上是所有代码,欢迎指点交流!
以上就是本文的全部内容,希望对大家的学习有所帮助,也希望大家多多支持脚本之家。
内容总结
以上是互联网集市为您收集整理的原生js轮播特效全部内容,希望文章能够帮你解决原生js轮播特效所遇到的程序开发问题。 如果觉得互联网集市技术教程内容还不错,欢迎将互联网集市网站推荐给程序员好友。
内容备注
版权声明:本文内容由互联网用户自发贡献,该文观点与技术仅代表作者本人。本站仅提供信息存储空间服务,不拥有所有权,不承担相关法律责任。如发现本站有涉嫌侵权/违法违规的内容, 请发送邮件至 gblab@vip.qq.com 举报,一经查实,本站将立刻删除。
内容手机端
扫描二维码推送至手机访问。
来源:【匿名】