jQuery实现自定义checkbox和radio样式
内容导读
互联网集市收集整理的这篇技术教程文章主要介绍了jQuery实现自定义checkbox和radio样式,小编现在分享给大家,供广大互联网技能从业者学习和参考。文章包含4992字,纯文字阅读大概需要8分钟。
内容图文

1,起因
最近在工作中要实现自定义式的radio样式,而我们通常使用的时默认的样式,因为自己实在想不到解决的方法,于是开始搜索,最终看到了不错的解决办法,可以完美解决我们遇到的问题。
2,原理
大家都知道在写结构的时候,radio或checkbox都会跟随label一起使用,label的for属性值和input的id值相同的情况下,点击label就可以选中input,这里正是利用label 来覆盖我们的input默认样式,通过给label添加背景图片(美化的checkbox或radio),也就是在点击的过程中,我们是看不到默认的input的(给input设置z-index:-1),而点击的是label,通过不同的事件,加载不同的背景图片(这里是改变背景图片的位置)
3,设置美化checkbox或radio的默认样式
(1)页面结构
<form class="form" method="post">
  <fieldset>
    <legend>Which genres do you like?</legend>
    <input type="checkbox" value="action" id="check-1" name="genre"><label for="check-1" class="">Action / Adventure</label>
    <input type="checkbox" value="comedy" id="check-2" name="genre"><label for="check-2" class="">Comedy</label>
    <input type="checkbox" value="epic" id="check-3" name="genre"><label for="check-3" class="">Epic / Historical</label>
    <input type="checkbox" value="science" id="check-4" name="genre"><label for="check-4" class="">Science Fiction</label>
    <input type="checkbox" value="romance" id="check-5" name="genre"><label for="check-5" class="">Romance</label>
    <input type="checkbox" value="western" id="check-6" name="genre"><label for="check-6" class="">Western</label>
  </fieldset>
  <fieldset>
    <legend>Caddyshack is the greatest movie of all time, right?</legend>
    <input type="radio" value="1" id="radio-1" name="opinions"><label for="radio-1" class="">Totally</label>
    <input type="radio" value="1" id="radio-2" name="opinions"><label for="radio-2" class="">You must be kidding</label>
    <input type="radio" value="1" id="radio-3" name="opinions"><label for="radio-3" class="">What's Caddyshack?</label>
  </fieldset>
</form>
(2)jquery code(前提必须引入jquery库)
jQuery.fn.customInput = function(){
  $(this).each(function(i){
    if($(this).is('[type=checkbox],[type=radio]')){
      var input = $(this);
      //get the associated label using the input's id
      var label = $('label[for='+input.attr('id')+']');
      //get type,for classname suffix
      var inputType = (input.is('[type=checkbox]')) ? 'checkbox' : 'radio';
      //wrap the input + label in a div
      $('<div class="custom-'+ inputType +'"></div>').insertBefore(input).append(input,label);
      //find all inputs in this set using the shared name attribute
      var allInputs = $('input[name='+input.attr('name')+']');
      //necessary for browsers that don't support the :hover pseudo class on labels
      label.hover(function(){
        $(this).addClass('hover');
        if(inputType == 'checkbox' && input.is(':checked')) {
          $(this).addClass('checkedHover');
        }
      },function(){
        $(this).removeClass('hover checkedHover');
      });

      //bind custom event, trigger it, bind click,focus,blur events
      input.bind('updateState',function(){
        if(input.is(':checked')){
          if(input.is(':radio')){
            allInputs.each(function(){
              $('label[for='+$(this).attr('id')+']').removeClass('checked');
            });
          };
          label.addClass('checked');
        } else {
          label.removeClass('checked checkedHover checkedFocus');
        }
      })
      .trigger('updateState')
      .click(function(){
        $(this).trigger('updateState');
      })
      .focus(function(){
        label.addClass('focus');
        if(inputType == 'checkbox' && input.is(':checked')) {
          $(this).addClass('checkedFocus');
        }
      })
      .blur(function(){
        label.removeClass('focus checkedFocus');
      });
    }
  });
}
引入jquery库,再引入上面的代码后,就可以执行下面的代码
$('input').customInput();
(3)生成的外层div
如果你的代码结构是label和input成对写的话,那么在它们的外层就会生成一个div,如图

(4)设置自定义默认样式
准备好一张图,如下:
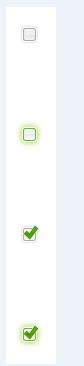
你可能会问,为什么上面没有在顶端,而是有一定的距离,因为我们的input选项多是居中的,而我们是使用label的背景图片来模拟的,所以我们是为了让input选项居中显示。总之:ico小图标一定要垂直排列,一定要留有一定的距离来达到居中显示。
/* wrapper divs */
      .custom-checkbox,
      .custom-radio {
        position: relative;
        display: inline-block;
      }
      /* input, label positioning */
      .custom-checkbox input,
      .custom-radio input {
        position: absolute;
        left: 2px;
        top: 3px;
        margin: 0;
        z-index: -1;
      }
      .custom-checkbox label,
      .custom-radio label {
        display: block;
        position: relative;
        z-index: 1;
        font-size: 1.3em;
        padding-right: 1em;
        line-height: 1;
        padding: .5em 0 .5em 30px;
        margin: 0 0 .3em;
        cursor: pointer;
      }
这是最外层的一些设置,当然你可以自己修改
/* ==默认状态效果== */
      .custom-checkbox label {
        background: url(images/checkbox.gif) no-repeat;
      }
      .custom-radio label {
        background: url(images/button-radio.png) no-repeat;
      }
      .custom-checkbox label,
      .custom-radio label {
        background-position: 0px 0px;
      }
/*==鼠标悬停和得到焦点状态==*/
      .custom-checkbox label.hover,
      .custom-checkbox label.focus,
      .custom-radio label.hover,
      .custom-radio label.focus {
        /*background-position: -10px -114px;*/
      }

      /*==选中状态==*/
      .custom-checkbox label.checked,
      .custom-radio label.checked {
        background-position: 0px -47px;
      }
      .custom-checkbox label.checkedHover,
      .custom-checkbox label.checkedFocus {
        /*background-position: -10px -314px;*/
      }
      .custom-checkbox label.focus,
      .custom-radio label.focus {
        outline: 1px dotted #ccc;
      }
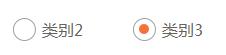
结尾:总之,我是完美的解决了我的问题,顺便截图发一个看看
以上所述就是本文的全部内容了,希望大家能够喜欢。
内容总结
以上是互联网集市为您收集整理的jQuery实现自定义checkbox和radio样式全部内容,希望文章能够帮你解决jQuery实现自定义checkbox和radio样式所遇到的程序开发问题。 如果觉得互联网集市技术教程内容还不错,欢迎将互联网集市网站推荐给程序员好友。
内容备注
版权声明:本文内容由互联网用户自发贡献,该文观点与技术仅代表作者本人。本站仅提供信息存储空间服务,不拥有所有权,不承担相关法律责任。如发现本站有涉嫌侵权/违法违规的内容, 请发送邮件至 gblab@vip.qq.com 举报,一经查实,本站将立刻删除。
内容手机端
扫描二维码推送至手机访问。