如何用Java和Kotlin实现高性能桌面条形码扫描
内容导读
互联网集市收集整理的这篇技术教程文章主要介绍了如何用Java和Kotlin实现高性能桌面条形码扫描,小编现在分享给大家,供广大互联网技能从业者学习和参考。文章包含5095字,纯文字阅读大概需要8分钟。
内容图文

很多做Java开发的喜欢用ZXing实现扫码功能,但是ZXing的功能有限。如果要开发企业级的产品,就需要企业级的SDK。Dynamsoft Barcode Reader作为企业级的扫码SDK,提供了移动和桌面版本。SDK基于JNI封装,能够给Java程序提供最好的性能。
使用Gradle创建Java/Kotlin工程
习惯安卓开发的都很熟悉Gradle。Gradle用于桌面程序开发也很方便。
用Gradle命令创建一个新的工程:
$ gradle init
 Select type of project to generate:
 1: basic
 2: application
 3: library
 4: Gradle plugin
 Enter selection (default: basic) [1..4]

 Select implementation language:
 1: C++
 2: Groovy
 3: Java
 4: Kotlin
 5: Scala
 6: Swift
 Enter selection (default: Java) [1..6]

 Split functionality across multiple subprojects?:
 1: no - only one application project
 2: yes - application and library projects
 Enter selection (default: no - only one application project) [1..2]

 Select build script DSL:
 1: Groovy
 2: Kotlin
 Enter selection (default: Kotlin) [1..2]
创建的时候,编程语言可以选择Java或者Kotlin。
打开 app > build.gradle。加入Maven仓库和依赖:
repositories {
     // Use JCenter for resolving dependencies.
     jcenter()
     maven {
         url "http://download2.dynamsoft.com/maven/dbr/jar"
     }
 }

 dependencies {
     // Use JUnit test framework.
     testImplementation 'junit:junit:4.13'

     // This dependency is used by the application.
     implementation 'com.google.guava:guava:29.0-jre'

     // Dynamsoft Barcode Reader SDK
     implementation 'com.dynamsoft:dbr:8.1.2'
 }
如果要做Android开发,URL和依赖的名字需要修改下:
repositories {
     maven {
         url "http://download2.dynamsoft.com/maven/dbr/aar"
     }
 }

 dependencies {
     implementation 'com.dynamsoft:dynamsoftbarcodereader:latest.release@aar'
 }
Java/Kotlin桌面扫码程序
打开App.java/App.kt文件,创建BarcodeReader对象:
// Java
import com.dynamsoft.dbr.*;

BarcodeReader br = new BarcodeReader(license);
// Kotlin
import com.dynamsoft.dbr.*

val br = BarcodeReader(license)
设置初始化参数:
// Java
br.initRuntimeSettingsWithString("{\"ImageParameter\":{\"Name\":\"Balance\",\"DeblurLevel\":5,\"ExpectedBarcodesCount\":512,\"LocalizationModes\":[{\"Mode\":\"LM_CONNECTED_BLOCKS\"},{\"Mode\":\"LM_STATISTICS\"}]}}", EnumConflictMode.CM_OVERWRITE);
// Kotlin
br.initRuntimeSettingsWithString("{\"ImageParameter\":{\"Name\":\"Balance\",\"DeblurLevel\":5,\"ExpectedBarcodesCount\":512,\"LocalizationModes\":[{\"Mode\":\"LM_CONNECTED_BLOCKS\"},{\"Mode\":\"LM_STATISTICS\"}]}}", EnumConflictMode.CM_OVERWRITE)
读取文件解码,返回结果:
// Java
results = mBarcodeReader.decodeFile(file, "");
for (TextResult result : results) {
    System.out.println(String.format("  Barcode %d:", index++));
    if(result.barcodeFormat != 0){
        System.out.println("    Type: " + result.barcodeFormatString);
    } else {
        System.out.println("    Type: " + result.barcodeFormatString_2);
    }


    System.out.println("    Value: " + result.barcodeText);

    System.out.println(String.format("    Region points: {(%d,%d),(%d,%d),(%d,%d),(%d,%d)}",
    result.localizationResult.resultPoints[0].x, result.localizationResult.resultPoints[0].y,
    result.localizationResult.resultPoints[1].x,result.localizationResult.resultPoints[1].y,
    result.localizationResult.resultPoints[2].x,result.localizationResult.resultPoints[2].y,
    result.localizationResult.resultPoints[3].x,result.localizationResult.resultPoints[3].y));
}
// Kotlin
val results: Array<TextResult> = br.decodeFile(file, "")
for (result in results) {
    println(String.format("  Barcode %d:", index++))
    if (result.barcodeFormat != 0) {
        System.out.println("    Type: " + result.barcodeFormatString)
    } else {
        System.out.println("    Type: " + result.barcodeFormatString_2)
    }
    System.out.println("    Value: " + result.barcodeText)
    println(
        java.lang.String.format(
            "    Region points: {(%d,%d),(%d,%d),(%d,%d),(%d,%d)}",
            result.localizationResult.resultPoints.get(0).x,
            result.localizationResult.resultPoints.get(0).y,
            result.localizationResult.resultPoints.get(1).x,
            result.localizationResult.resultPoints.get(1).y,
            result.localizationResult.resultPoints.get(2).x,
            result.localizationResult.resultPoints.get(2).y,
            result.localizationResult.resultPoints.get(3).x,
            result.localizationResult.resultPoints.get(3).y
        )
    )
}
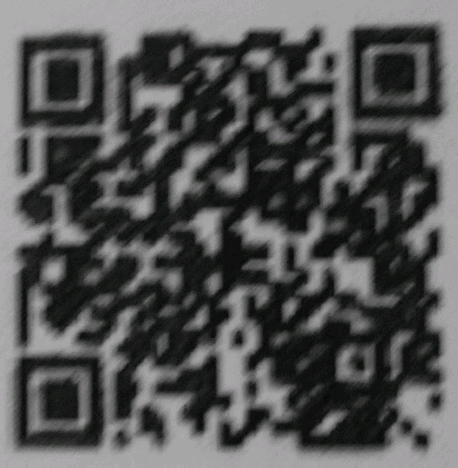
现在测试一张模糊的QR二维码:
在Gradle运行命令中加上文件名和license文件:
./gradlew run --args="../../images/QR-Blurred.jpg ../../license.txt"
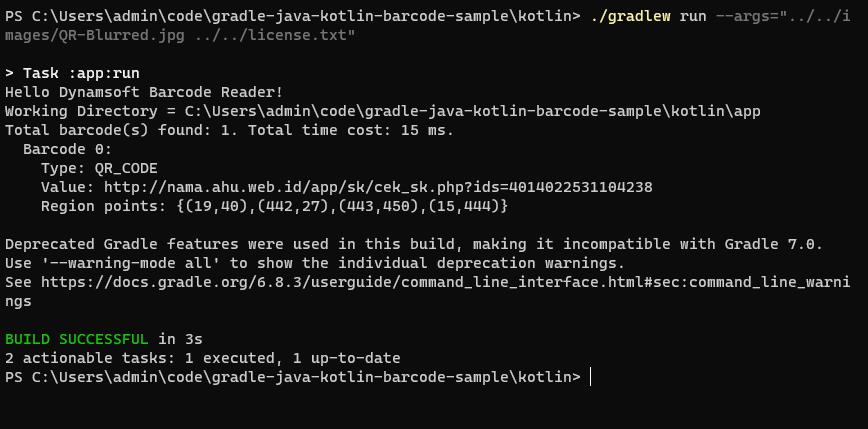
如果没有license,程序也可以运行,但是结果会被混淆。可以申请一个免费的30天试用license来显示正确的结果。
使用Travis CI测试Windows, Linux和Mac
如果想测试下这个命令行扫码程序是否可以在Windows, Linux和Mac上正常运行,可以配置.travis.yml文件:
language: java

jobs:
  include:
    - name: "Linux"
      os: linux
    - name: "macOS"
      os: osx
    - name: "Windows"
      os: windows
      language: shell
      before_install:
        - choco install jdk8 -params 'installdir=c:\\jdk' -y;
        - export JAVA_HOME=${JAVA_HOME:-/c/jdk};
      env: PATH=/c/jdk/bin:$PATH

branches:
  only:
    - main

script:
  - if [[ ${TRAVIS_OS_NAME} != "windows" ]]; then
        chmod +x java/gradlew;
        chmod +x kotlin/gradlew;
    fi
  - cd java
  - ./gradlew test
  - ./gradlew run --args="../../images/AllSupportedBarcodeTypes.png"
  - cd ..
  - cd kotlin
  - ./gradlew test
  - ./gradlew run --args="../../images/AllSupportedBarcodeTypes.png"
Travis CI的Windows虚拟机目前不支持Java,可以尝试手动安装。在Linux和Mac上需要用chmod +x修改gradlew的权限。
源码
https://github.com/yushulx/gradle-java-kotlin-barcode-sample
内容总结
以上是互联网集市为您收集整理的如何用Java和Kotlin实现高性能桌面条形码扫描全部内容,希望文章能够帮你解决如何用Java和Kotlin实现高性能桌面条形码扫描所遇到的程序开发问题。 如果觉得互联网集市技术教程内容还不错,欢迎将互联网集市网站推荐给程序员好友。
内容备注
版权声明:本文内容由互联网用户自发贡献,该文观点与技术仅代表作者本人。本站仅提供信息存储空间服务,不拥有所有权,不承担相关法律责任。如发现本站有涉嫌侵权/违法违规的内容, 请发送邮件至 gblab@vip.qq.com 举报,一经查实,本站将立刻删除。
内容手机端
扫描二维码推送至手机访问。