Vue 基于node npm & vue-cli & element UI创建vue单页应用
内容导读
互联网集市收集整理的这篇技术教程文章主要介绍了Vue 基于node npm & vue-cli & element UI创建vue单页应用,小编现在分享给大家,供广大互联网技能从业者学习和参考。文章包含3958字,纯文字阅读大概需要6分钟。
内容图文

基于node npm & vue-cli & element UI创建vue单页应用
开发环境
Win 10
node-v10.15.3-x64.msi
下载地址:
安装node
安装vue-cli
1、安装node-v10.15.3-x64.msi
2、设置注册地址
因为npm官方仓库在国外,有时候下载速度会非常慢,不过有淘宝镜像可以使用,下载包的速度很快。而且淘宝镜像是定时更新同步npm的官方仓库的。
npm config set registry https://registry.npm.taobao.org
这样,npm在执行安装包的命令时,会先从淘宝镜像去下载包。
如果不设置,安装包过程中可能出现如下错误
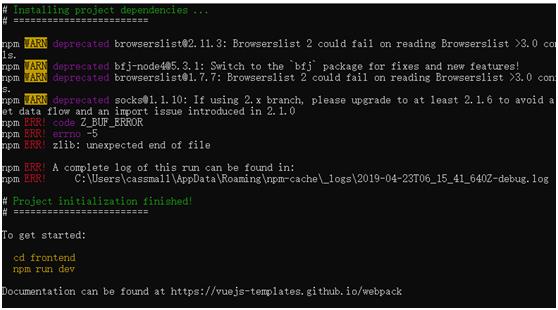
npm ERR! code Z_BUF_ERROR
npm ERR! errno -5
npm ERR! zlib: unexpected end of file
npm ERR! A complete log of this run can be found in:
3、安装全局脚手架工具vue-cli
npm install vue-cli -g
创建vue项目
1、进入到存放项目根目录,执行vue-init webpack <package>命令
cd /d E:\MyProjects\TMP
E:\MyProjects\TMP>vue-init webpack frontend
? Project name (frontend)待输入项目名,可直接按Enter键,或者输入其它(括号中都部分为默认值,下同)
? Project description (A Vue.js project) 待输入项目名,可直接按Enter键,或者输入其它
? Author待输入作者名称
? Vue build (Use arrow keys)
> Runtime + Compiler: recommended for most users运行时编译,可按上下方向键切换选项,选好后按Enter键,到此处可直接按Enter键
Runtime-only: about 6KB lighter min+gzip, but templates (or any Vue-specific HTML) are ONLY allowed in .vue files - render functions are required elsewhere 只运行时
? Install vue-router? (Y/n) 是否安装vue-router输入Y,按Enter键
? Use ESLint to lint your code? (Y/n) 是否在代码中使用ESLint输入n,按Enter键
? Set up unit tests (Y/n) 输入n,按回车键,即不设置单元测试
? Setup e2e tests with Nightwatch? (Y/n) 是否使用E2E 黑盒测试,输入n,按回车键,
? Should we run `npm install` for you after the project has been created? (recommended) (Use arrow keys)
> Yes, use NPM 项目创建后是否运行npm install按上下方向键选择,此处可选择该项,直接回车,如果选择No, I will handle that myself,则执行npm run dev之前,需要执行npm install
Yes, use Yarn
No, I will handle that myself
... 略
cd frontend
npm run dev
... 略
注意:
1、 执行vue-init命令后,会出现交互式等待,等待输入、选择(通过按方向键),具体输入、选择如上
2、验证
E:\MyProjects\TMP>cd frontend
E:\MyProjects\TMP\frontend>npm run dev
……略
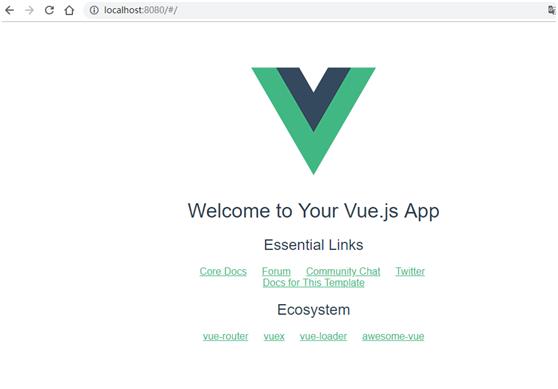
15:16:15 I Your application is running here: http://localhost:8080
浏览器访问:
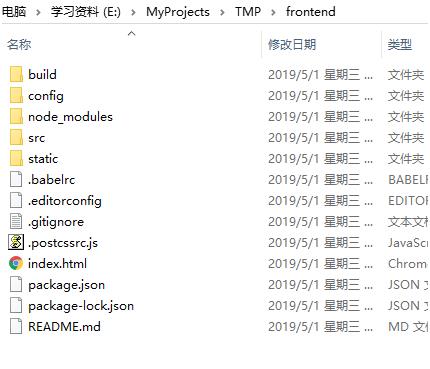
至此,项目文件结构如下
运行编译vue项目
1、修改frontend/index.html,如下,添加一下带背景色内容<p>hello my vue</p>
<!DOCTYPE html>
<html>
<head>
<meta charset="utf-8">
<meta name="viewport" content="width=device-width,initial-scale=1.0">
<title>frontend</title>
</head>
<body>
<div id="app"></div>
<!-- built files will be auto injected -->
<p>hello my vue</p>
</body>
</html>
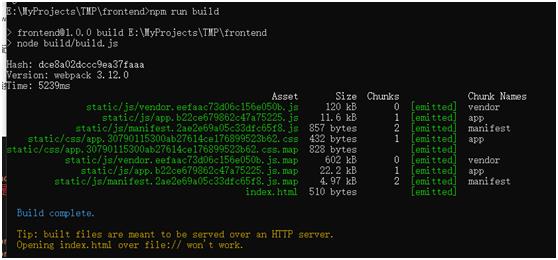
2、在vue项目根目录(例中为frontend目录)下,cmd命令行运行npm run build,运行完成后,会在当前目录下生成dist目录,里面包含一个 index.html 和一个文件夹static。
参考链接:
https://v1-cn.vuejs.org/guide/installation.html
安装element-ui
E:\MyProjects\TMP>cd frontend
E:\MyProjects\TMP\frontend>npm i element-ui
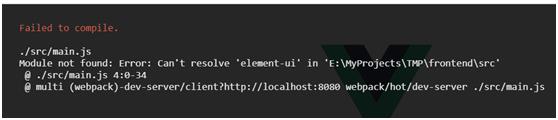
注意,如上,先要进入vue项目所在目录(例中为frontend目录),然后执行 npm i element-ui命令,不然后面运行会出现以下错误:
如果需要按需引用element-ui,继续执行以下命令
npm install babel-plugin-component –D
修改main.js
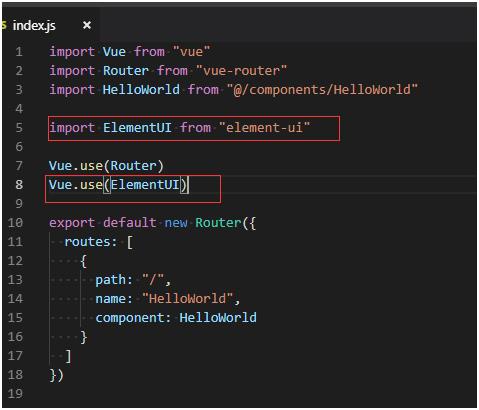
修改main.js文件
两种导入方式
1、 导入整个element-ui
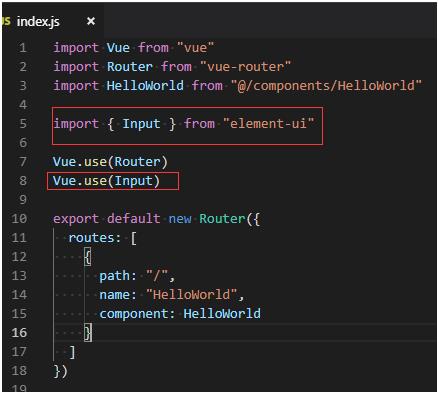
2、按需引用(假设插件已经安装)
修改App.vue
如下,修改、添加带背景色内容
<template>
<div id="app">
<img src="./assets/logo.png">
<router-view/>
<el-input v-model="input" placeholder="请输入内容">输入框</el-input>
</div>
</template>
<script>
export default {
name: 'App',
data() {
return {
input: ''
}
}
}
</script>
<style>
#app {
font-family: 'Avenir', Helvetica, Arial, sans-serif;
-webkit-font-smoothing: antialiased;
-moz-osx-font-smoothing: grayscale;
text-align: center;
color: #2c3e50;
margin-top: 60px;
}
</style>
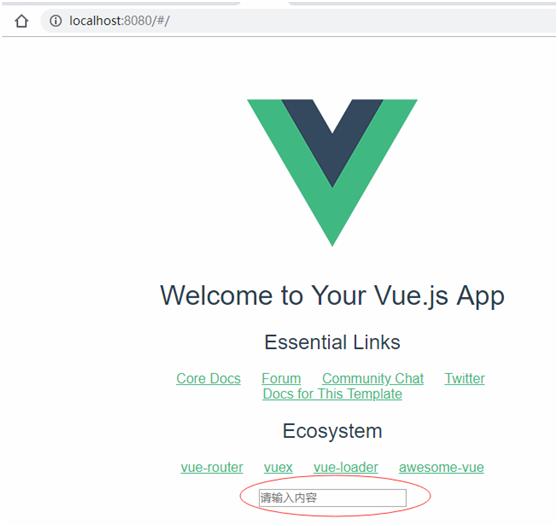
浏览验证
参考链接:
https://cloud.tencent.com/developer/section/1489858
https://cloud.tencent.com/developer/section/1489859
内容总结
以上是互联网集市为您收集整理的Vue 基于node npm & vue-cli & element UI创建vue单页应用全部内容,希望文章能够帮你解决Vue 基于node npm & vue-cli & element UI创建vue单页应用所遇到的程序开发问题。 如果觉得互联网集市技术教程内容还不错,欢迎将互联网集市网站推荐给程序员好友。
内容备注
版权声明:本文内容由互联网用户自发贡献,该文观点与技术仅代表作者本人。本站仅提供信息存储空间服务,不拥有所有权,不承担相关法律责任。如发现本站有涉嫌侵权/违法违规的内容, 请发送邮件至 gblab@vip.qq.com 举报,一经查实,本站将立刻删除。
内容手机端
扫描二维码推送至手机访问。