Linux(Centos7.6)下安装Gitlab详细教程
内容导读
互联网集市收集整理的这篇技术教程文章主要介绍了Linux(Centos7.6)下安装Gitlab详细教程,小编现在分享给大家,供广大互联网技能从业者学习和参考。文章包含1916字,纯文字阅读大概需要3分钟。
内容图文
下安装Gitlab详细教程")
Gitlab搭建操作步骤:
1、查看Linux系统版本确认gitlab需要使用的安装包类型
使用命令:cat /etc/redhat-release
CentOS Linux release 7.6.1810 (Core)
本系统是CentOS 7,对应官方教程地址:https://about.gitlab.com/installation/#centos-7
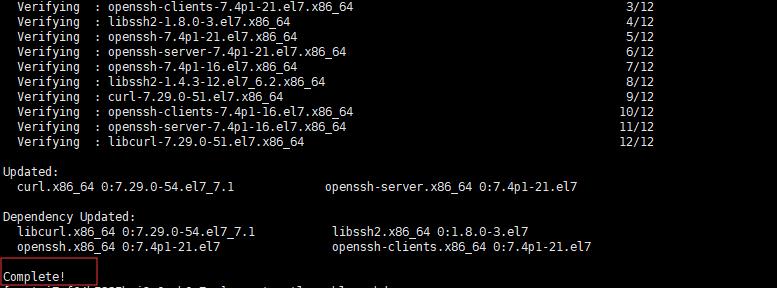
2、安装 curl,policycoreutils-python,openssh-server服务
使用命令:yum install -y curl policycoreutils-python openssh-server
出现以下界面,说明成功
3、将SSH服务设置成开机自启动
命令:systemctl enable sshd
4、启动SSH服务
命令:systemctl start sshd
5、开启防火墙
命令:systemctl start firewalld或者service firewalld start
6、添加http服务到firewalld,允许http服务通过, pemmanent表示永久生效,若不加--permanent系统下次启动后就会失效
firewall-cmd --permanent --add-service=http
firewall-cmd --permanent --add-service=https
7、重启防火墙
命令:(sudo) systemctl reload firewalld
8、接下来,安装Postfix以发送通知邮件,并将postfix服务设置成开机自启动
Linux centos 查看postfix已经安装 rpm -qa |grep postfix,如果安装过,则无需安装。
安装postfix:
命令:sudo yum install postfix
设置postfix自启动
命令:sudo systemctl enable postfix
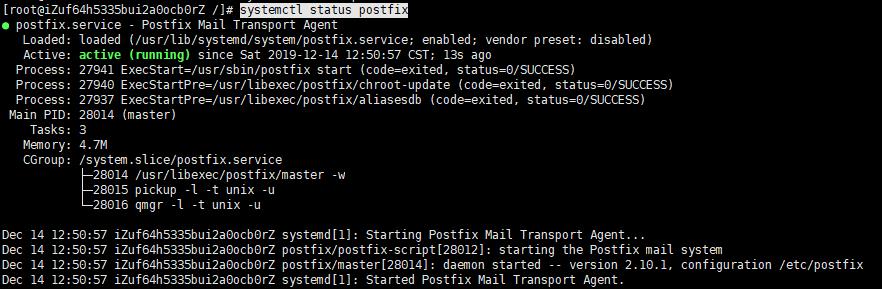
9、启动Postfix
命令:ssudo systemctl start postfix
可能会启动失败:Job for postfix.service failed because the control process exited with error code. See "systemctl status postfix.service" and "journalctl -xe" for details.
这是因为防火墙或者配置文件导致,无法启动的邮件服务,首先关闭防火墙,修改配置文件vim /etc/postfix/main.cf
把inet_interfaces = localhost注释掉,把inet_interfaces = all的注释打开,然后就可以启动了。
可以通过命令:systemctl status postfix查看是否启动成功,下图所示标识启动成功
10、下载镜像
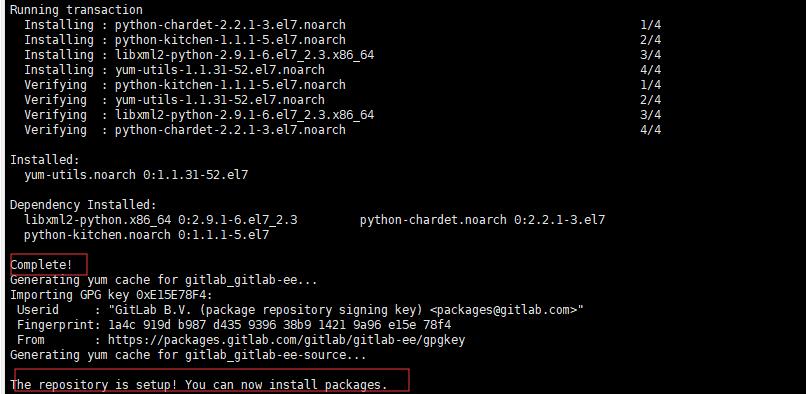
官网链接:https://packages.gitlab.com/gitlab/gitlab-ee/packages/el/7/gitlab-ee-12.5.4-ee.0.el7.x86_64.rpm

使用命令下载镜像:curl -s https://packages.gitlab.com/install/repositories/gitlab/gitlab-ee/script.rpm.sh | sudo bash

出现下图所示,标识reposity镜像下载成功
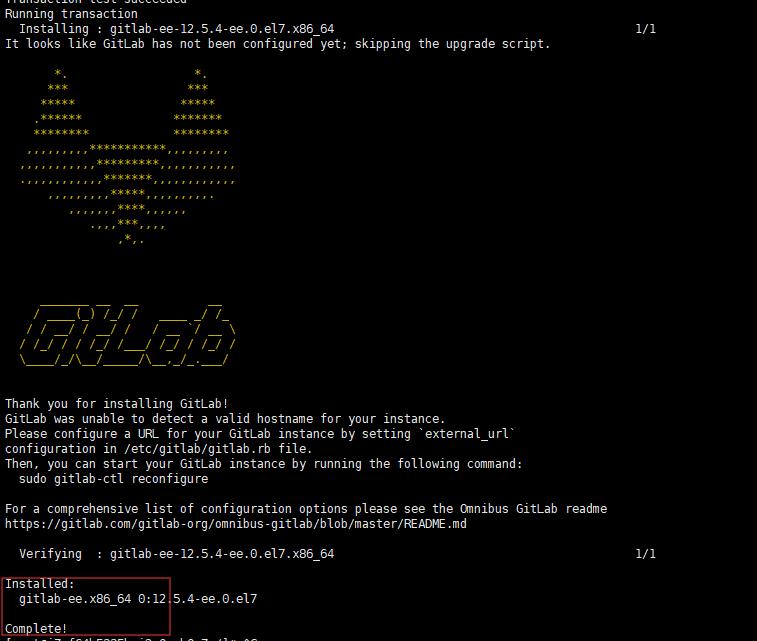
安装镜像:sudo yum install -y gitlab-ee-12.5.4-ee.0.el7.x86_64,出现下图所示,标识安装成功
11、
内容总结
以上是互联网集市为您收集整理的Linux(Centos7.6)下安装Gitlab详细教程全部内容,希望文章能够帮你解决Linux(Centos7.6)下安装Gitlab详细教程所遇到的程序开发问题。 如果觉得互联网集市技术教程内容还不错,欢迎将互联网集市网站推荐给程序员好友。
内容备注
版权声明:本文内容由互联网用户自发贡献,该文观点与技术仅代表作者本人。本站仅提供信息存储空间服务,不拥有所有权,不承担相关法律责任。如发现本站有涉嫌侵权/违法违规的内容, 请发送邮件至 gblab@vip.qq.com 举报,一经查实,本站将立刻删除。
内容手机端
扫描二维码推送至手机访问。