首页 / 更多教程 / OpenCV——饱和度调整
OpenCV——饱和度调整
内容导读
互联网集市收集整理的这篇技术教程文章主要介绍了OpenCV——饱和度调整,小编现在分享给大家,供广大互联网技能从业者学习和参考。文章包含2446字,纯文字阅读大概需要4分钟。
内容图文

参考:
// define head function
#ifndef PS_ALGORITHM_H_INCLUDED
#define PS_ALGORITHM_H_INCLUDED
#include <iostream>
#include <string>
#include "cv.h"
#include "highgui.h"
#include "cxmat.hpp"
#include "cxcore.hpp"
using namespace std;
using namespace cv;
void Show_Image(Mat&, const string &);

#endif // PS_ALGORITHM_H_INCLUDED

/*
This program adjust
the saturation.
*/
#include "PS_Algorithm.h"
#include <time.h>
using namespace std;
using namespace cv;
int main(void)
{
    string Img_name("4.jpg");
    Mat Img;
    Img=imread(Img_name);
    Show_Image(Img, Img_name);
    Mat Img_out(Img.size(), CV_32FC3);
    Img.convertTo(Img_out, CV_32FC3);
    Mat Img_in(Img.size(), CV_32FC3);
    Img.convertTo(Img_in, CV_32FC3);
    // define the iterator of the input image
    MatIterator_<Vec3f> inp_begin, inp_end;
    inp_begin=Img_in.begin<Vec3f>();
    inp_end =Img_in.end<Vec3f>();

    // define the iterator of the output image
    MatIterator_<Vec3f> out_begin, out_end;
    out_begin=Img_out.begin<Vec3f>();
    out_end =Img_out.end<Vec3f>();

    // increment (-100.0, 100.0)
    float Increment=-50.0/100.0;

    float delta=0;
    float minVal, maxVal;
    float t1, t2, t3;
    float L,S;
    float alpha;

    for(; inp_begin!=inp_end; inp_begin++, out_begin++)
    {
        t1=(*inp_begin)[0];
        t2=(*inp_begin)[1];
        t3=(*inp_begin)[2];

        minVal=std::min(std::min(t1,t2),t3);
        maxVal=std::max(std::max(t1,t2),t3);
        delta=(maxVal-minVal)/255.0;
        L=0.5*(maxVal+minVal)/255.0;
        S=std::max(0.5*delta/L, 0.5*delta/(1-L));

        if (Increment>0)
        {
            alpha=max(S, 1-Increment);
            alpha=1.0/alpha-1;
            (*out_begin)[0]=(*inp_begin)[0]+((*inp_begin)[0]-L*255.0)*alpha;
            (*out_begin)[1]=(*inp_begin)[1]+((*inp_begin)[1]-L*255.0)*alpha;
            (*out_begin)[2]=(*inp_begin)[2]+((*inp_begin)[2]-L*255.0)*alpha;
        }
        else
        {
            alpha=Increment;
            (*out_begin)[0]=L*255.0+((*inp_begin)[0]-L*255.0)*(1+alpha);
            (*out_begin)[1]=L*255.0+((*inp_begin)[1]-L*255.0)*(1+alpha);
            (*out_begin)[2]=L*255.0+((*inp_begin)[2]-L*255.0)*(1+alpha);

        }
    }
    Img_out=Img_out/255.0;
    Show_Image(Img_out, "out");
    imwrite("out.jpg", Img_out*255);
    waitKey();
    cout<<"All is well."<<endl;
}

// define the show image
#include "PS_Algorithm.h"
#include <iostream>
#include <string>

using namespace std;
using namespace cv;

void Show_Image(Mat& Image, const string& str)
{
    namedWindow(str.c_str(),CV_WINDOW_AUTOSIZE);
    imshow(str.c_str(), Image);

}
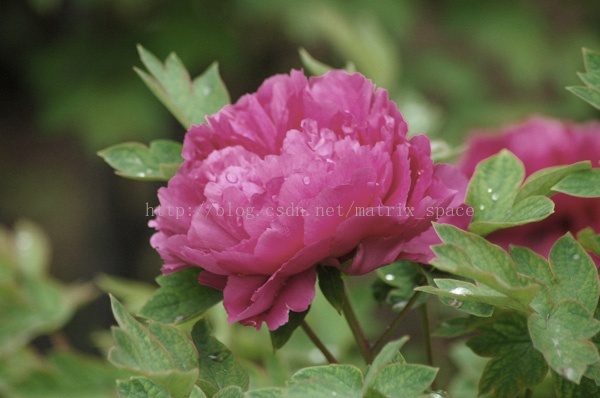
原图

效果图
原文:http://blog.csdn.net/matrix_space/article/details/40652691
内容总结
以上是互联网集市为您收集整理的OpenCV——饱和度调整全部内容,希望文章能够帮你解决OpenCV——饱和度调整所遇到的程序开发问题。 如果觉得互联网集市技术教程内容还不错,欢迎将互联网集市网站推荐给程序员好友。
内容备注
版权声明:本文内容由互联网用户自发贡献,该文观点与技术仅代表作者本人。本站仅提供信息存储空间服务,不拥有所有权,不承担相关法律责任。如发现本站有涉嫌侵权/违法违规的内容, 请发送邮件至 gblab@vip.qq.com 举报,一经查实,本站将立刻删除。
内容手机端
扫描二维码推送至手机访问。
来源:【匿名】