android 自定义带动画的统计饼图
内容导读
互联网集市收集整理的这篇技术教程文章主要介绍了android 自定义带动画的统计饼图,小编现在分享给大家,供广大互联网技能从业者学习和参考。文章包含7615字,纯文字阅读大概需要11分钟。
内容图文

闲来无事,发现市面上好多app都有饼图统计的功能,得空自己实现以下,菜鸟一只,求指教,轻喷!
基本要求:
- 在XML布局中可配置控件的属性。
- 遵守基本的安卓规范
View基本绘制原理:
首先计算View的大小,测量View的大小主要有三个:
public final void measure(int widthMeasureSpec, int heightMeasureSpec)
protected void onMeasure(int widthMeasureSpec, int heightMeasureSpec)
protected final void setMeasuredDimension(int measuredWidth, int measuredHeight)
measure()调用onMeasure(),onMeasure取得宽高然后调用setMeasureDimension()保存测量结果,nMeasure在view的子类中重写。
注意MeasureSpec这个帮助类:
(1) UPSPECIFIED :父容器对于子容器没有任何限制,子容器想要多大就多大.如wrap_content
(2) EXACTLY父容器已经为子容器设置了尺寸,子容器应当服从这些边界,不论子容器想要多大的空间.如match_parent或者具体的值50dp
(3) AT_MOST子容器可以是声明大小内的任意大小.
2.)View的位置
public void layout(int l, int t, int r, int b)
protected boolean setFrame(int left, int top, int right, int bottom)
protected void onLayout(boolean changed, int left, int top, int right, int bottom)
layout通过调用setFrame(l,t,r,b),子视图在父视图中的具体位置,onLayout一般只会在自定义ViewGroup中才会使用,表示子视图在父视图的排列规则以及位置
3.)绘制就是画成什么样子
public void draw(Canvas canvas)
protected void onDraw(Canvas canvas)
通过调用draw函数进行视图绘制,在View类中onDraw函数是个空函数,最终的绘制需求需要在自定义的onDraw函数中进行实现,比如ImageView完成图片的绘制,如果自定义ViewGroup这个函数则不需要重载。
具体事例如下:

                package
                 com.example.customview.view;


                import
                 java.util.Timer;

                import
                 java.util.TimerTask;


                import
                 com.example.customview.R;


                import
                 android.content.Context;

                import
                 android.content.res.TypedArray;

                import
                 android.graphics.Canvas;

                import
                 android.graphics.Color;

                import
                 android.graphics.Paint;

                import
                 android.graphics.Point;

                import
                 android.graphics.RectF;

                import
                 android.support.v4.app.TaskStackBuilder;

                import
                 android.util.AttributeSet;

                import
                 android.util.Log;

                import
                 android.view.View;


                public
                class CirclePercentView extends View {
    privatefinalstatic String TAG = CirclePercentView.class.getSimpleName();
    private Paint mPaint;
    private RectF oval;
    // 总数privateint max;

    privateint value;
    // 背景圆的颜色privateint backColor;
    // 圆环的颜色privateint frontColor;

    privatefloat tempValue;
    // 画圆环的速度privateint step;
    privatefloat maxAngle;
    private Timer timer;
    // 字体大小privatefloat textSize;
    // 字体颜色privateint textColor;
    // 统计数值与统计描述的上下间距privatefloat margin;
    // 园环宽度privatefloat borderWidth;
    // 统计描述文本private String descripe;

    public CirclePercentView(Context context, AttributeSet attrs) {
        super(context, attrs);
        init(context, attrs);
    }

    public CirclePercentView(Context context, AttributeSet attrs, int defStyleAttr) {
        super(context, attrs, defStyleAttr);
        init(context, attrs);
    }

    privatevoid init(Context context, AttributeSet attrs) {
        // 自定义属性
        TypedArray ta = context.obtainStyledAttributes(attrs,
                R.styleable.CirclePercentView);
        max = ta.getInt(R.styleable.CirclePercentView_maxValue, 0);
        value = ta.getInt(R.styleable.CirclePercentView_value, 0);
        backColor = ta.getColor(R.styleable.CirclePercentView_backgroudColor,
                Color.GRAY);
        frontColor = ta
                .getColor(R.styleable.CirclePercentView_frontColor, Color.BLUE);
        textColor = ta.getColor(R.styleable.CirclePercentView_textColor, Color.BLACK);
        textSize = ta.getDimension(R.styleable.CirclePercentView_textFont, 16);
        margin = ta.getDimension(R.styleable.CirclePercentView_textMargin, 16);
        borderWidth = ta.getDimension(R.styleable.CirclePercentView_borderWidth, 8);
        descripe = ta.getString(R.styleable.CirclePercentView_descripe);
        ta.recycle();
        // 计算角度
        maxAngle = value * 360f / max;
        mPaint = new Paint();
        mPaint.setAntiAlias(true);
        oval = new RectF();
        timer = new Timer();
        startAnim(100, 5000);
    }

    /**
     *
     * @param t1
     *            间隔时长
     * @param t2
     *            动画总时长
     */privatevoid startAnim(long t1, long t2) {
        step = (int) (maxAngle / t2 * t1);
        startAnim();
    }

    privatevoid startAnim() {
        timer.scheduleAtFixedRate(new TimerTask() {

            @Override
            publicvoid run() {
                Log.e("tempValuetempValuetempValue", tempValue + "maxAngle"
                        + maxAngle + "maxAngle" + maxAngle);
                if (tempValue + step >= maxAngle) {
                    tempValue = maxAngle;
                    timer.cancel();
                } else {
                    tempValue += step;
                }
                // 注意此处postInvalidate()与invalidate()的区别                postInvalidate();

            }
        }, 100, 100);
    }

    @Override
    protectedvoid onMeasure(int widthMeasureSpec, int heightMeasureSpec) {
        super.onMeasure(widthMeasureSpec, heightMeasureSpec);
        int widthMode = MeasureSpec.getMode(widthMeasureSpec);
        int widthSize = MeasureSpec.getSize(widthMeasureSpec);
        int heightMode = MeasureSpec.getMode(heightMeasureSpec);
        int heightSize = MeasureSpec.getSize(heightMeasureSpec);
        Log.e(TAG, "onMeasure--widthMode-->" + widthMode);
        switch (widthMode) {
        case MeasureSpec.EXACTLY:
            Log.e(TAG, "EXACTLY-->EXACTLY" + widthSize);
            setMeasuredDimension(widthSize, heightSize);
            break;
        case MeasureSpec.AT_MOST:
            Log.e(TAG, "AT_MOST-->AT_MOST" + widthSize);
            break;
        case MeasureSpec.UNSPECIFIED:
            Log.e(TAG, "UNSPECIFIED-->UNSPECIFIED" + widthSize);
            break;
        }
        Log.e(TAG, "onMeasure--widthSize-->" + widthSize);
        Log.e(TAG, "onMeasure--heightMode-->" + heightMode);
        Log.e(TAG, "onMeasure--heightSize-->" + heightSize);
    }

    @Override
    protectedvoid onLayout(boolean changed, int left, int top, int right,
            int bottom) {
        super.onLayout(changed, left, top, right, bottom);
        Log.e(TAG, "onLayout");
    }

    @Override
    protectedvoid onDraw(Canvas canvas) {
        super.onDraw(canvas);

        mPaint.setColor(backColor);
        // FILL填充, STROKE描边,FILL_AND_STROKE填充和描边        mPaint.setStyle(Paint.Style.FILL_AND_STROKE);
        int with = getWidth();
        int height = getHeight();
        // 取最小值作为圆的直径int size = Math.min(with, height);
        Log.e(TAG, "onDraw---->" + with + "*" + height);
        // 计算圆的半径float radius = (size - 2 * borderWidth) / 2;
        // 画背景圆
        canvas.drawCircle(size / 2, size / 2, radius, mPaint);
        // 画文本
        mPaint.setStrokeWidth(0);
        mPaint.setColor(textColor);
        mPaint.setTextSize(textSize);
        canvas.drawText(descripe, radius - mPaint.measureText(descripe) * 0.5f,
                size / 2 + textSize + margin, mPaint);
        float textHalfWidth = mPaint
                .measureText((int) (tempValue / 360 * 100 + 0.5f) + "%") * 0.5f;
        canvas.drawText((int) (tempValue / 360 * 100 + 0.5f) + "%", radius
                - textHalfWidth, size / 2, mPaint);
        // 画圆环        mPaint.setStyle(Paint.Style.STROKE);
        mPaint.setColor(frontColor);
        mPaint.setStrokeWidth(borderWidth);
        // 放圆的矩形
        oval.set(size / 2 - radius, size / 2 - radius, size / 2 + radius, size
                / 2 + radius);
        // 注意第三个参数
        canvas.drawArc(oval, 0, tempValue, false, mPaint); // 根据进度画圆弧
    }
}
attrs.xml如下:
具体使用如下:
                <?
                xml version="1.0" encoding="utf-8"
                ?>
                <
                resources
                >
                <
                declare-styleable
                name
                ="CirclePercentView"
                >
                <
                attr
                name
                ="maxValue"
                 format
                ="integer"
                />
                <
                attr
                name
                ="value"
                 format
                ="integer"
                />
                <
                attr
                name
                ="backgroudColor"
                 format
                ="color|reference"
                />
                <
                attr
                name
                ="frontColor"
                 format
                ="color|reference"
                />
                <
                attr
                name
                ="textFont"
                 format
                ="dimension|reference"
                />
                <
                attr
                name
                ="textColor"
                 format
                ="color|reference"
                />
                <
                attr
                name
                ="textMargin"
                 format
                ="dimension|reference"
                />
                <
                attr
                name
                ="borderWidth"
                 format
                ="dimension|reference"
                />
                <
                attr
                name
                ="descripe"
                 format
                ="string|reference"
                />
                </
                declare-styleable
                >
                </
                resources
                >
                <
                LinearLayout
                xmlns:android
                ="http://schemas.android.com/apk/res/android"

    xmlns:tools
                ="http://schemas.android.com/tools"

    xmlns:app
                ="http://schemas.android.com/apk/res-auto"

    android:layout_width
                ="match_parent"

    android:layout_height
                ="match_parent"

    android:orientation
                ="vertical"
                >
                <
                com.example.customview.view.CirclePercentView

                android:layout_width
                ="match_parent"

        android:layout_height
                ="match_parent"

        android:layout_margin
                ="10dp"

        app:backgroudColor
                ="#cccccc"

        app:borderWidth
                ="12dp"

        app:frontColor
                ="#ff00ff"

        app:maxValue
                ="360"

        app:textColor
                ="#ececcc"

        app:textFont
                ="24sp"

        app:textMargin
                ="0dp"

        app:value
                ="270"

        app:descripe
                ="参与人数"
                />
                </
                LinearLayout
                >
也可以在代码中通过暴露方法对各个属性的值进行设置,这里就不举例了
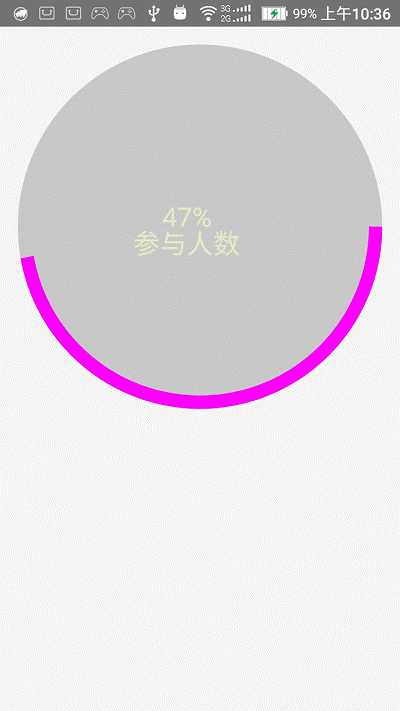
运行结果,如下

原文:http://www.cnblogs.com/sharkli/p/5966140.html
内容总结
以上是互联网集市为您收集整理的android 自定义带动画的统计饼图全部内容,希望文章能够帮你解决android 自定义带动画的统计饼图所遇到的程序开发问题。 如果觉得互联网集市技术教程内容还不错,欢迎将互联网集市网站推荐给程序员好友。
内容备注
版权声明:本文内容由互联网用户自发贡献,该文观点与技术仅代表作者本人。本站仅提供信息存储空间服务,不拥有所有权,不承担相关法律责任。如发现本站有涉嫌侵权/违法违规的内容, 请发送邮件至 gblab@vip.qq.com 举报,一经查实,本站将立刻删除。
内容手机端
扫描二维码推送至手机访问。