『TensorFlow』迁移学习_他山之石,可以攻玉
内容导读
互联网集市收集整理的这篇技术教程文章主要介绍了『TensorFlow』迁移学习_他山之石,可以攻玉,小编现在分享给大家,供广大互联网技能从业者学习和参考。文章包含12882字,纯文字阅读大概需要19分钟。
内容图文

目的:
使用google已经训练好的模型,将最后的全连接层修改为我们自己的全连接层,将原有的1000分类分类器修改为我们自己的5分类分类器,利用原有模型的特征提取能力实现我们自己数据对应模型的快速训练。实际中对于一个陌生的数据集,原有模型经过不高的迭代次数即可获得很好的准确率。
实战:
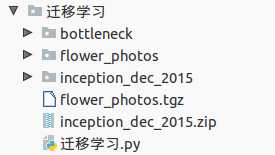
实机文件夹如下,两个压缩文件可以忽略:
花朵图片数据下载:
1 curl -O http://download.tensorflow.org/example_images/flower_photos.tgz
已经训练好的Inception-v3的1000分类模型下载:
            1
            wget https://storage.googleapis.com/download.tensorflow.org/models/inception_dec_2015.zip
迁移学习代码如下:
              1
            import
             glob

              2
            import
             os.path

              3
            import
             random

              4
            import
             numpy as np

              5
            import
             tensorflow as tf

              6
            from tensorflow.python.platform import gfile
  7  8‘‘‘模型及样本路径设置‘‘‘  9 10 BOTTLENECK_TENSOR_SIZE = 2048                          # 瓶颈层节点个数 11 BOTTLENECK_TENSOR_NAME = ‘pool_3/_reshape:0‘# 瓶颈层输出张量名称 12 JPEG_DATA_TENSOR_NAME  = ‘DecodeJpeg/contents:0‘# 输入层张量名称 13 14 MODEL_DIR  = ‘./inception_dec_2015‘# 模型存放文件夹 15 MODEL_FILE = ‘tensorflow_inception_graph.pb‘# 模型名 16 17 CACHE_DIR  = ‘./bottleneck‘# 瓶颈输出中转文件夹 18 INPUT_DATA = ‘./flower_photos‘# 数据文件夹 19 20 VALIDATION_PERCENTAGE = 10                             # 验证用数据百分比 21 TEST_PERCENTAGE       = 10                             # 测试用数据百分比 22 23‘‘‘新添加神经网络部参数设置‘‘‘ 24 25 LEARNING_RATE = 0.01
 26 STEP          = 4000
 27 BATCH         = 100
 28 29def creat_image_lists(validation_percentage,testing_percentage):
 30‘‘‘ 31    将图片(无路径文件名)信息保存在字典中
 32    :param validation_percentage: 验证数据百分比
 33    :param testing_percentage:    测试数据百分比
 34    :return:                      字典{标签:{文件夹:str,训练:[],验证:[],测试:[]},...}
 35‘‘‘ 36     result = {}
 37     sub_dirs = [x[0] for x in os.walk(INPUT_DATA)]
 38# 由于os.walk()列表第一个是‘./‘,所以排除 39     is_root_dir = True            #<----- 40# 遍历各个label文件夹 41for sub_dir in sub_dirs:
 42if is_root_dir:           #<----- 43             is_root_dir = False
 44continue 45 46         extensions = [‘jpg‘, ‘jpeg‘, ‘JPG‘, ‘JPEG‘]
 47         file_list  = []
 48         dir_name   = os.path.basename(sub_dir)
 49# 遍历各个可能的文件尾缀 50for extension in extensions:
 51# file_glob = os.path.join(INPUT_DATA,dir_name,‘*.‘+extension) 52             file_glob = os.path.join(sub_dir, ‘*.‘ + extension)
 53             file_list.extend(glob.glob(file_glob))      # 匹配并收集路径&文件名 54# print(file_glob,‘\n‘,glob.glob(file_glob)) 55ifnot file_list: continue 56 57         label_name = dir_name.lower()                   # 生成label,实际就是小写文件夹名 58 59# 初始化各个路径&文件收集list 60         training_images   = []
 61         testing_images    = []
 62         validation_images = []
 63 64# 去路径,只保留文件名 65for file_name in file_list:
 66             base_name = os.path.basename(file_name)
 67 68# 随机划分数据给验证和测试 69             chance = np.random.randint(100)
 70if chance < validation_percentage:
 71                validation_images.append(base_name)
 72elif chance < (validation_percentage + testing_percentage):
 73                testing_images.append(base_name)
 74else:
 75                training_images.append(base_name)
 76# 本标签字典项生成 77         result[label_name] = {
 78‘dir‘        : dir_name,
 79‘training‘   : training_images,
 80‘testing‘    : testing_images,
 81‘validation‘ : validation_images
 82        }
 83return result
 84 85def get_random_cached_bottlenecks(sess,n_class,image_lists,batch,category,jpeg_data_tensor,bottleneck_tensor):
 86‘‘‘ 87    函数随机获取一个batch的图片作为训练数据
 88    :param sess:
 89    :param n_class:
 90    :param image_lists:
 91    :param how_many:
 92    :param category:            training or validation
 93    :param jpeg_data_tensor:
 94    :param bottleneck_tensor:
 95    :return:                    瓶颈张量输出 & label
 96‘‘‘ 97     bottlenecks   = []
 98     ground_truths = []
 99for i in range(batch):
100         label_index = random.randrange(n_class)              # 标签索引随机生成101         label_name  = list(image_lists.keys())[label_index]  # 标签名获取102         image_index = random.randrange(65536)                # 标签内图片索引随机种子103# 瓶颈层张量104         bottleneck = get_or_create_bottleneck(               # 获取对应标签随机图片瓶颈张量105            sess,image_lists,label_name,image_index,category,
106            jpeg_data_tensor,bottleneck_tensor)
107         ground_truth = np.zeros(n_class,dtype=np.float32)
108         ground_truth[label_index] = 1.0                      # 标准结果[0,0,1,0...]109# 收集瓶颈张量和label110        bottlenecks.append(bottleneck)
111        ground_truths.append(ground_truth)
112return bottlenecks,ground_truths
113114def get_or_create_bottleneck(
115        sess,image_lists,label_name,index,category,jpeg_data_tensor,bottleneck_tensor):
116‘‘‘117    寻找已经计算且保存下来的特征向量,如果找不到则先计算这个特征向量,然后保存到文件
118    :param sess:
119    :param image_lists:       全图像字典
120    :param label_name:        当前标签
121    :param index:             图片索引
122    :param category:          training or validation
123    :param jpeg_data_tensor:
124    :param bottleneck_tensor:
125    :return:
126‘‘‘127     label_lists  = image_lists[label_name]          # 本标签字典获取 标签:{文件夹:str,训练:[],验证:[],测试:[]}128     sub_dir      = label_lists[‘dir‘]               # 获取标签值129     sub_dir_path = os.path.join(CACHE_DIR,sub_dir)  # 保存文件路径130ifnot os.path.exists(sub_dir_path):os.mkdir(sub_dir_path)
131     bottleneck_path = get_bottleneck_path(image_lists,label_name,index,category)
132ifnot os.path.exists(bottleneck_path):
133         image_path = get_image_path(image_lists, INPUT_DATA, label_name, index, category)
134#image_data = gfile.FastGFile(image_path,‘rb‘).read()135         image_data = open(image_path,‘rb‘).read()
136# print(gfile.FastGFile(image_path,‘rb‘).read()==open(image_path,‘rb‘).read())137# 生成向前传播后的瓶颈张量138         bottleneck_values = run_bottleneck_on_images(sess,image_data,jpeg_data_tensor,bottleneck_tensor)
139# list2string以便于写入文件140         bottleneck_string = ‘,‘.join(str(x) for x in bottleneck_values)
141# print(bottleneck_values)142# print(bottleneck_string)143         with open(bottleneck_path, ‘w‘) as bottleneck_file:
144            bottleneck_file.write(bottleneck_string)
145else:
146         with open(bottleneck_path, ‘r‘) as bottleneck_file:
147             bottleneck_string = bottleneck_file.read()
148         bottleneck_values = [float(x) for x in bottleneck_string.split(‘,‘)]
149# 返回的是list注意150return bottleneck_values
151152def run_bottleneck_on_images(sess,image_data,jpeg_data_tensor,bottleneck_tensor):
153‘‘‘154    使用加载的训练好的Inception-v3模型处理一张图片,得到这个图片的特征向量。
155    :param sess:              会话句柄
156    :param image_data:        图片文件句柄
157    :param jpeg_data_tensor:  输入张量句柄
158    :param bottleneck_tensor: 瓶颈张量句柄
159    :return:                  瓶颈张量值
160‘‘‘161# print(‘input:‘,len(image_data))162     bottleneck_values = sess.run(bottleneck_tensor,feed_dict={jpeg_data_tensor:image_data})
163     bottleneck_values = np.squeeze(bottleneck_values)
164# print(‘bottle:‘,len(bottleneck_values))165return bottleneck_values
166167def get_bottleneck_path(image_lists, label_name, index, category):
168‘‘‘169    获取一张图片的中转(featuremap)地址(添加txt)
170    :param image_lists:   全图片字典
171    :param label_name:    标签名
172    :param index:         随机数索引
173    :param category:      training or validation
174    :return:              中转(featuremap)地址(添加txt)
175‘‘‘176return get_image_path(image_lists, CACHE_DIR, label_name, index, category) + ‘.txt‘177178def get_image_path(image_lists, image_dir, label_name, index, category):
179‘‘‘180    通过类别名称、所属数据集和图片编号获取一张图片的中转(featuremap)地址(无txt)
181    :param image_lists: 全图片字典
182    :param image_dir:   外层文件夹(内部是标签文件夹)
183    :param label_name:  标签名
184    :param index:       随机数索引
185    :param category:    training or validation
186    :return:            图片中间变量地址
187‘‘‘188     label_lists   = image_lists[label_name]
189     category_list = label_lists[category]       # 获取目标category图片列表190     mod_index     = index % len(category_list)  # 随机获取一张图片的索引191     base_name     = category_list[mod_index]    # 通过索引获取图片名192return os.path.join(image_dir,label_lists[‘dir‘],base_name)
193194def get_test_bottlenecks(sess,image_lists,n_class,jpeg_data_tensor,bottleneck_tensor):
195‘‘‘196    获取全部的测试数据,计算输出
197    :param sess:
198    :param image_lists:
199    :param n_class:
200    :param jpeg_data_tensor:
201    :param bottleneck_tensor:
202    :return:                   瓶颈输出 & label
203‘‘‘204     bottlenecks  = []
205     ground_truths = []
206     label_name_list = list(image_lists.keys())
207for label_index,label_name in enumerate(image_lists[label_name_list]):
208         category = ‘testing‘209for index, unused_base_name in enumerate(image_lists[label_name][category]): # 索引, {文件名}210             bottleneck = get_or_create_bottleneck(
211                sess, image_lists, label_name, index,
212                category, jpeg_data_tensor, bottleneck_tensor)
213             ground_truth = np.zeros(n_class, dtype=np.float32)
214             ground_truth[label_index] = 1.0
215            bottlenecks.append(bottleneck)
216            ground_truths.append(ground_truth)
217return bottlenecks, ground_truths
218219def main():
220# 生成文件字典221     images_lists = creat_image_lists(VALIDATION_PERCENTAGE,TEST_PERCENTAGE)
222# 记录label种类(字典项数)223     n_class = len(images_lists.keys())
224225# 加载模型226# with gfile.FastGFile(os.path.join(MODEL_DIR,MODEL_FILE),‘rb‘) as f:   # 阅读器上下文227     with open(os.path.join(MODEL_DIR, MODEL_FILE), ‘rb‘) as f:            # 阅读器上下文228         graph_def = tf.GraphDef()                                         # 生成图229         graph_def.ParseFromString(f.read())                               # 图加载模型230# 加载图上节点张量(按照句柄理解)231     bottleneck_tensor,jpeg_data_tensor = tf.import_graph_def(             # 从图上读取张量,同时导入默认图232        graph_def,
233         return_elements=[BOTTLENECK_TENSOR_NAME,JPEG_DATA_TENSOR_NAME])
234235‘‘‘新的神经网络‘‘‘236# 输入层,由原模型输出层feed237     bottleneck_input   = tf.placeholder(tf.float32,[None,BOTTLENECK_TENSOR_SIZE],name=‘BottleneckInputPlaceholder‘)
238     ground_truth_input = tf.placeholder(tf.float32,[None,n_class]               ,name=‘GroundTruthInput‘)
239# 全连接层240     with tf.name_scope(‘final_train_ops‘):
241         Weights = tf.Variable(tf.truncated_normal([BOTTLENECK_TENSOR_SIZE,n_class],stddev=0.001))
242         biases  = tf.Variable(tf.zeros([n_class]))
243         logits  = tf.matmul(bottleneck_input,Weights) + biases
244         final_tensor = tf.nn.softmax(logits)
245# 交叉熵损失函数246     cross_entropy = tf.reduce_mean(tf.nn.softmax_cross_entropy_with_logits(logits=logits,labels=ground_truth_input))
247# 优化算法选择248     train_step    = tf.train.GradientDescentOptimizer(LEARNING_RATE).minimize(cross_entropy)
249250# 正确率251     with tf.name_scope(‘evaluation‘):
252         correct_prediction = tf.equal(tf.argmax(final_tensor,1),tf.argmax(ground_truth_input,1))
253         evaluation_step    = tf.reduce_mean(tf.cast(correct_prediction,tf.float32))
254255    with tf.Session() as sess:
256         init = tf.global_variables_initializer()
257        sess.run(init)
258for i in range(STEP):
259# 随机batch获取瓶颈输出 & label260             train_bottlenecks,train_ground_truth = get_random_cached_bottlenecks(
261                 sess,n_class,images_lists,BATCH,‘training‘,jpeg_data_tensor,bottleneck_tensor)
262             sess.run(train_step,feed_dict={bottleneck_input:train_bottlenecks,ground_truth_input:train_ground_truth})
263264# 每迭代100次运行一次验证程序265if i % 100 == 0 or i + 1 == STEP:
266                 validation_bottlenecks, validation_ground_truth = get_random_cached_bottlenecks(
267                     sess, n_class, images_lists, BATCH, ‘validation‘, jpeg_data_tensor, bottleneck_tensor)
268                 validation_accuracy = sess.run(evaluation_step, feed_dict={
269                    bottleneck_input: validation_bottlenecks, ground_truth_input: validation_ground_truth})
270print(‘Step %d: Validation accuracy on random sampled %d examples = %.1f%%‘ %
271                       (i, BATCH, validation_accuracy * 100))
272273         test_bottlenecks,test_ground_truth = get_test_bottlenecks(
274            sess,images_lists,n_class,jpeg_data_tensor,bottleneck_tensor)
275         test_accuracy = sess.run(evaluation_step,feed_dict={
276            bottleneck_input:test_bottlenecks,ground_truth_input:test_ground_truth})
277print(‘Final test accuracy = %.1f%%‘ % (test_accuracy * 100))
278279if__name__ == ‘__main__‘:
280     main()
问题&建议:
1.建议从main函数开始阅读,跳到哪里读到那里;
2.我给的注释很详尽,原书《TensorFlow实战Google深度学习框架》也有更为详尽的注释,所以这里不多说了;
3.比较有借鉴意义的两点:
- 如何使用把自己的图片数据导入框架中训练测试
- 如何加载模型,import模型中的张量(在源代码以及[置顶]『TensorFlow』常用函数实践笔记给出了介绍)
4.一个有意思的测试:
在读取图片之前加入PIL包的读取,
            1 img = np.asarray(Image.open(image_path))
2print(np.prod(img.shape))
3print(img.shape)
在单张图片向前传播中加入了输入图片数据和输出,
             1
            def
             run_bottleneck_on_images(sess,image_data,jpeg_data_tensor,bottleneck_tensor):

             2
            ‘‘‘
             3
                使用加载的训练好的Inception-v3模型处理一张图片,得到这个图片的特征向量。

             4
                :param sess:              会话句柄

             5
                :param image_data:        图片文件句柄

             6
                :param jpeg_data_tensor:  输入张量句柄

             7
                :param bottleneck_tensor: 瓶颈张量句柄

             8
                :return:                  瓶颈张量值

             9
            ‘‘‘
            10     bottleneck_values = sess.run(bottleneck_tensor,feed_dict={jpeg_data_tensor:image_data})
11     bottleneck_values = np.squeeze(bottleneck_values)
12print(‘input:‘,len(image_data))
13print(‘bottle:‘,len(bottleneck_values))
14return bottleneck_values
输出挺有意思,
230400
(240, 320, 3)
input: 45685 <class ‘bytes‘>
2048
...
172800
(240, 240, 3)
input: 30673 <class‘bytes‘>
2048
即是说feed的数据是原始的二进制文件,而且即使输入大小不同,输出大小是一致的(也就是说原网络是有裁剪数据的),所以有两个要搞明白的问题:
- Inception-v3网络的tensorflow的源码
- 继续研究一下其他的输入数据的方式,交叉印证一下到底怎么传入图片数据,是不是只能二进制输入
更新:
源码好难懂,inception_v3结构也过于复杂,没看明白,不过还是有收获的,可视化图:
             1
            import
             os

             2
            import
             tensorflow as tf

             3
             4 inception_graph_def_file = os.path.join(‘./‘, ‘tensorflow_inception_graph.pb‘)
 5with tf.Session() as sess:
 6     with tf.gfile.FastGFile(inception_graph_def_file, ‘rb‘) as f:
 7         graph_def = tf.GraphDef()
 8        graph_def.ParseFromString(f.read())
 9         tf.import_graph_def(graph_def, name=‘‘)
10     writer = tf.summary.FileWriter(‘./‘, sess.graph)
11     writer.close()
有关图片输入:
             1
            import
             tensorflow as tf

             2
            import
             matplotlib.pyplot as plt

             3
             4
            #
             使用‘r‘会出错,无法解码,只能以2进制形式读取
             5
            #
             img_raw = tf.gfile.FastGFile(‘./123.png‘,‘rb‘).read()
             6 img_raw = open(‘./123.png‘,‘rb‘).read()
 7 8# 把二进制文件解码为uint8 9 img_0 = tf.image.decode_png(img_raw)
10# img_1 = tf.image.convert_image_dtype(img_0,dtype=tf.uint8)1112 sess = tf.Session()
13print(sess.run(img_0).shape)
14plt.imshow(sess.run(img_0))
15 plt.show()
原始读取的是二进制文件,强行‘r‘会出错,因为解码方式不对(utf-8之类都是文字解码器),之后使用tf的解码器可以解码成uint8的可读数组文件,tf.image.convert_image_dtype(img_0,dtype=tf.float32)用于后续处理,对图像的预处理之类的。
也就是说我们feed二进制代码之后原模型可以把它当作原始图片文件,进行解码切割操作,实际上训练的还是解码后的矩阵文件,联想到输入层节点的名称‘DecodeJpeg/contents:0‘,问题就解决了。
原文:http://www.cnblogs.com/hellcat/p/6909269.html
内容总结
以上是互联网集市为您收集整理的『TensorFlow』迁移学习_他山之石,可以攻玉全部内容,希望文章能够帮你解决『TensorFlow』迁移学习_他山之石,可以攻玉所遇到的程序开发问题。 如果觉得互联网集市技术教程内容还不错,欢迎将互联网集市网站推荐给程序员好友。
内容备注
版权声明:本文内容由互联网用户自发贡献,该文观点与技术仅代表作者本人。本站仅提供信息存储空间服务,不拥有所有权,不承担相关法律责任。如发现本站有涉嫌侵权/违法违规的内容, 请发送邮件至 gblab@vip.qq.com 举报,一经查实,本站将立刻删除。
内容手机端
扫描二维码推送至手机访问。