实例教程 HTML5 Canvas 超炫酷烟花绽放动画实现代码
内容导读
互联网集市收集整理的这篇技术教程文章主要介绍了实例教程 HTML5 Canvas 超炫酷烟花绽放动画实现代码,小编现在分享给大家,供广大互联网技能从业者学习和参考。文章包含8342字,纯文字阅读大概需要12分钟。
内容图文
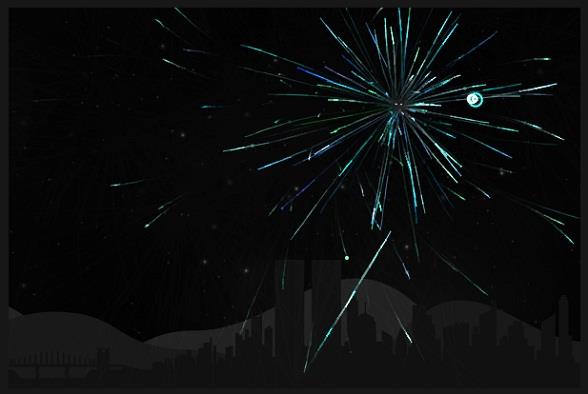
这是一个很酷的HTML5 Canvas动画,它将模拟的是我们现实生活中烟花绽放的动画特效,效果非常逼真,但是毕竟是电脑模拟,带女朋友看就算了,效果还是差了点,呵呵。这个HTML5 Canvas动画有一点比较出色,就是其性能,Chrome上基本没有卡的感觉,就算你放出很多烟花也一样。
下面我们来简单分析一下实现这款HTML5烟花特效的过程及代码,主要由HTML代码、CSS代码以及Javascript代码组成,当然javascript代码是最重要的。
HTML代码:
- < div id =”gui” > </ div >
- < div id =”canvas-container” > < div id =”mountains2″ > </ div >
- < div id =”mountains1″ > </ div > < div id =”skyline” > </ div > </ div >
HTML的结构非常简单,即构造了一个canvas容器,我们会利用JS在这个容器中生成一个Canvas对象。看最后的JS代码你就会知道了。
CSS代码:
- #canvas -container { background : #000 url (bg.jpg); height : 400px ; left : 50%; margin : - 200px 0 0 - 300px ; position : absolute ; top : 50%; width : 600px ; z-index : 2;
- } canvas { cursor : crosshair ; display : block ; position : relative ; z-index : 3;
- } canvas:active { cursor : crosshair ;
- } #skylin e { background : url (skyline.png) repeat -x 50% 0; bottom bottom : 0; height : 135px ; left : 0; position : absolute ; width : 100%; z-index : 1;
- } #mounta ins1 { background : url (mountains1.png) repeat -x 40% 0; bottom bottom : 0; height : 200px ; left : 0; position : absolute ; width : 100%; z-index : 1;
- } #mounta ins2 { background : url (mountains2.png) repeat -x 30% 0; bottom bottom : 0; height : 250px ; left : 0; position : absolute ; width : 100%; z-index : 1;
- } #gui { right right : 0; position : fixed ; top : 0; z-index : 3;
- }
CSS代码没什么特别,主要也就定义一下背景色和边框之类的。
接下来是最重要的Javascript代码。
Javascript代码:
- self.init = function (){
- self.dt = 0;
- self.oldTime = Date.now();
- self.canvas = document.createElement( ‘canvas‘ );
- self.canvasContainer = $( ‘#canvas-container‘ ); var canvasContainerDisabled = document.getElementById( ‘canvas-container‘ );
- self.canvas.onselectstart = function () { return false ;
- };
- self.canvas.width = self.cw = 600;
- self.canvas.height = self.ch = 400;
- self.particles = [];
- self.partCount = 30;
- self.fireworks = [];
- self.mx = self.cw/2;
- self.my = self.ch/2;
- self.currentHue = 170;
- self.partSpeed = 5;
- self.partSpeedVariance = 10;
- self.partWind = 50;
- self.partFriction = 5;
- self.partGravity = 1;
- self.hueMin = 150;
- self.hueMax = 200;
- self.fworkSpeed = 2;
- self.fworkAccel = 4;
- self.hueVariance = 30;
- self.flickerDensity = 20;
- self.showShockwave = false ;
- self.showTarget = true ;
- self.clearAlpha = 25;
- self.canvasContainer.append(self.canvas);
- self.ctx = self.canvas.getContext( ‘2d‘ );
- self.ctx.lineCap = ‘round‘ ;
- self.ctx.lineJoin = ‘round‘ ;
- self.lineWidth = 1;
- self.bindEvents();
- self.canvasLoop();
- self.canvas.onselectstart = function () { return false ;
- };
- };
这段JS代码主要是往canvas容器中构造一个Canvas对象,并且对这个canvas对象的外观以及动画属性作了初始化。
- var Particle = function (x, y, hue){ this .x = x; this .y = y; this .coordLast = [
- {x: x, y: y},
- {x: x, y: y},
- {x: x, y: y}
- ]; this .angle = rand(0, 360); this .speed = rand(((self.partSpeed - self.partSpeedVariance) <= 0) ? 1 : self.partSpeed - self.partSpeedVariance, (self.partSpeed + self.partSpeedVariance)); this .friction = 1 - self.partFriction/100; this .gravity = self.partGravity/2; this .hue = rand(hue-self.hueVariance, hue+self.hueVariance); this .brightness = rand(50, 80); this .alpha = rand(40,100)/100; this .decay = rand(10, 50)/1000; this .wind = (rand(0, self.partWind) - (self.partWind/2))/25; this .lineWidth = self.lineWidth;
- };
- Particle.prototype.update = function (index){ var radians = this .angle * Math.PI / 180; var vx = Math.cos(radians) * this .speed; var vy = Math.sin(radians) * this .speed + this .gravity; this .speed *= this .friction; this .coordLast[2].x = this .coordLast[1].x; this .coordLast[2].y = this .coordLast[1].y; this .coordLast[1].x = this .coordLast[0].x; this .coordLast[1].y = this .coordLast[0].y; this .coordLast[0].x = this .x; this .coordLast[0].y = this .y; this .x += vx * self.dt; this .y += vy * self.dt; this .angle += this .wind; this .alpha -= this .decay; if (!hitTest(0,0,self.cw,self.ch, this .x- this .radius, this .y- this .radius, this .radius*2, this .radius*2) || this .alpha < .05){
- self.particles.splice(index, 1);
- }
- };
- Particle.prototype.draw = function (){ var coordRand = (rand(1,3)-1);
- self.ctx.beginPath();
- self.ctx.moveTo(Math.round( this .coordLast[coordRand].x), Math.round( this .coordLast[coordRand].y));
- self.ctx.lineTo(Math.round( this .x), Math.round( this .y));
- self.ctx.closePath();
- self.ctx.strokeStyle = ‘hsla(‘ + this .hue+ ‘, 100%, ‘ + this .brightness+ ‘%, ‘ + this .alpha+ ‘)‘ ;
- self.ctx.stroke(); if (self.flickerDensity > 0){ var inverseDensity = 50 - self.flickerDensity; if (rand(0, inverseDensity) === inverseDensity){
- self.ctx.beginPath();
- self.ctx.arc(Math.round( this .x), Math.round( this .y), rand( this .lineWidth, this .lineWidth+3)/2, 0, Math.PI*2, false ) self.ctx.closePath(); var randAlpha = rand(50,100)/100;
- self.ctx.fillStyle = ‘hsla(‘ + this .hue+ ‘, 100%, ‘ + this .brightness+ ‘%, ‘ +randAlpha+ ‘)‘ ;
- self.ctx.fill();
- }
- }
- };
这段JS代码的功能是实现烟花爆炸后的小颗粒的绘制,从draw方法中可以看出,创建几个随机点,烟花颗粒即可在这个范围的随机点中散落。
- var Firework = function (startX, startY, targetX, targetY){ this .x = startX; this .y = startY; this .startX = startX; this .startY = startY; this .hitX = false ; this .hitY = false ; this .coordLast = [
- {x: startX, y: startY},
- {x: startX, y: startY},
- {x: startX, y: startY}
- ]; this .targetX = targetX; this .targetY = targetY; this .speed = self.fworkSpeed; this .angle = Math.atan2(targetY - startY, targetX - startX); this .shockwaveAngle = Math.atan2(targetY - startY, targetX - startX)+(90*(Math.PI/180)); this .acceleration = self.fworkAccel/100; this .hue = self.currentHue; this .brightness = rand(50, 80); this .alpha = rand(50,100)/100; this .lineWidth = self.lineWidth; this .targetRadius = 1;
- };
- Firework.prototype.update = function (index){
- self.ctx.lineWidth = this .lineWidth;
- vx = Math.cos( this .angle) * this .speed,
- vy = Math.sin( this .angle) * this .speed; this .speed *= 1 + this .acceleration; this .coordLast[2].x = this .coordLast[1].x; this .coordLast[2].y = this .coordLast[1].y; this .coordLast[1].x = this .coordLast[0].x; this .coordLast[1].y = this .coordLast[0].y; this .coordLast[0].x = this .x; this .coordLast[0].y = this .y; if (self.showTarget){ if ( this .targetRadius < 8){ this .targetRadius += .25 * self.dt;
- } else { this .targetRadius = 1 * self.dt;
- }
- } if ( this .startX >= this .targetX){ if ( this .x + vx <= this .targetX){ this .x = this .targetX; this .hitX = true ;
- } else { this .x += vx * self.dt;
- }
- } else { if ( this .x + vx >= this .targetX){ this .x = this .targetX; this .hitX = true ;
- } else { this .x += vx * self.dt;
- }
- } if ( this .startY >= this .targetY){ if ( this .y + vy <= this .targetY){ this .y = this .targetY; this .hitY = true ;
- } else { this .y += vy * self.dt;
- }
- } else { if ( this .y + vy >= this .targetY){ this .y = this .targetY; this .hitY = true ;
- } else { this .y += vy * self.dt;
- }
- } if ( this .hitX && this .hitY){ var randExplosion = rand(0, 9);
- self.createParticles( this .targetX, this .targetY, this .hue);
- self.fireworks.splice(index, 1);
- }
- };
- Firework.prototype.draw = function (){
- self.ctx.lineWidth = this .lineWidth; var coordRand = (rand(1,3)-1);
- self.ctx.beginPath();
- self.ctx.moveTo(Math.round( this .coordLast[coordRand].x), Math.round( this .coordLast[coordRand].y));
- self.ctx.lineTo(Math.round( this .x), Math.round( this .y));
- self.ctx.closePath();
- self.ctx.strokeStyle = ‘hsla(‘ + this .hue+ ‘, 100%, ‘ + this .brightness+ ‘%, ‘ + this .alpha+ ‘)‘ ;
- self.ctx.stroke(); if (self.showTarget){
- self.ctx.save();
- self.ctx.beginPath();
- self.ctx.arc(Math.round( this .targetX), Math.round( this .targetY), this .targetRadius, 0, Math.PI*2, false )
- self.ctx.closePath();
- self.ctx.lineWidth = 1;
- self.ctx.stroke();
- self.ctx.restore();
- } if (self.showShockwave){
- self.ctx.save();
- self.ctx.translate(Math.round( this .x), Math.round( this .y));
- self.ctx.rotate( this .shockwaveAngle);
- self.ctx.beginPath();
- self.ctx.arc(0, 0, 1*( this .speed/5), 0, Math.PI, true );
- self.ctx.strokeStyle = ‘hsla(‘ + this .hue+ ‘, 100%, ‘ + this .brightness+ ‘%, ‘ +rand(25, 60)/100+ ‘)‘ ;
- self.ctx.lineWidth = this .lineWidth;
- self.ctx.stroke();
- self.ctx.restore();
- }
- };
这段JS代码是创建烟花实例的,我们也可以从draw方法中看出,当我们鼠标点击画布中的某点时,烟花发射的目的地就在那个点上。
这款HTML5 Canvas烟花效果的核心代码就是这样,谢谢阅读,希望能帮到大家,请继续关注脚本之家,我们会努力分享更多优秀的文章。
原文:http://www.jb51.net/html5/241985.html
内容总结
以上是互联网集市为您收集整理的实例教程 HTML5 Canvas 超炫酷烟花绽放动画实现代码全部内容,希望文章能够帮你解决实例教程 HTML5 Canvas 超炫酷烟花绽放动画实现代码所遇到的程序开发问题。 如果觉得互联网集市技术教程内容还不错,欢迎将互联网集市网站推荐给程序员好友。
内容备注
版权声明:本文内容由互联网用户自发贡献,该文观点与技术仅代表作者本人。本站仅提供信息存储空间服务,不拥有所有权,不承担相关法律责任。如发现本站有涉嫌侵权/违法违规的内容, 请发送邮件至 gblab@vip.qq.com 举报,一经查实,本站将立刻删除。
内容手机端
扫描二维码推送至手机访问。