Android布局之相对布局——RelativeLayout
内容导读
互联网集市收集整理的这篇技术教程文章主要介绍了Android布局之相对布局——RelativeLayout,小编现在分享给大家,供广大互联网技能从业者学习和参考。文章包含7745字,纯文字阅读大概需要12分钟。
内容图文
此博文主要是相对布局xml属性的解析及实例。
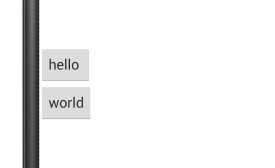
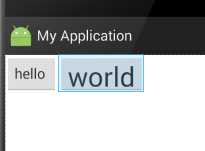
android:layout_above:此控件底部的边缘位于设定ID控件的上方
    <Button
        android:id="@+id/btn1"
        android:layout_width="wrap_content"
        android:layout_height="wrap_content"
        android:text="hello "
        android:layout_above="@+id/btn2" />    //<<<<------
    <Button
        android:id="@+id/btn2"
        android:layout_width="wrap_content"
        android:layout_height="wrap_content"
        android:text="world"
        android:layout_centerVertical="true"
        android:layout_alignParentLeft="true"
        android:layout_alignParentStart="true" />
显示结果:
android:layout_below:此控件顶部的边缘位于设定ID控件的下方
    <Button
        android:id="@+id/btn1"
        android:layout_width="wrap_content"
        android:layout_height="wrap_content"
        android:text="hello " />
    <Button
        android:id="@+id/btn2"
        android:layout_width="wrap_content"
        android:layout_height="wrap_content"
        android:text="world"
        android:layout_below="@+id/btn1"    //<<<<<<-------
        android:layout_alignParentLeft="true"
        android:layout_alignParentStart="true" />
显示结果:

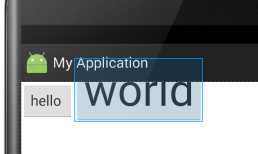
android:layout_alignBaseline:将此控件内容的基线与给定ID控件内容的基线对齐。
    <Button
        android:id="@+id/btn1"
        android:layout_width="wrap_content"
        android:layout_height="wrap_content"
        android:text="hello "
        />
    <Button
        android:id="@+id/btn2"
        android:layout_width="wrap_content"
        android:layout_height="wrap_content"
        android:text="world"
        android:layout_alignBaseline="@+id/btn1"  //<<<<<------
        android:textSize="56sp"
        android:layout_toRightOf="@+id/btn1"
此属性没加时显示效果:
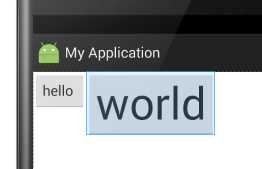
此属性加了之后的显示效果(此示例会超出布局,具体情况请自己多加练习):
android:layout_alignBottom:将此控件的底部边缘与给定ID的控件底部边缘对齐。
    <Button
        android:id="@+id/btn1"
        android:layout_width="wrap_content"
        android:layout_height="wrap_content"
        android:text="hello "
        />
    <Button
        android:id="@+id/btn2"
        android:layout_width="wrap_content"
        android:layout_height="wrap_content"
        android:text="world"
        android:textSize="34sp"
     android:layout_alignBottom="@+id/btn1"    //<<<<----
     android:layout_toRightOf="@+id/btn1" />
此属性没加时显示效果:
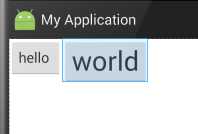
添加后显示的效果:
android:layout_alignEnd:将此控件与给定ID控件的末端对齐。以下的例子,很容易懂
    <Button
        android:layout_width="wrap_content"
        android:layout_height="wrap_content"
        android:text="New Button"
        android:id="@+id/button"
        android:layout_alignParentTop="true"
        android:layout_alignParentStart="true" />

    <Button
        android:layout_width="wrap_content"
        android:layout_height="wrap_content"
        android:text="New"
        android:id="@+id/button2"
        android:layout_alignEnd="@+id/button"    //<<<<<--------
        android:layout_below="@+id/button" />
此属性未添加时的显示结果:
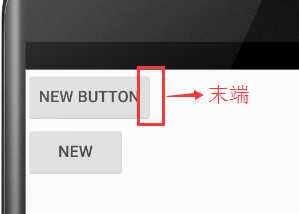
当添加此属性时的显示结果:
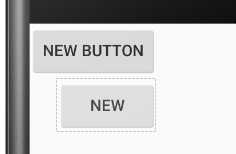
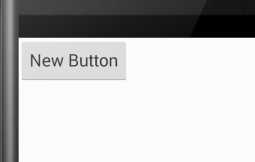
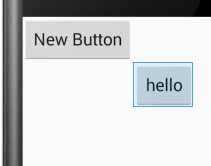
android:layout_alignLeft:将此控件的左边缘与给定ID控件的左边缘对齐
    <Button
        android:layout_width="wrap_content"
        android:layout_height="wrap_content"
        android:text="New Button"
        android:id="@+id/button"
        android:layout_alignParentTop="true"
        android:layout_centerHorizontal="true" />
    <Button
        android:layout_width="wrap_content"
        android:layout_height="wrap_content"
        android:text="New"
        android:id="@+id/button2"
        android:layout_alignLeft="@+id/button"    //<<<<<------
        android:layout_below="@+id/button" />
未添加此属性时显示效果:

添加此属性之后显示效果:
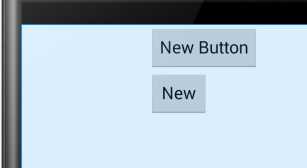
android:layout_alignParentBottom:如果设置为true,那么就将此控件的底部边缘与父容器的底部边缘匹配。
    <Button
        android:layout_width="wrap_content"
        android:layout_height="wrap_content"
        android:text="New Button"
        android:id="@+id/button"
        android:layout_alignParentBottom="true" />    //<<<<<------
未添加此属性显示效果:
添加后:

android:layout_alignParentEnd:如果设置为true,那么此控件的末边缘与父容器匹配
    <Button
        android:layout_width="wrap_content"
        android:layout_height="wrap_content"
        android:text="New Button"
        android:id="@+id/button"
        android:layout_alignParentEnd="true" />    //<<<<<<-------
未加此属性之前:
加了之后:

android:layout_alignParentLeft:如果设置为true,那么此控件的左边缘与父容器的左边缘匹配。这个属性可以用到的时候再用,这里可以参考layout_alignParentBottom属性,只是这个在左部而已。
android:layout_alignParentRight:如果设置为true,那么此控件的右边缘与父容器的右边缘匹配。此属性效果和 android:layout_alignParentEnd 属性效果差不多,显示效果参照 android:layout_alignParentEnd 的图
android:layout_alignParentStart:如果设置为true,那么此控件的开始边缘与父容器的开始边缘匹配。这个属性和android:layout_alignParentEnd 属性应该有别的用法,虽然在此例子中与left和right那两个属性显示效果差不多一样......
android:layout_alignParentTop:如果设置为true,那么此控件的顶部边缘与父容器的顶部边缘匹配。与layout_alignParentBottom相对。
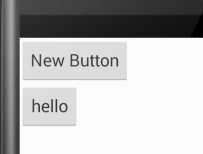
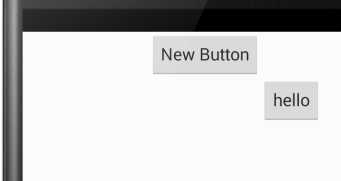
android:layout_alignRight:将此控件的右边缘与给定ID控件的右边缘对齐。
    <Button
        android:layout_width="wrap_content"
        android:layout_height="wrap_content"
        android:text="New Button"
        android:id="@+id/button"
        android:layout_alignParentStart="true" />
    <Button
        android:layout_width="wrap_content"
        android:layout_height="wrap_content"
        android:text="hello"
        android:layout_below="@+id/button"
        android:layout_alignRight="@+id/button"/>    //<<<<<------
未添加此属性时显示的效果:
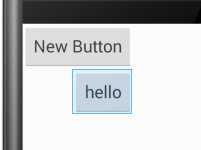
添加后:
android:layout_alignStart:将此控件的开始边缘与给定ID控件的开始边缘对齐。和android:layout_alignLeft作用差不多感觉。
android:layout_alignTop:将此控件的顶部边缘与给定ID控件的顶部边缘对齐。
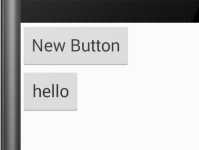
android:layout_toEndof:将此控件的开始边缘与给定ID控件的结束边缘对齐。
    <Button
        android:layout_width="wrap_content"
        android:layout_height="wrap_content"
        android:text="New Button"
        android:id="@+id/button"
        android:layout_alignParentStart="true" />
    <Button
        android:layout_width="wrap_content"
        android:layout_height="wrap_content"
        android:text="hello"
        android:layout_below="@+id/button"
        android:layout_toEndOf="@+id/button" />    //<<<<<<-----
未添加此属性时显示效果:
添加后显示效果:
android:layout_toLeftof:将此控件的右边缘与给定ID控件的左边缘对齐。
    <Button
        android:layout_width="wrap_content"
        android:layout_height="wrap_content"
        android:text="New Button"
        android:id="@+id/button"
        android:layout_alignParentTop="true"
        android:layout_centerHorizontal="true" />
    <Button
        android:layout_width="wrap_content"
        android:layout_height="wrap_content"
        android:text="hello"
        android:layout_below="@+id/button"
        android:layout_toLeftOf="@+id/button"/>    //<<<<<<------
未添加此属性时显示结果:
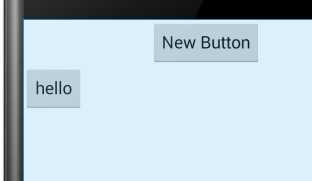
添加后显示结果:
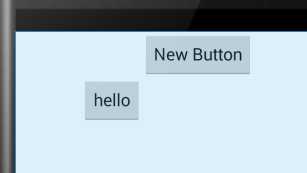
android:layout_toRightof:将此控件的左边缘与给定ID控件的右边缘对齐。
    <Button
        android:layout_width="wrap_content"
        android:layout_height="wrap_content"
        android:text="New Button"
        android:id="@+id/button"
        android:layout_alignParentTop="true"
        android:layout_centerHorizontal="true" />
    <Button
        android:layout_width="wrap_content"
        android:layout_height="wrap_content"
        android:text="hello"
        android:layout_below="@+id/button"
        android:layout_toRightOf="@+id/button" />    //<<<<<<<-------
未添加显示效果:
添加后显示效果:
android:layout_toStartof:将此控件的末边缘与给定ID控件的开始边缘对齐。和android:layout_toLeftof属性的显示效果一样。
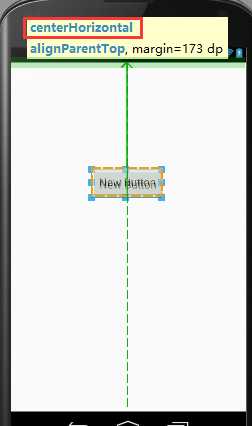
android:layout_centerHorizontal:如果设置为true,此控件将设置为水平居中
在这一条绿线上都是范围
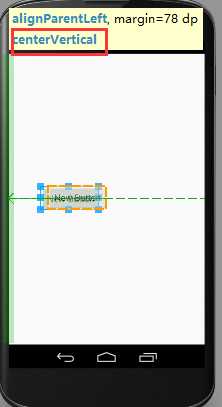
android:layout_centerVertical:如果设置为true,此控件将设置为垂直居中
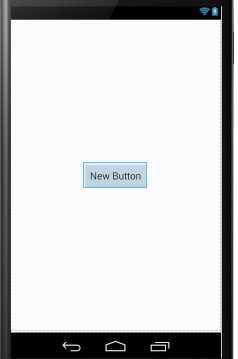
android:layout_centerInParent:如果设置为true,则此控件在他的父容器的中心位置。
android:layout_alignWithParentIfMissing:如果设置为true,当控件的 layout_toLeftOf、layout_toRightOf、等等 属性找不到时,就以父元素作为参考。
------------------------------------------------------------------------
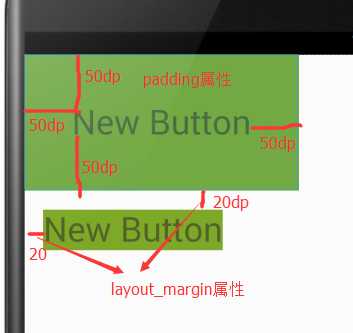
android:padding:指定控件中的内容与到此控件的四边缘的距离
android:layout_margin:设置此控件的四边缘与其他控件的距离
    <TextView
        android:layout_width="wrap_content"
        android:layout_height="wrap_content"
        android:text="New Button"
        android:textSize="36sp"
        android:id="@+id/button"
        android:background="@android:color/holo_green_dark"
        android:layout_alignParentTop="true"
        android:padding="50dp"                //<<<<<<-------
        android:layout_alignParentStart="true" />
    <TextView
        android:layout_width="wrap_content"
        android:layout_height="wrap_content"
        android:text="New Button"
        android:id="@+id/button2"
        android:textSize="36sp"
        android:background="@android:color/holo_green_dark"
        android:layout_margin="20dip"            //<<<<<<--------
        android:layout_below="@+id/button" />
显示效果:
android:paddingBottom:设置控件内容与控件下边缘的距离
android:paddingTop:设置控件内容与控件上边缘的距离
android:paddingLeft:设置控件内容与控件左边缘的距离
android:paddingRight:设置控件内容与控件右边缘的距离
android:layout_marginBottom:设置此控件的下边缘与其他控件的距离
android:layout_marginTop:设置此控件的上边缘与其他控件的距离
android:layout_marginLeft:设置此控件的左边缘与其他控件的距离
android:layout_marginRight:设置此控件的右边缘与其他控件的距离
原文:http://www.cnblogs.com/liter7/p/5178674.html
内容总结
以上是互联网集市为您收集整理的Android布局之相对布局——RelativeLayout全部内容,希望文章能够帮你解决Android布局之相对布局——RelativeLayout所遇到的程序开发问题。 如果觉得互联网集市技术教程内容还不错,欢迎将互联网集市网站推荐给程序员好友。
内容备注
版权声明:本文内容由互联网用户自发贡献,该文观点与技术仅代表作者本人。本站仅提供信息存储空间服务,不拥有所有权,不承担相关法律责任。如发现本站有涉嫌侵权/违法违规的内容, 请发送邮件至 gblab@vip.qq.com 举报,一经查实,本站将立刻删除。
内容手机端
扫描二维码推送至手机访问。