小程序实现页面顶部选项卡效果
内容导读
互联网集市收集整理的这篇技术教程文章主要介绍了小程序实现页面顶部选项卡效果,小编现在分享给大家,供广大互联网技能从业者学习和参考。文章包含2622字,纯文字阅读大概需要4分钟。
内容图文

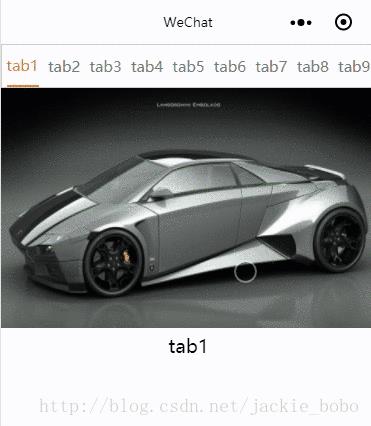
本文实例为大家分享了小程序实现选项卡效果的具体代码,供大家参考,具体内容如下
效果图:
github源码下载
<!--index.wxml-->
<view class="swiper-tab" >
  <view bindtap="swithNav" wx:for="{{tabCont}}" wx:key="item.index" class="swiper-tab-list {{currentTab==item.index?'active':''}}" data-current='{{item.index}}' >{{item.title}}</view>
</view>
<swiper class="swiper-box" current="{{currentTab}}" duration="300" style="height:400px" bindchange="GetCurrentTab" data-current='6' >
  <swiper-item wx:for="{{tabCont}}" wx:key="item.index">
   <image src='{{item.pic}}'></image>
   <view>{{item.title}}</view>
  </swiper-item>
</swiper>
CSS:
/**index.wxss**/

/**index.wxss**/

.swiper-tab {
 line-height: 80rpx;
 border: 1px solid #ccc;
 display: flex;
 justify-content: space-around;
 align-items: center;
}

.swiper-tab-list {
 font-size: 30rpx;
 color: #777;
 text-align: center;
}

.active {
 color: #da7c0c;
 border-bottom: 5rpx solid #da7c0c;
}

.swiper-box {
 display: block;
 height: 100%;
 width: 100%;
 overflow: hidden;
}

.swiper-box view {
 text-align: center;
}

image {
 width: 100%;
}
js:
Page({

 /**
  * 页面的初始数据
  */
 data: {
  currentTab:0,
  tabCont: [{ "title": "tab1", "pic": "../../img/1.jpg", "index": "0" }, { "title": "tab2", "pic": "../../img/2.jpg", "index": "1" }, { "title": "tab3", "pic": "../../img/3.jpg", "index": "2" }, { "title": "tab4", "pic": "../../img/2.jpg", "index": "3" }, { "title": "tab5", "pic": "../../img/2.jpg", "index": "4" }, { "title": "tab6", "pic": "../../img/2.jpg", "index": "5" }, { "title": "tab7", "pic": "../../img/2.jpg", "index": "6" }, { "title": "tab8", "pic": "../../img/2.jpg", "index": "7" }, { "title": "tab9", "pic": "../../img/2.jpg", "index": "8" }],
 },

 /**
  * 生命周期函数--监听页面加载
  */
 onLoad: function (options) {

 },

 /**
  * 生命周期函数--监听页面初次渲染完成
  */
 onReady: function () {

 },

 /**
  * 生命周期函数--监听页面显示
  */
 onShow: function () {

 },

 /**
  * 生命周期函数--监听页面隐藏
  */
 onHide: function () {

 },

 /**
  * 生命周期函数--监听页面卸载
  */
 onUnload: function () {

 },

 /**
  * 页面相关事件处理函数--监听用户下拉动作
  */
 onPullDownRefresh: function () {

 },

 /**
  * 页面上拉触底事件的处理函数
  */
 onReachBottom: function () {

 },

 /**
  * 用户点击右上角分享
  */
 onShareAppMessage: function () {

 },
 // swiper滑动时触发bindchange事件,获取事件对象e获取当前所在滑块的 index,并将其更新至data的currentTab中,视图渲染通过判断currentTab的让对应的tab hover。
 GetCurrentTab:function(e){
  console.log(e.detail.current);
  var that = this;
  this.setData({
   currentTab:e.detail.current
  });
  // console.log("11111"+this.data.currentTab);
 },
 swithNav:function(e){
  var that = this;
  that.setData({
   currentTab:e.target.dataset.current
  });

 }
})
以上就是本文的全部内容,希望对大家的学习有所帮助,也希望大家多多支持脚本之家。
内容总结
以上是互联网集市为您收集整理的小程序实现页面顶部选项卡效果全部内容,希望文章能够帮你解决小程序实现页面顶部选项卡效果所遇到的程序开发问题。 如果觉得互联网集市技术教程内容还不错,欢迎将互联网集市网站推荐给程序员好友。
内容备注
版权声明:本文内容由互联网用户自发贡献,该文观点与技术仅代表作者本人。本站仅提供信息存储空间服务,不拥有所有权,不承担相关法律责任。如发现本站有涉嫌侵权/违法违规的内容, 请发送邮件至 gblab@vip.qq.com 举报,一经查实,本站将立刻删除。
内容手机端
扫描二维码推送至手机访问。
来源:【匿名】